Operation Guide: The Nature of Progress
Czerka, biological weapons and a bunch of Trandoshans – what could go wrong? Yes, literally everything. Czerka Interstellar’s laboratory on the Onderonian moon Dxun has been raided by a group of Trandoshans. Your job is to contain and neutralise the problem. But – surprisingly – the Trandoshans are only part of the problem. Travel to the jungle moon of Dxun and experience cardio, running with huge batteries from one place to another and a crossover with Thomas the Tank Engine.
The entrance is located on Onderon. Dxun is currently the only Operation on level 75.
The Nature of Progress has a Nightmare Mode (chances that it will be featured in this guide are very low though).
1 Red, the Pack Leader
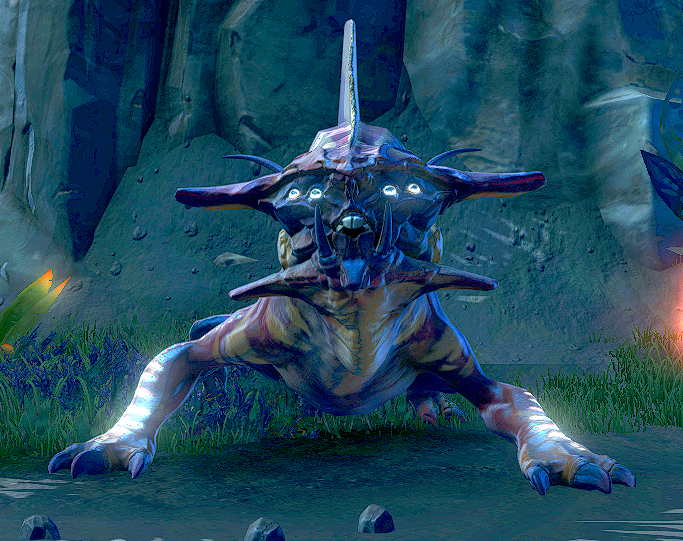
Enrage Timer
The enrage timer of 7:00min (420s) starts when the encounter starts. Upon expiration, Red will receive
All outgoing damage increased by 300%! The Pack Leader has become enraged!
View on swtor.jedipedia.net
![]() Enraged!,
increasing damage dealt by 300%.
Enraged!,
increasing damage dealt by 300%.
1.1 Story Mode
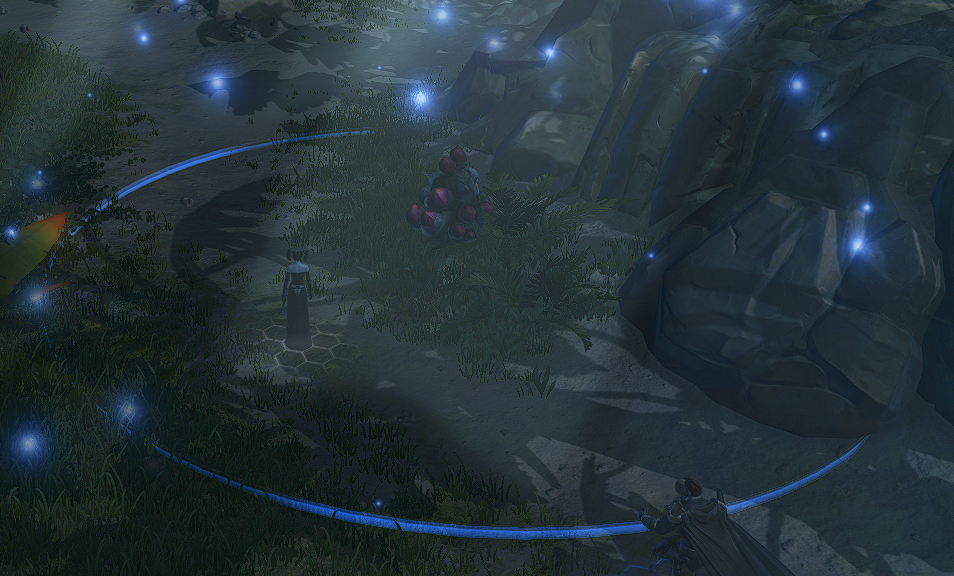
The Key Mechanic
View on swtor.jedipedia.net
![]() Red Venom Cloud,
applying stacks of
Causes internal damage every 2s. Red’s neurotoxin afflicts the pain centres within the brain which gradually pushes them into a state of shock.
Red Venom Cloud,
applying stacks of
Causes internal damage every 2s. Red’s neurotoxin afflicts the pain centres within the brain which gradually pushes them into a state of shock.
Attack and Damage Type: Tech, Internal (AoE)
View on swtor.jedipedia.net
![]() Red Venom
to the whole group, dealing periodic internal damage. The only way to cleanse these stacks is by clicking on the flowers scattered around the area. Clicking on the flowers creates a circle around them. Everyone stepping inside the circle will have all their stacks removed and gain the buff
Halts application of Red Venom and clears all existing charges. The Synthium Drepidric Spores prevent Red's deadly venom from binding to your cells.
Red Venom
to the whole group, dealing periodic internal damage. The only way to cleanse these stacks is by clicking on the flowers scattered around the area. Clicking on the flowers creates a circle around them. Everyone stepping inside the circle will have all their stacks removed and gain the buff
Halts application of Red Venom and clears all existing charges. The Synthium Drepidric Spores prevent Red's deadly venom from binding to your cells.
Duration: 30 seconds
View on swtor.jedipedia.net
![]() Phosphilapse Corona.
This buff prevents getting stacks of
Causes internal damage every 2s. Red’s neurotoxin afflicts the pain centres within the brain which gradually pushes them into a state of shock.
Phosphilapse Corona.
This buff prevents getting stacks of
Causes internal damage every 2s. Red’s neurotoxin afflicts the pain centres within the brain which gradually pushes them into a state of shock.
Attack and Damage Type: Tech, Internal (AoE)
Duration: 10 minutes
View on swtor.jedipedia.net
![]() Red Venom
for the next 30 seconds.
Red Venom
for the next 30 seconds.
A flower should be popped at circa 10 stacks of
Causes internal damage every 2s. Red’s neurotoxin afflicts the pain centres within the brain which gradually pushes them into a state of shock.
Attack and Damage Type: Tech, Internal (AoE)
Duration: 10 minutes
View on swtor.jedipedia.net
![]() Red Venom.
Red Venom.
Red’s Abilities
Red herself has only two noteworthy abilities.
View on swtor.jedipedia.net
![]() Hydrochloric Pool,
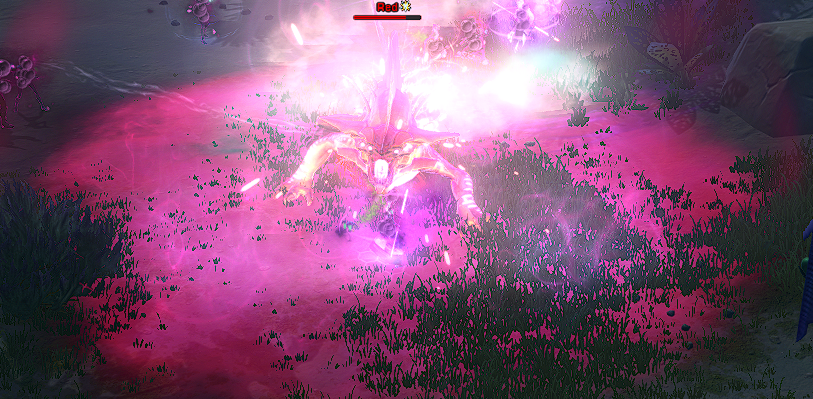
a 2 seconds cast happening at roughly 40 seconds and then every 45 seconds. After the cast, she will put a purple pool of hydrochloric acid on the floor. Everyone standing inside receives the debuff
Reduces outgoing damage, healing done, and defence. A pungent odor of oxidising durasteel overwhelms your senses...
Hydrochloric Pool,
a 2 seconds cast happening at roughly 40 seconds and then every 45 seconds. After the cast, she will put a purple pool of hydrochloric acid on the floor. Everyone standing inside receives the debuff
Reduces outgoing damage, healing done, and defence. A pungent odor of oxidising durasteel overwhelms your senses...
Duration: 2.1 seconds
View on swtor.jedipedia.net
![]() Ruinous Corrosion
which lasts for 2.1 seconds but will be reapplied when standing in the pool.
Reduces outgoing damage, healing done, and defence. A pungent odor of oxidising durasteel overwhelms your senses...
Ruinous Corrosion
which lasts for 2.1 seconds but will be reapplied when standing in the pool.
Reduces outgoing damage, healing done, and defence. A pungent odor of oxidising durasteel overwhelms your senses...
Duration: 2.1 seconds
View on swtor.jedipedia.net
![]() Ruinous Corrosion
reduces all damage and healing done, as well as Melee/ Ranged Defence and Force/ Tech Resistance by 20%.
Ruinous Corrosion
reduces all damage and healing done, as well as Melee/ Ranged Defence and Force/ Tech Resistance by 20%.
Attack and Damage Type: Force, Elemental (AoE)
View on swtor.jedipedia.net
![]() Acidic Jet,
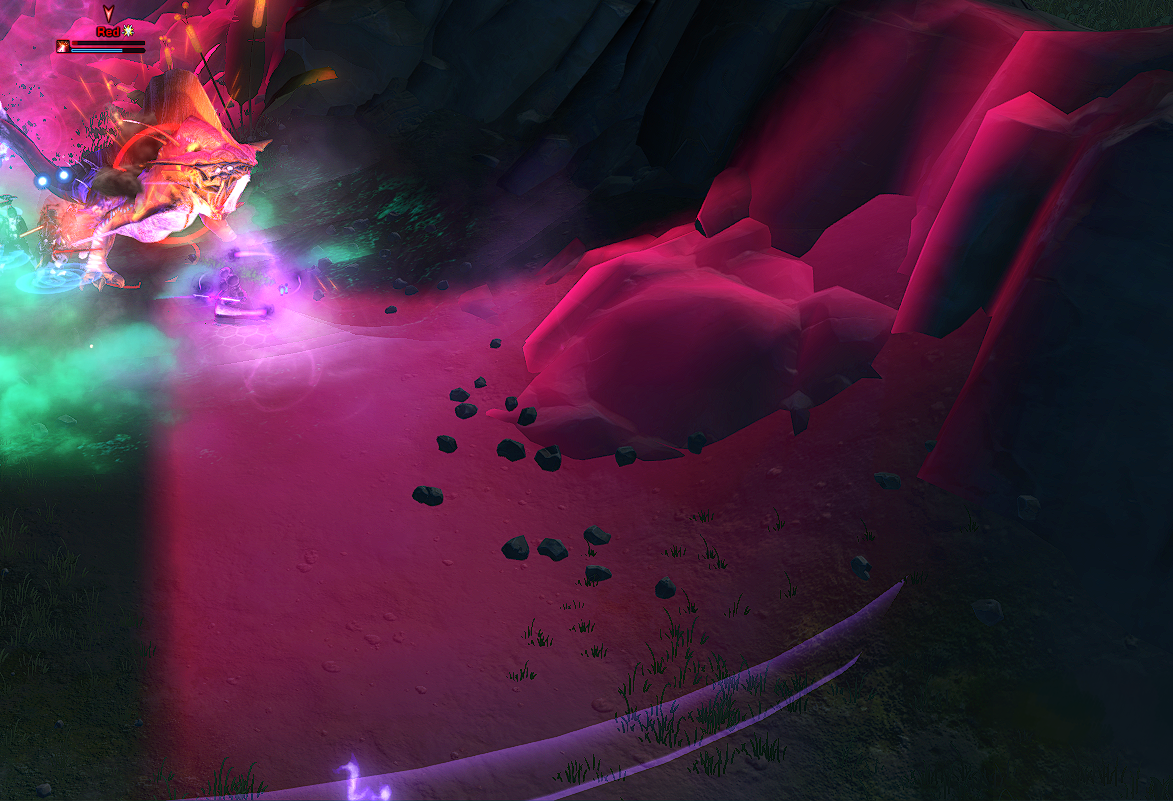
a frontal cone which is channelled for 6 seconds. This ability starts to occur at 60 seconds and then every 30 seconds. It deals high damage to anyone standing in the cone.
Acidic Jet,
a frontal cone which is channelled for 6 seconds. This ability starts to occur at 60 seconds and then every 30 seconds. It deals high damage to anyone standing in the cone.
Both abilities can be interrupted, especially
Periodically dealing elemental damage to all targets in a forward cone. The caustic digestive juices of the beast begins to melt your flesh.
Attack and Damage Type: Force, Elemental (AoE)
View on swtor.jedipedia.net
![]() Acidic Jet
should be interrupted.
Acidic Jet
should be interrupted.
Avoiding the Adds
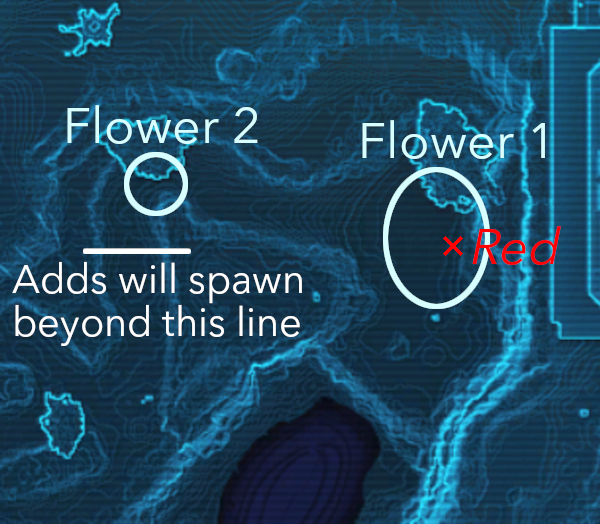
Unless DPS is very low, this is easily doable.
After the first flower has been used at circa 10 stacks of
Causes internal damage every 2s. Red’s neurotoxin afflicts the pain centres within the brain which gradually pushes them into a state of shock.
Attack and Damage Type: Tech, Internal (AoE)
Duration: 10 minutes
View on swtor.jedipedia.net
![]() Red Venom
and the group is receiving stacks again, the tank moves Red near the second flower. As soon as this flower is used (again at circa 10 stacks), the tank moves Red back to the start to have more space for the pools.
Red Venom
and the group is receiving stacks again, the tank moves Red near the second flower. As soon as this flower is used (again at circa 10 stacks), the tank moves Red back to the start to have more space for the pools.
The Adds
If you moved further along the path, the adds will appear. There are two different types of adds.
Venomous Stalkers and Venomous Harvorisks have an AoE ability called
Attack and Damage Type: Tech, Internal (AoE)
View on swtor.jedipedia.net
![]() Venomous Bile,
leaving a green pool behind that damages anyone standing in it. Furthermore, they have an ability which applies
Reduces movement speed by up to 70%. The crippling neurotoxin causes your limbs to go numb.
Venomous Bile,
leaving a green pool behind that damages anyone standing in it. Furthermore, they have an ability which applies
Reduces movement speed by up to 70%. The crippling neurotoxin causes your limbs to go numb.
Duration: 1.1 seconds
View on swtor.jedipedia.net
![]() Paralysing Venom
to the target, reducing their movement speed by up to 70%.
Paralysing Venom
to the target, reducing their movement speed by up to 70%.
The Stampeding Bull will appear shortly after the Venomous Stalkers and Venomous Harvorisks and should be prioritised when he is up. He has two passives,
Damages enemies within 2.2m and knocks them back. The stampeding beasts cannot and will not stop!
HM/ NiM: Knockback Distance increased by 25%.
Attack and Damage Type: Force, Kinetic
View on swtor.jedipedia.net
![]() Trample
and
Immune to fear, root, sleep, physics, lift, blind and hindered. Fear of the pack leader causes a stampede, overpowering most forms of crowd control.
Trample
and
Immune to fear, root, sleep, physics, lift, blind and hindered. Fear of the pack leader causes a stampede, overpowering most forms of crowd control.
HM/ NiM: This also grants immunity to knockdown and snare. Gains one charge of Fury each time it is stunned.
View on swtor.jedipedia.net
![]() Stampede!.
Damages enemies within 2.2m and knocks them back. The stampeding beasts cannot and will not stop!
Stampede!.
Damages enemies within 2.2m and knocks them back. The stampeding beasts cannot and will not stop!
HM/ NiM: Knockback Distance increased by 25%.
Attack and Damage Type: Force, Kinetic
View on swtor.jedipedia.net
![]() Trample
causes enemies closer than 2.2 metres to the Stampeding Bull to get knocked back.
Immune to fear, root, sleep, physics, lift, blind and hindered. Fear of the pack leader causes a stampede, overpowering most forms of crowd control.
Trample
causes enemies closer than 2.2 metres to the Stampeding Bull to get knocked back.
Immune to fear, root, sleep, physics, lift, blind and hindered. Fear of the pack leader causes a stampede, overpowering most forms of crowd control.
HM/ NiM: This also grants immunity to knockdown and snare. Gains one charge of Fury each time it is stunned.
View on swtor.jedipedia.net
![]() Stampede!
makes the bull immune to fear, root, sleep, physics, lift, blind and being hindered.
Stampede!
makes the bull immune to fear, root, sleep, physics, lift, blind and being hindered.
The Stampeding Bull’s attack is
Attack and Damage Type: Melee, Kinetic
0.7 seconds cast
View on swtor.jedipedia.net
![]() The Horns,
a 0.7 seconds cast knocking back enemies in front of him.
The Horns,
a 0.7 seconds cast knocking back enemies in front of him.
1.2 Hard Mode
Red can no longer be interrupted.
Her basic attack now applies stacks of
Reduces incoming healing by 1% per charge. When this effect expires the pustules will explode dealing damage for each stack. The Pack Leader’s bite is accompanied by a cloud of miasma born from the remains of countless victims.
Attack and Damage Type on expiration: Force, Internal
Duration: 30 seconds
View on swtor.jedipedia.net
![]() Festering Wound,
reducing healing received by 1% per stack. It stacks up to 50 times and lasts 30 seconds. Upon expiration, the affected will explode and receive damage based on the amount of stacks.
Festering Wound,
reducing healing received by 1% per stack. It stacks up to 50 times and lasts 30 seconds. Upon expiration, the affected will explode and receive damage based on the amount of stacks.
The first
Periodically dealing elemental damage to all targets in a forward cone. The caustic digestive juices of the beast begins to melt your flesh.
Attack and Damage Type: Force, Elemental (AoE)
View on swtor.jedipedia.net
![]() Acidic Jet
now occurs at 21 seconds and then every 30 seconds.
Acidic Jet
now occurs at 21 seconds and then every 30 seconds.
The first
2 seconds cast
View on swtor.jedipedia.net
![]() Hydrochloric Pool
now happens at 15 seconds and then every 45 seconds.
Reduces outgoing damage, healing done, and defence. A pungent odor of oxidising durasteel overwhelms your senses...
Hydrochloric Pool
now happens at 15 seconds and then every 45 seconds.
Reduces outgoing damage, healing done, and defence. A pungent odor of oxidising durasteel overwhelms your senses...
Attack and Damage Type: Force, Elemental
Duration: 2.1 seconds
View on swtor.jedipedia.net
![]() Ruinous Corrosion
now not only reduces damage and healing done by 80%, Melee/ Ranged Defence and Force/ Tech Resistance by 30% but also deals damage.
Ruinous Corrosion
now not only reduces damage and healing done by 80%, Melee/ Ranged Defence and Force/ Tech Resistance by 30% but also deals damage.
The circle of the flower now halves the
Causes internal damage every 2s. Red’s neurotoxin afflicts the pain centres within the brain which gradually pushes them into a state of shock.
Attack and Damage Type: Tech, Internal (AoE)
Duration: 10 minutes
View on swtor.jedipedia.net
![]() Red Venom
stacks. This usually happens twice (example: 11 -> 5 -> 2).
Halts application of Red Venom and halves the number of existing charges. The Synthium Drepidric Spores prevent Red's deadly venom from binding to your cells.
Red Venom
stacks. This usually happens twice (example: 11 -> 5 -> 2).
Halts application of Red Venom and halves the number of existing charges. The Synthium Drepidric Spores prevent Red's deadly venom from binding to your cells.
Duration: 45 seconds
View on swtor.jedipedia.net
![]() Phosphilapse Corona
now lasts for 45 seconds.
Phosphilapse Corona
now lasts for 45 seconds.
Strategy
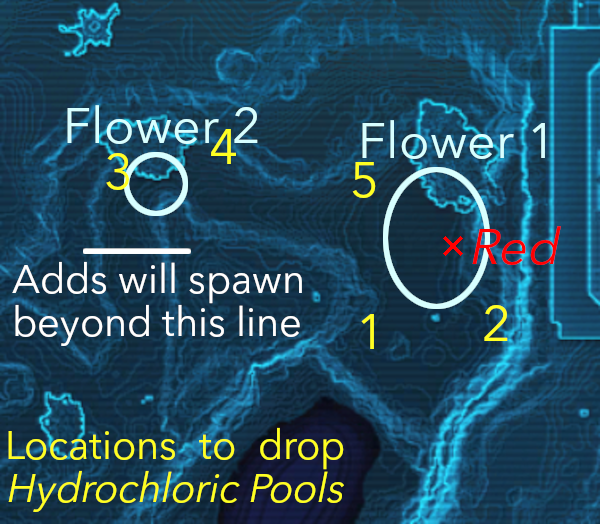
To increase DPS, you can go with just one tank.
The tank moves along the numbers in the graphic whenever Red places a pool on the ground. The tank should stay close to the walls so that the pools consume as little space as possible.
Around when the second pool happens, the first flower is used. After the second pool, the tank must get in the flower’s circle too and destack. Red should be faced away from the raid.
The tank takes Red to position 3, the raid follows. Around when the fourth pool happens, the second flower is used. The tank then moves back to the start and continues dropping the pools there.
Dropping pools between the locations 4 and 5 should be avoided since the whole raid would have to walk through the pools. Dropping pools on the flowers must be avoided too.
2 The Holding Pens
2.1 Breach CI-004: Lights Out
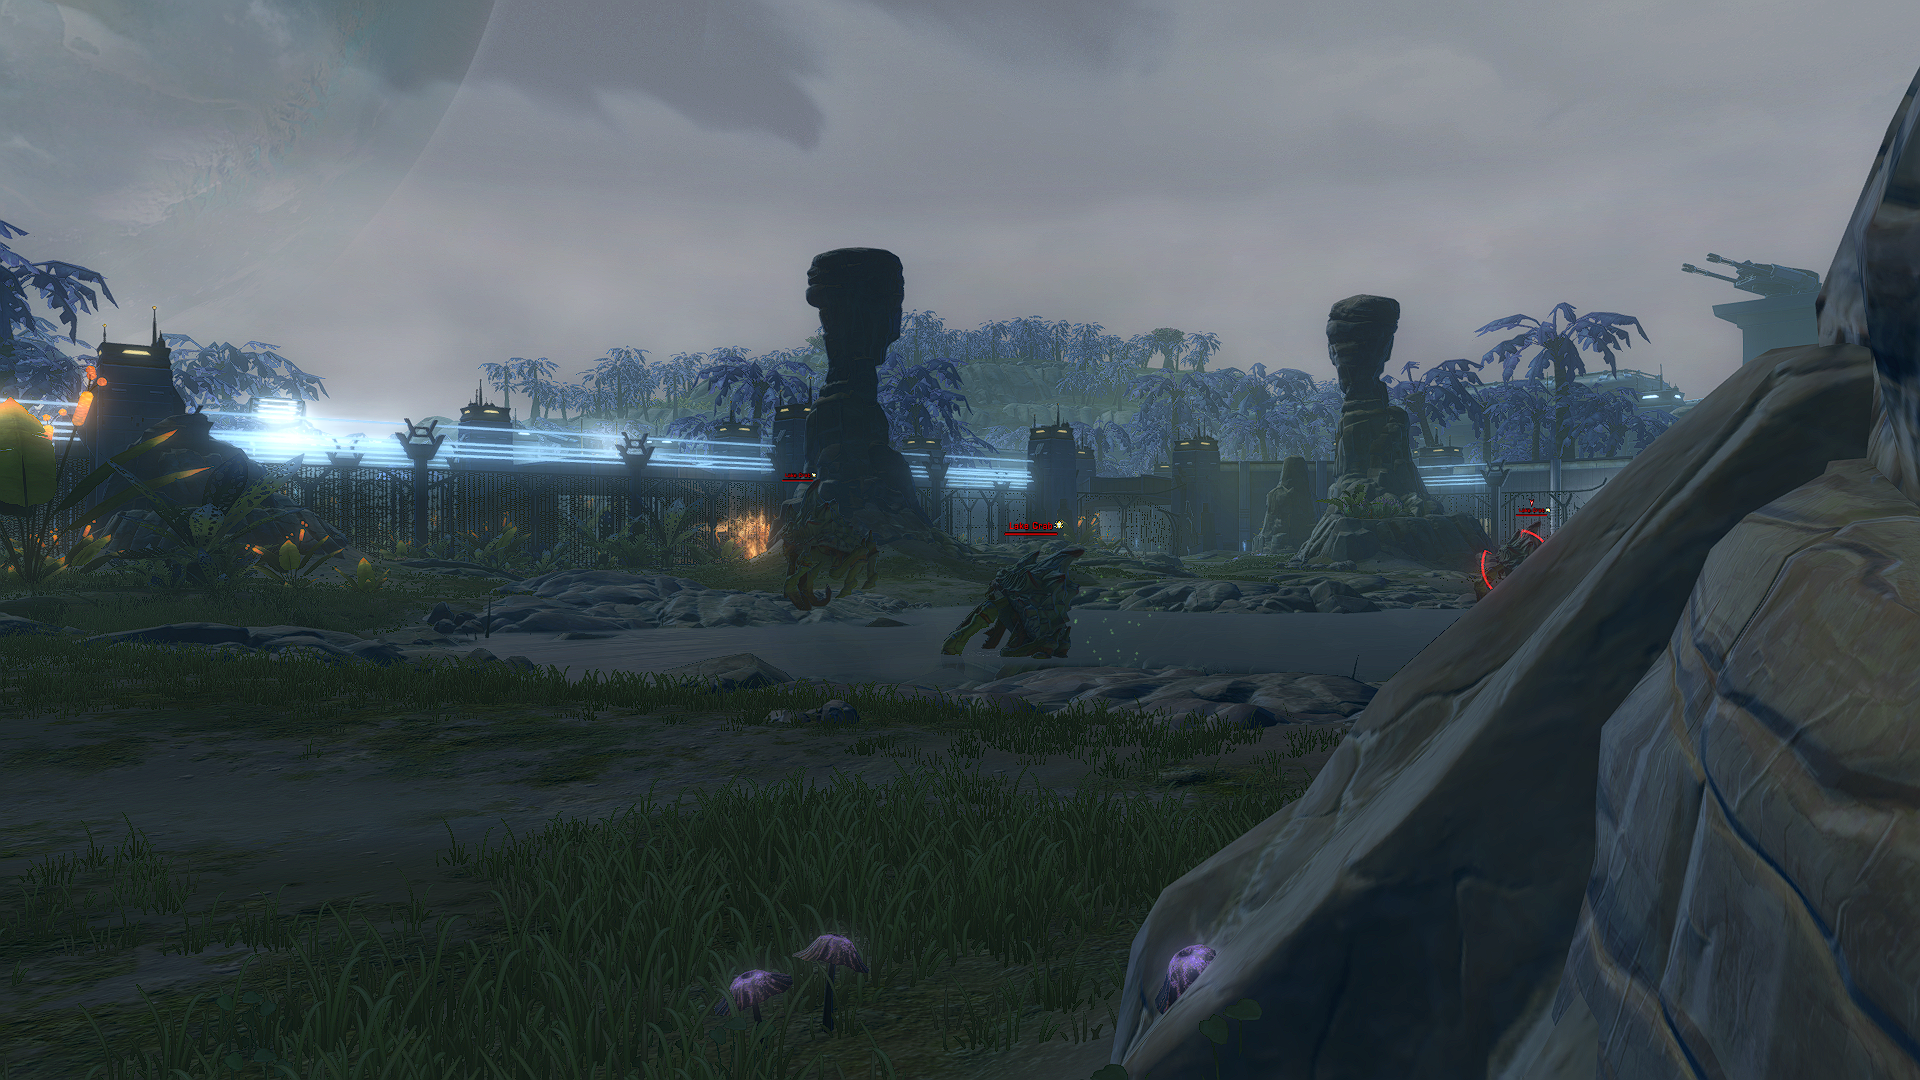
Breach CI-004: Lights Out or Reach the Auxiliary Shield Generator Shed is the first encounter of the Holding Pens and the second one in the Nature of Progress. The raid must navigate through the holding pens to reach the auxiliary shield generator shed. As one might expect, the holding pens are not empty and the fauna on Dxun is not very friendly towards players.
2.1.1 Story Mode
Pre-fight

View on swtor.jedipedia.net
![]() CI-M Synapse Accelerator Serum
and
This special flare used by the CI-Dark Project’s handlers contains a unique mixture of metallic oxidisers typically reserved for military grade explosives. Although it is impractical as a light source due to a flame temperature of 3,400c and extremely short burn time, the light produced by these flares is one of the few known deterrents to CI-Dark’s genetically optimised lifeforms.
CI-M Synapse Accelerator Serum
and
This special flare used by the CI-Dark Project’s handlers contains a unique mixture of metallic oxidisers typically reserved for military grade explosives. Although it is impractical as a light source due to a flame temperature of 3,400c and extremely short burn time, the light produced by these flares is one of the few known deterrents to CI-Dark’s genetically optimised lifeforms.
1 seconds cast
Lasts 45 seconds
View on swtor.jedipedia.net
![]() CI-Dark Control Flares.
CI-Dark Control Flares.
Everyone takes a stim. Tanks should take at least two in case they take a lot of damage. As for the flares, those should be picked up by a healer. DPS will be busy killing adds and tanks will be busy keeping the adds on them.
When clicking on the console at the exit, the encounter will start.
Flares and Stims
Used once, the
Injects a target with a dose of the experimental CI-M Synapse Accelerator Serum. When used as directed, this serum grants the user increased run speed and immunity to movement impairing effects, while also halving tiredness. Injecting a second dose while the first is active will over Overclock and Overload the body.
View on swtor.jedipedia.net
![]() CI-M Synapse Accelerator Serum
grants the targeted player
Immune to movement impairing effects, knockdowns, and physics. Movement speed increased. Your body suddenly moves effortlessly. Both your mind and the world around you seem so much clearer.
CI-M Synapse Accelerator Serum
grants the targeted player
Immune to movement impairing effects, knockdowns, and physics. Movement speed increased. Your body suddenly moves effortlessly. Both your mind and the world around you seem so much clearer.
Duration: 12 seconds
View on swtor.jedipedia.net
![]() Accelerated,
increasing movement speed by 35% and granting immunity to movement impairing effects, knockdowns and physics. A second dose grants
Accuracy and critical chance increased by 100%. Immune to movement impairing effects, knockdowns, and physics. Movement speed increased. Your mind and body are heightened to an extent you never knew possible. You think and move with perfect precision through a world in slow motion around you. You also suddenly feel like you’re cooking in an oven.
Accelerated,
increasing movement speed by 35% and granting immunity to movement impairing effects, knockdowns and physics. A second dose grants
Accuracy and critical chance increased by 100%. Immune to movement impairing effects, knockdowns, and physics. Movement speed increased. Your mind and body are heightened to an extent you never knew possible. You think and move with perfect precision through a world in slow motion around you. You also suddenly feel like you’re cooking in an oven.
Duration: 12 seconds
View on swtor.jedipedia.net
![]() Overclocked
and
Maximum health decreased by 25%. Multi-dosing the CI-M Synapse Accelerator Serum is extremely dangerous...
Overclocked
and
Maximum health decreased by 25%. Multi-dosing the CI-M Synapse Accelerator Serum is extremely dangerous...
Duration: 30 seconds
View on swtor.jedipedia.net
![]() Overloaded.
Accuracy and critical chance increased by 100%. Immune to movement impairing effects, knockdowns, and physics. Movement speed increased. Your mind and body are heightened to an extent you never knew possible. You think and move with perfect precision through a world in slow motion around you. You also suddenly feel like you’re cooking in an oven.
Overloaded.
Accuracy and critical chance increased by 100%. Immune to movement impairing effects, knockdowns, and physics. Movement speed increased. Your mind and body are heightened to an extent you never knew possible. You think and move with perfect precision through a world in slow motion around you. You also suddenly feel like you’re cooking in an oven.
Duration: 12 seconds
View on swtor.jedipedia.net
![]() Overclocked
grants a 100% bonus to Accuracy and Critical Chance and 100% bonus to Defence Chance for tanks.
Maximum health decreased by 25%. Multi-dosing the CI-M Synapse Accelerator Serum is extremely dangerous...
Overclocked
grants a 100% bonus to Accuracy and Critical Chance and 100% bonus to Defence Chance for tanks.
Maximum health decreased by 25%. Multi-dosing the CI-M Synapse Accelerator Serum is extremely dangerous...
Duration: 30 seconds
View on swtor.jedipedia.net
![]() Overloaded
reduces the maximum health by 25%.
Overloaded
reduces the maximum health by 25%.
The stim always affects the targeted player, especially healers must therefore be cautious not to stim others.
1 seconds cast
Lasts 45 seconds
View on swtor.jedipedia.net
![]() CI-Dark Control Flares
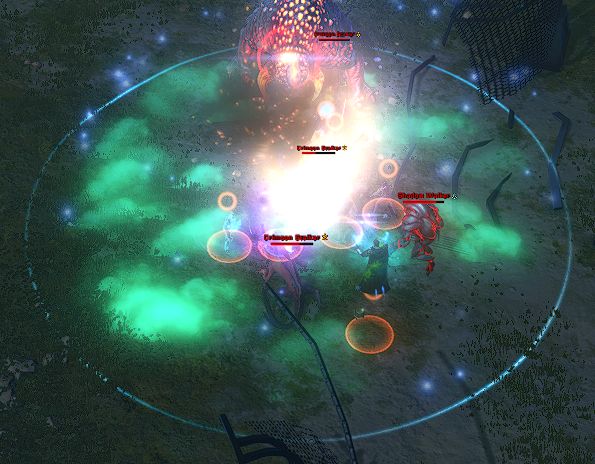
create for 20 seconds a circle of bright light around them, “blinding” enemies inside. They have a cast time of 1 second and a cooldown of 20 seconds. When they need to be used and their effects on enemies will be described later.
CI-Dark Control Flares
create for 20 seconds a circle of bright light around them, “blinding” enemies inside. They have a cast time of 1 second and a cooldown of 20 seconds. When they need to be used and their effects on enemies will be described later.
Standing in the circle applies the buff
You are illuminated by a blinding light.
Duration: 2.1 seconds
View on swtor.jedipedia.net
![]() Impractically Bright Light
to any player or enemy inside the circle. The effect lasts for 2.1 seconds but gets reapplied when standing in the circle. It protects players from some abilities of some enemies.
Impractically Bright Light
to any player or enemy inside the circle. The effect lasts for 2.1 seconds but gets reapplied when standing in the circle. It protects players from some abilities of some enemies.
The Encounter
The group must traverse the first part of the holding pens.
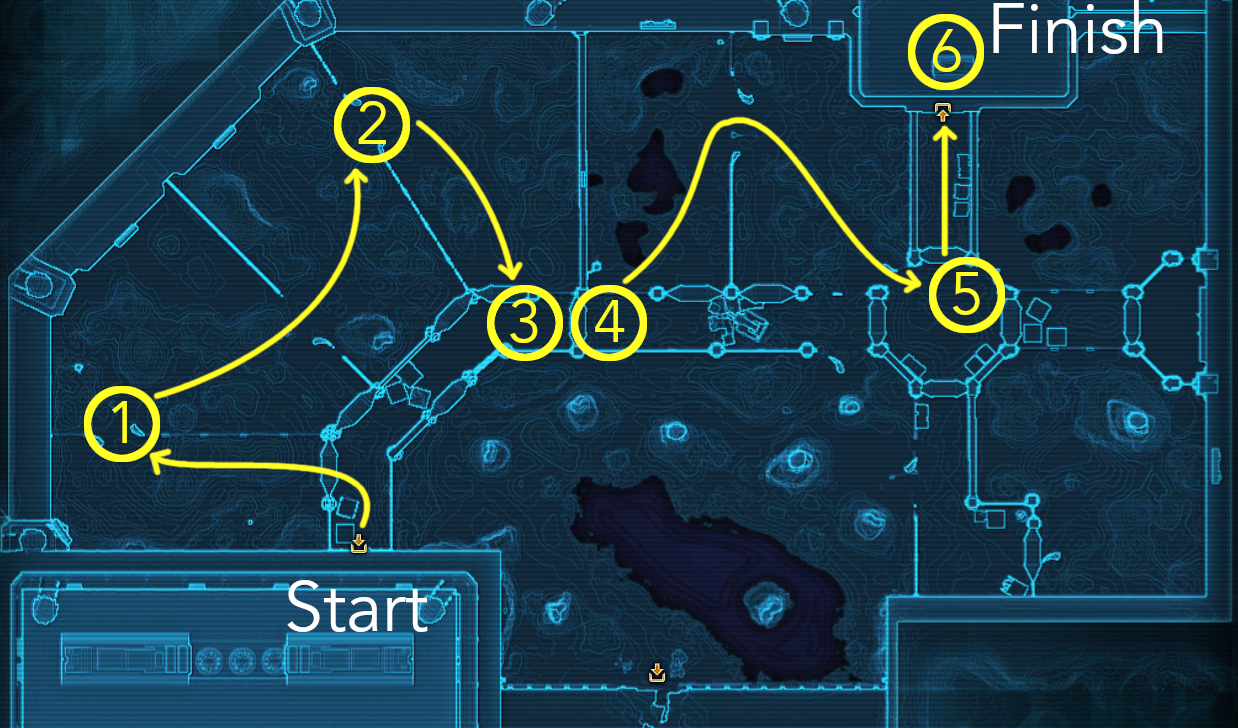
2 – The second Rampaging Charger. Flare him too, then kill the other adds and continue.
3 – The first Warden Droid. Use a flare when the adds appear. After killing the Warden Droid, you can use the console to open the door.
4 – The third Rampaging Charger and a Felshade Reaper. You will most likely need two flares for this group.
You can skip this group by sticking to the right wall and not using any abilities. This includes healing and speed cooldowns. Having a Marauder use Predation before the door is open works. This does not work at the first attempt, just think of it as a feature.
5 – The second Warden Droid. Use a flare for the adds. When the droid is destroyed, use the console to open the door and move to the shed.
6 – Adds will run inside until you close the door. This is done by clicking on a few consoles, “guided” by the support team (i.e. the quest givers you hear talking every now and then). Use the remaining flares for the adds until the door is shut and the adds are dead.
After closing the door, you reach a checkpoint, and the first Holding Pens encounter is completed.
2.1.2 Hard Mode
Flares and Stims
Receiving another stim while being affected with
Maximum health decreased by 25%. Multi-dosing the CI-M Synapse Accelerator Serum is extremely dangerous...
Duration: 30 seconds
View on swtor.jedipedia.net
![]() Overloaded.
(i.e. being stimmed three times in total) results in an instant death.
Overloaded.
(i.e. being stimmed three times in total) results in an instant death.
The Encounter
The main difference from Story Mode is that not only more, but also different adds spawn. For instance, there is way more Incendiary Shrieks, resulting in more circles that could apply
Taking periodic elemental [Jedipedia says it is Damage Type 9; Elemental damage would be Damage Type 3] damage. You are covered in a burning tar-like substance.
Attack Type: Tech (AoE, DoT)
Duration: 60 seconds
View on swtor.jedipedia.net
![]() Corrosive Rain
to raid members.
Corrosive Rain
to raid members.
It is important to kill the main adds (Rampaging Chargers, Warden Droids) as soon as possible and then move to the next spot, killing remaining adds on the way.
Any class with knockbacks, AoE stuns and group movement speed is helpful here.
2.2 Breach CI-004: According to Plan
The second part of the Holding Pens is Breach CI-004: According to Plan or Capture the Security Centre. After restoring the power in the auxiliary shield generator shed, you need to capture the Security Centre. Unfortunately, the now partially active security coils on the facility roof make simply running through the rest of the holding pens a shocking experience. And the holding pens are still full of creatures.
2.2.1 Story Mode
Pre-fight
Before the encounter starts, the group must enter the Northern building by passing two doors. After that, they will be in a small shed where they can pick up
Injects a target with a dose of the experimental CI-M Synapse Accelerator Serum. When used as directed, this serum grants the user increased run speed and immunity to movement impairing effects, while also halving tiredness. Injecting a second dose while the first is active will over Overclock and Overload the body.
View on swtor.jedipedia.net
![]() CI-M Synapse Accelerator Serum
and
This special flare used by the CI-Dark Project’s handlers contains a unique mixture of metallic oxidisers typically reserved for military grade explosives. Although it is impractical as a light source due to a flame temperature of 3,400c and extremely short burn time, the light produced by these flares is one of the few known deterrents to CI-Dark’s genetically optimised lifeforms.
CI-M Synapse Accelerator Serum
and
This special flare used by the CI-Dark Project’s handlers contains a unique mixture of metallic oxidisers typically reserved for military grade explosives. Although it is impractical as a light source due to a flame temperature of 3,400c and extremely short burn time, the light produced by these flares is one of the few known deterrents to CI-Dark’s genetically optimised lifeforms.
1 seconds cast
Lasts 45 seconds
View on swtor.jedipedia.net
![]() CI-Dark Control Flares.
CI-Dark Control Flares.
Part 1: Reaching the Control Centre
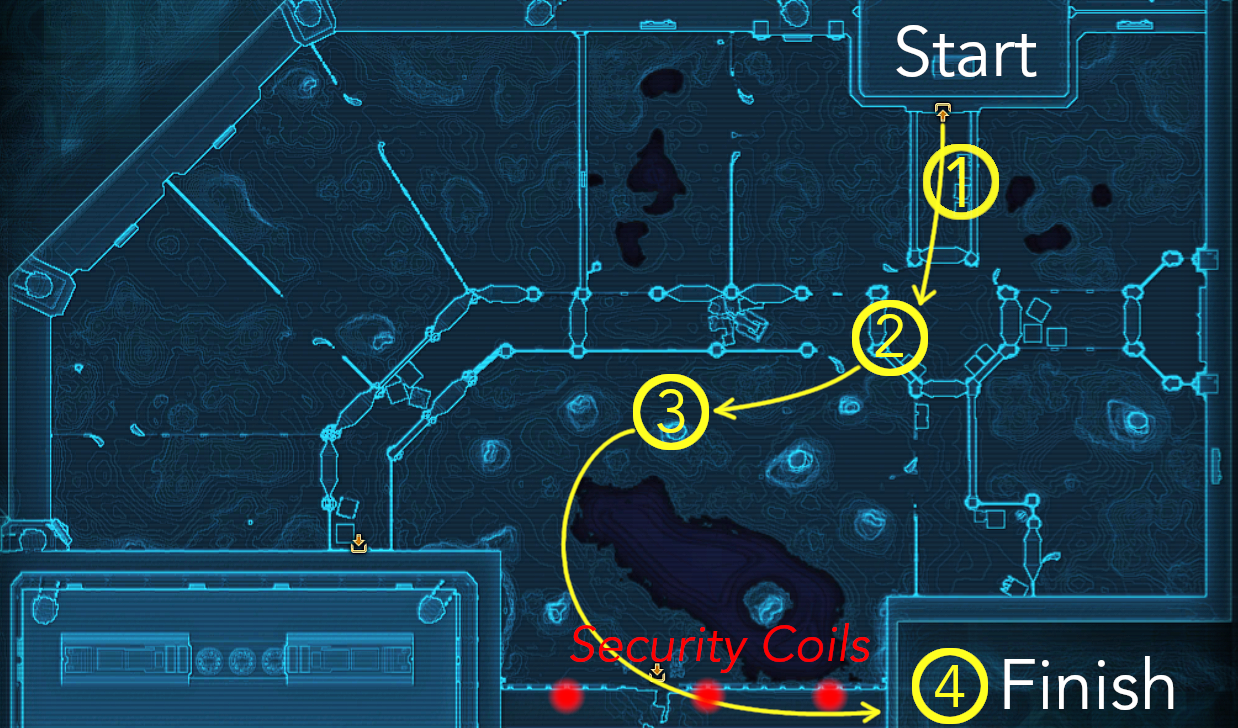
2 – Wait until the Security Coils loose power. You will most likely have some Crimson Stalkers coming from 1; just kill them.
3 – A Lake Crab will spawn here; a tank must pick it up. There is no need to attack it, though. Simply continue when the Security Coils lost power. You should use the stim and any speed buffs here and run as fast as you can. Using a flare here can help.
4 – Get in the Control Centre and click the panel next to the entrance to shut the door. Kill any adds that may have found their way inside (or went through the closed door).
The Security Coils
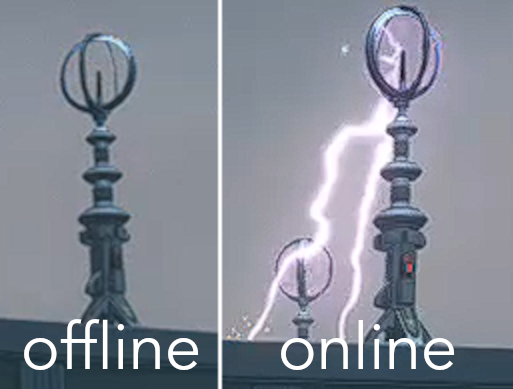
When the coils are online, everyone in their LoS will be zapped which deals high damage. The group therefore must hide behind the rocks as soon as they come online.
Cheesing the First Part
The first part can be skipped by letting only one player run to the Control Centre. While it is easier to let a stealther do this, anyone can. The rest should attack the adds at 1 and kill them; the one running can then just walk past them. Once arrived in the Control Centre, the player needs to use the panel to close it and the group will be teleported inside. The player running must still make sure to not get zapped by the Security Coils.
Part 2: Inside the Control Centre
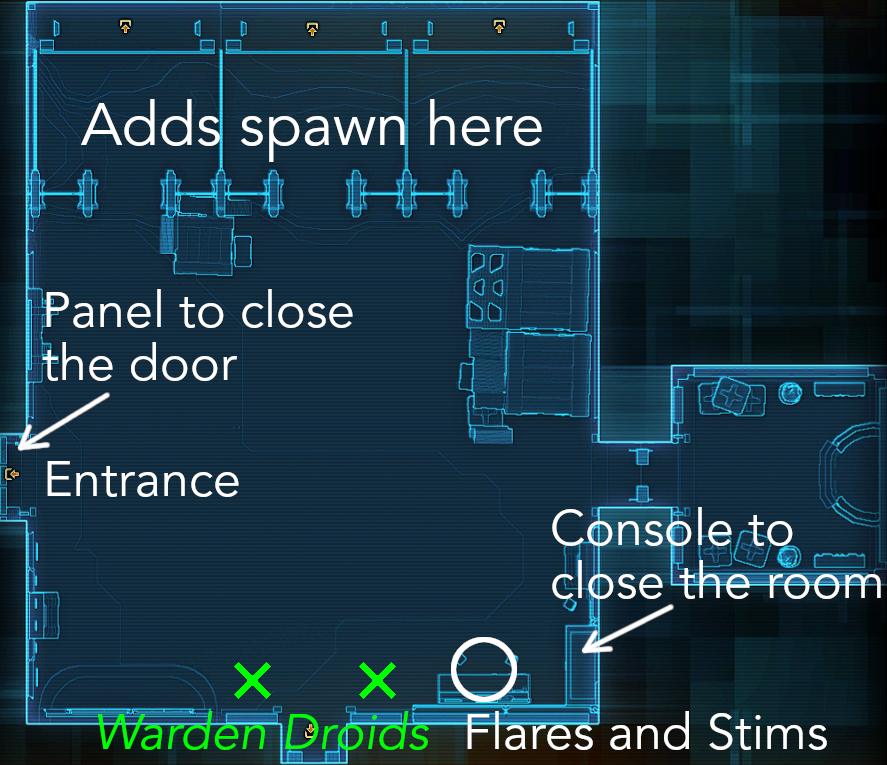
The group has 25 seconds to recover; then the shields will fail and adds enter from the North. Flares should be used on them.
35 seconds after the shields fail, the Warden Droids come online. The group should stand near the droids and focus them so that AoE and DoT spread will take care to the other adds meanwhile.
After both droids are killed, one group member must use the console to seal the entrance. The raid can then finish off the remaining adds to complete the encounter.
After that, the fun part of the Operation starts.
2.2.2 Hard Mode
Part 1: Reaching the Control Centre
Using the console to close the door to the Security Centre now kills any player outside. Therefore, the cheese from Story Mode does not work here.
Part 2: Inside the Control Centre
Duration: 30 seconds
View on swtor.jedipedia.net
![]() Optimisation Protocol.
This causes the Warden Droids to buff each other, should they be too close together. When between 5 and 10 metres (beige circle around the droids), they will grant each other
Significantly increases all damage dealt by and reduces all damage received.
Optimisation Protocol.
This causes the Warden Droids to buff each other, should they be too close together. When between 5 and 10 metres (beige circle around the droids), they will grant each other
Significantly increases all damage dealt by and reduces all damage received.
Duration: 2 seconds
View on swtor.jedipedia.net
![]() Major Optimisation.
increasing damage done by 75% and reducing damage received by 50%. If they are closer than 5 metres (red circle), they both receive
Massively increases all damage dealt by and reduces all damage received.
Major Optimisation.
increasing damage done by 75% and reducing damage received by 50%. If they are closer than 5 metres (red circle), they both receive
Massively increases all damage dealt by and reduces all damage received.
Duration: 2 seconds
View on swtor.jedipedia.net
![]() Perfect Optimisation,
increasing damage done by 170% and reducing damage received by 70%.
Perfect Optimisation,
increasing damage done by 170% and reducing damage received by 70%.
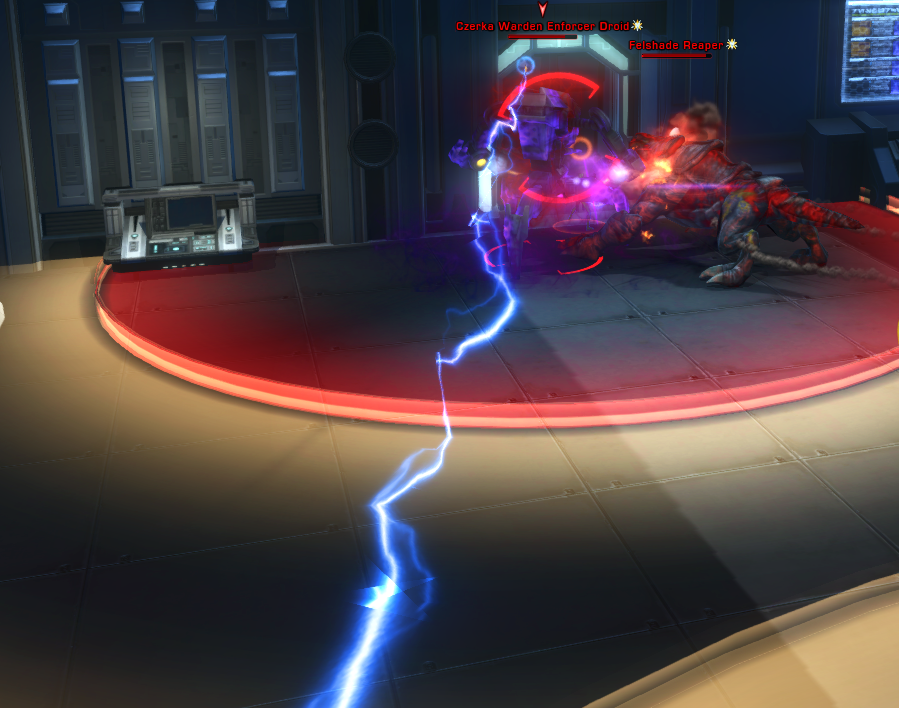
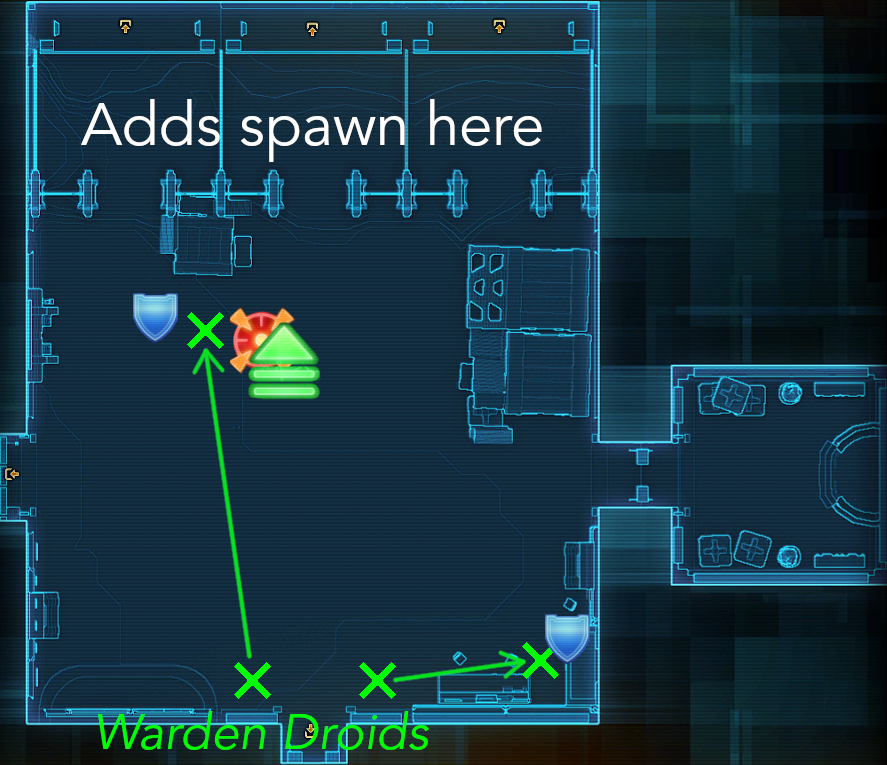
To prevent the droids from buffing each other, they must be separated. One tank takes a droid to where the flares and stims are, the other one takes their droid near the adds spawn locations. Shortly after the droids activated, the shields will fail, and two Felshade Reapers enter the room. Each tank taunts one of the Reapers. Their attacks will then cleave the droid, thereby killing it. The tanks should use two stims here to mitigate the Reapers’ damage.
The rest of the groups stays with the tank at the adds spawn locations. Use flares here. The tank there should also taunt the other adds there to make it easier for the healers. DPS must take care to avoid the Reaper cleaving the droid. They can also help on the droid there.
2.3 The Adds
An exhaustive list of adds and an even more exhaustive list of their abilities. The list is somewhat sorted by priority; the earlier an add appears on the list, the higher is the priority to kill it.
| Lights Out | According to Plan | ||||||||||
|---|---|---|---|---|---|---|---|---|---|---|---|
| 1 | 2 | 3 | 4 | 5 | 6 | 1 | 2 | 3 | 4 | Control Centre | |
| Warden Droid | ✓ | ✓ | ✓ | ||||||||
| Felshade Reaper¹ | ✓ | ✓ | ✓ | ||||||||
| Rampaging Charger | ✓ | ✓ | ✓ | ✓ | |||||||
| Lake Crab | ✓ | ✓ | |||||||||
| Felshade Hunter¹ | ✓ | ✓ | ✓ | ✓ | |||||||
| Shadow Walker¹ | ✓ | ✓ | ✓ | ||||||||
| Crimson Stalker | ✓ | ✓ | ✓ | ✓ | ✓ | ✓ | ✓ | ✓ | ✓ | ✓ | |
| Incendiary Shriek¹ | ✓² | ✓ | ✓² | ||||||||
¹ Affected by
This special flare used by the CI-Dark Project’s handlers contains a unique mixture of metallic oxidisers typically reserved for military grade explosives. Although it is impractical as a light source due to a flame temperature of 3,400c and extremely short burn time, the light produced by these flares is one of the few known deterrents to CI-Dark’s genetically optimised lifeforms.
1 seconds cast
Lasts 45 seconds
View on swtor.jedipedia.net
![]() CI-Dark Control Flares
CI-Dark Control Flares
² Not on Story Mode
Czerka Warden Droid
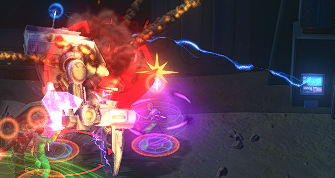
The Warden Droids appear in Lights Out at 3 and 5, and in According to Plan in the Control Centre.
The most important aspect of them is their buff
This Warden Droid is locking a nearby console. It will not be usable while this Warden Droid is still functional.
View on swtor.jedipedia.net
![]() Data Lock,
causing a nearby console to be locked until the droid has been destroyed. The droids therefore must be killed to advance. In Lights Out, they lock the two doors, in According to Plan they lock the console to close the room.
Data Lock,
causing a nearby console to be locked until the droid has been destroyed. The droids therefore must be killed to advance. In Lights Out, they lock the two doors, in According to Plan they lock the console to close the room.
Ability wise there is not much to say. The Warden Droids channel
Attack and Damage Type: Melee, Kinetic
1 second channel
View on swtor.jedipedia.net
![]() Containment Taser,
dealing a bit of damage.
Containment Taser,
dealing a bit of damage.
Felshade Reaper
Felshade Reapers appear in Lights Out at 4, and in According to Plan at 1 and inside the Control Centre.
The Felshade Reapers are quite dangerous, and flares should be used for them. While standing in the flared area, they will receive stacks of
Increase damage from all sources by 10% per charge, maximum of 30%. Disoriented and unable to defend itself!
Duration: 15 seconds
View on swtor.jedipedia.net
![]() Blinding Light.
This can stack up to 3 times and increases their damage taken by 10% per stack.
Blinding Light.
This can stack up to 3 times and increases their damage taken by 10% per stack.
When not affected by a flare, they will cast
While stealth is active the next attack will deal significantly increased damage.
2 seconds cast
View on swtor.jedipedia.net
![]() Ghost in the Darkness.
for 2 seconds. This causes them to enter stealth mode for a maximum of 20 seconds. When exiting stealth, they receive
All outgoing damage is significantly increased upon exiting stealth after an attack.
Ghost in the Darkness.
for 2 seconds. This causes them to enter stealth mode for a maximum of 20 seconds. When exiting stealth, they receive
All outgoing damage is significantly increased upon exiting stealth after an attack.
Duration: 3 seconds
View on swtor.jedipedia.net
![]() Extermination Protocol,
causing them to deal 50% more damage for 3 seconds. When being affected by a flare while in stealth mode, they exit stealth mode without gaining
All outgoing damage is significantly increased upon exiting stealth after an attack.
Extermination Protocol,
causing them to deal 50% more damage for 3 seconds. When being affected by a flare while in stealth mode, they exit stealth mode without gaining
All outgoing damage is significantly increased upon exiting stealth after an attack.
Duration: 3 seconds
View on swtor.jedipedia.net
![]() Extermination Protocol.
Extermination Protocol.
Their attack is
Attack and Damage Type: Melee, Kinetic
View on swtor.jedipedia.net
![]() Devour,
dealing high damage. To be able to do this attack, neither the Felshade Reapers, nor their target may be affected by the flare. If either one of them is affected by it, they will do
Attack and Damage Type: Melee, Kinetic (AoE)
Devour,
dealing high damage. To be able to do this attack, neither the Felshade Reapers, nor their target may be affected by the flare. If either one of them is affected by it, they will do
Attack and Damage Type: Melee, Kinetic (AoE)
View on swtor.jedipedia.net
![]() Maul
instead, dealing much less damage than
Attack and Damage Type: Melee, Kinetic
Maul
instead, dealing much less damage than
Attack and Damage Type: Melee, Kinetic
View on swtor.jedipedia.net
![]() Devour.
Devour.
Rampaging Charger
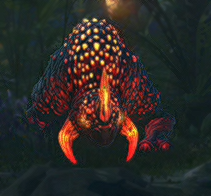
Each one Rampaging Charger appears in Lights Out at 1, 2 and 4. In According to Plan it appears at 1. In both location 4 in Lights Out and location 1 in According to Plan, the Charger is getting eaten by the Felshade Reaper unless they are aggroed by group members doing attacks or healing.
Ability wise, they are like the Stampeding Bull add in the Red encounter. The passive
Damages enemies within 2.2m and knocks them back. The stampeding beasts cannot and will not stop!
HM/ NiM: Knockback Distance increased by 25%.
Attack and Damage Type: Force, Kinetic
View on swtor.jedipedia.net
![]() Trample
causes players closer than 2.2 metres to get knocked back. The Charger’s ability is
Attack and Damage Type: Melee, Kinetic
Trample
causes players closer than 2.2 metres to get knocked back. The Charger’s ability is
Attack and Damage Type: Melee, Kinetic
0.7 seconds cast
View on swtor.jedipedia.net
![]() The Horns,
a 0.7 seconds cast knocking back players in front.
The Horns,
a 0.7 seconds cast knocking back players in front.
The tank can position themselves against the fence or the wall, so they do not get knocked back too far.
They can be stunned, pulled, and so on.
Lake Crab
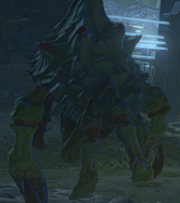
The Lake Crabs only appear in According to Plan, at 3 and 4. One appears 3, multiple appear on the way to 4.
They cast
1.5 seconds cast
View on swtor.jedipedia.net
![]() Tongue Grab
for 1.5 seconds, pulling a player standing between 5 and 40 metres away to them. The danger of this attack is that the player might either land in the lake which results in an instant death or that they might get in LoS of the Security Coils, zapping them to death. The stim protects against getting pulled by the crab.
Tongue Grab
for 1.5 seconds, pulling a player standing between 5 and 40 metres away to them. The danger of this attack is that the player might either land in the lake which results in an instant death or that they might get in LoS of the Security Coils, zapping them to death. The stim protects against getting pulled by the crab.
Felshade Hunter
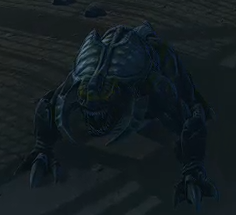
The smaller and less lethal cousins of the Felshade Reaper appear in Lights Out at 4 – 6 and in According to Plan at 2 – 4, as well as in the Control Centre.
Like the Reapers, the receive stacks of
Increase damage from all sources by 10% per charge, maximum of 30%. Disoriented and unable to defend itself!
Duration: 15 seconds
View on swtor.jedipedia.net
![]() Blinding Light.
while standing in a flare, stacking 3 times, and increasing incoming damage by 10% per stack. Therefore, they should always be kept in the flare.
Blinding Light.
while standing in a flare, stacking 3 times, and increasing incoming damage by 10% per stack. Therefore, they should always be kept in the flare.
The Hunters have the same stealth mechanic as Reapers. When not inside a flare, they will cast
While stealth is active the next attack will deal significantly increased damage.
2 seconds cast
View on swtor.jedipedia.net
![]() Ghost in the Darkness.
for 2 seconds, enter stealth for a maximum of 20 seconds and gain
All outgoing damage is significantly increased upon exiting stealth after an attack.
Ghost in the Darkness.
for 2 seconds, enter stealth for a maximum of 20 seconds and gain
All outgoing damage is significantly increased upon exiting stealth after an attack.
Duration: 3 seconds
View on swtor.jedipedia.net
![]() Extermination Protocol,
causing them to deal 50% more damage for 3 seconds when exiting stealth.
Extermination Protocol,
causing them to deal 50% more damage for 3 seconds when exiting stealth.
Their
Attack and Damage Type: Melee, Kinetic
View on swtor.jedipedia.net
![]() Devour
attack which is only executed while neither they nor their target are affected by the flare still deals some damage, but not as high as the Reapers’. When they or their target are affected by the flare, the Hunters do
Attack and Damage Type: Melee, Kinetic
Devour
attack which is only executed while neither they nor their target are affected by the flare still deals some damage, but not as high as the Reapers’. When they or their target are affected by the flare, the Hunters do
Attack and Damage Type: Melee, Kinetic
View on swtor.jedipedia.net
![]() Maul
instead, which – again – deals less damage than the Reapers do.
Maul
instead, which – again – deals less damage than the Reapers do.
Shadow Walker
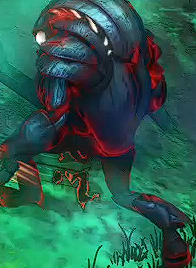
The Shadow Walkers appear in Lights Out at 2 and 5 and in According to Plan in the Control Centre.
While harmless when kept in the flare, they can become quite dangerous when outside a flare. When inside a flare, they receive – much like the Felshades – stacks of
Increase damage from all sources by 10% per charge, maximum of 30%. Disoriented and unable to defend itself!
Duration: 15 seconds
View on swtor.jedipedia.net
![]() Blinding Light.
This stacks up to 3 times and causes 10% increased damage received per stack.
Blinding Light.
This stacks up to 3 times and causes 10% increased damage received per stack.
Their buff
Has an aversion to the light of CI-Dark control flares.
View on swtor.jedipedia.net
![]() Photosensitivity
increases their movement speed by 60%.
Photosensitivity
increases their movement speed by 60%.
When neither the Walkers nor their target are inside a flare, they channel
3 seconds channel
View on swtor.jedipedia.net
![]() Dismember
for 3 seconds, applying the debuff
Stunned, periodically taking damage. You are being torn apart!
Dismember
for 3 seconds, applying the debuff
Stunned, periodically taking damage. You are being torn apart!
Attack and Damage Type: Force, Kinetic
View on swtor.jedipedia.net
![]() Dismember
to their target. This causes the target to receive damage and be stunned for the duration of the channel. This attack can become quite dangerous.
Dismember
to their target. This causes the target to receive damage and be stunned for the duration of the channel. This attack can become quite dangerous.
When outside the flare, they do
Attack and Damage Type: Melee, Kinetic
View on swtor.jedipedia.net
![]() Maim,
dealing a bit of damage.
Maim,
dealing a bit of damage.
Crimson Stalker
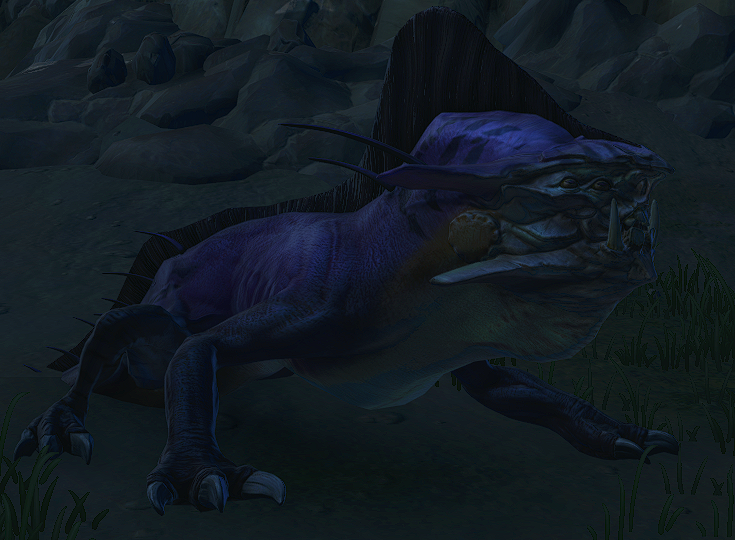
The Crimson Stalkers appear in Lights Out at every location and in According to Plan at 1. They usually come in packs of multiple Stalkers.
Their attack
Attack and Damage Type: Melee, Kinetic
View on swtor.jedipedia.net
![]() Envenomed Bite
applies
Reduces movement speed by up to 60% [HM+: 90%]. The crippling neurotoxin causes your limbs to go numb.
Envenomed Bite
applies
Reduces movement speed by up to 60% [HM+: 90%]. The crippling neurotoxin causes your limbs to go numb.
Duration: 1.1 seconds
View on swtor.jedipedia.net
![]() Paralysing Venom
to their target, reducing their movement speed by up to 60% (up to 90% on Hard Mode). This makes it difficult to evade them.
Paralysing Venom
to their target, reducing their movement speed by up to 60% (up to 90% on Hard Mode). This makes it difficult to evade them.
View on swtor.jedipedia.net
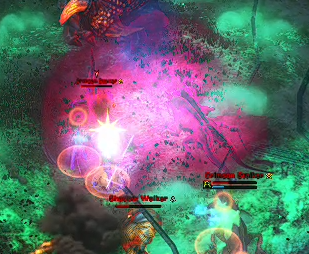
![]() Hydrochloric Pool,
a 2 seconds cast putting a purple pool on the floor. Everyone standing inside receives the debuff
Reduces outgoing damage, healing done, and defence. A pungent odor of oxidising durasteel overwhelms your senses...
Hydrochloric Pool,
a 2 seconds cast putting a purple pool on the floor. Everyone standing inside receives the debuff
Reduces outgoing damage, healing done, and defence. A pungent odor of oxidising durasteel overwhelms your senses...
Attack and Damage Type: Force, Elemental
Duration: 2.1 seconds
View on swtor.jedipedia.net
![]() Ruinous Corrosion
which lasts for 2.1 seconds but will be reapplied when standing in the pool.
Reduces outgoing damage, healing done, and defence. A pungent odor of oxidising durasteel overwhelms your senses...
Ruinous Corrosion
which lasts for 2.1 seconds but will be reapplied when standing in the pool.
Reduces outgoing damage, healing done, and defence. A pungent odor of oxidising durasteel overwhelms your senses...
Attack and Damage Type: Force, Elemental
Duration: 2.1 seconds
View on swtor.jedipedia.net
![]() Ruinous Corrosion
reduces all damage and healing done, as well as Melee/ Range Defence and Force/ Tech Resistance by 20%. In contrast to Red, the Stalker’s pools are much smaller, but standing in
Reduces outgoing damage, healing done, and defence. A pungent odor of oxidising durasteel overwhelms your senses...
Ruinous Corrosion
reduces all damage and healing done, as well as Melee/ Range Defence and Force/ Tech Resistance by 20%. In contrast to Red, the Stalker’s pools are much smaller, but standing in
Reduces outgoing damage, healing done, and defence. A pungent odor of oxidising durasteel overwhelms your senses...
Attack and Damage Type: Force, Elemental
Duration: 2.1 seconds
View on swtor.jedipedia.net
![]() Ruinous Corrosion
also deals a considerable amount of damage.
Ruinous Corrosion
also deals a considerable amount of damage.
On Hard Mode,
Reduces outgoing damage, healing done, and defence. A pungent odor of oxidising durasteel overwhelms your senses...
Attack and Damage Type: Force, Elemental
Duration: 2.1 seconds
View on swtor.jedipedia.net
![]() Ruinous Corrosion
reduces damage and healing done by 50% and Melee/ Range Defence and Force/ Tech Resistance by 30%.
Ruinous Corrosion
reduces damage and healing done by 50% and Melee/ Range Defence and Force/ Tech Resistance by 30%.
Incendiary Shriek
The Incendiary Shrieks appear in Lights Out at 3. On Hard Mode, they also appear in Lights Out 1 and 5.
They are harmless until they are affected by a flare.
Their buff
Violently reacts to increases in luminosity.
View on swtor.jedipedia.net
![]() Photoreactive Hypergollicity
increases their movement speed by 60%.
Photoreactive Hypergollicity
increases their movement speed by 60%.
Duration: 4 seconds
View on swtor.jedipedia.net
![]() Impending Burst.
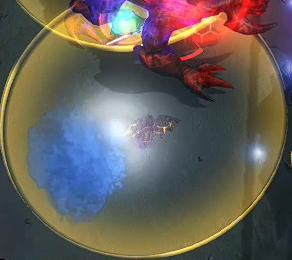
This is a small yellow circle with a 4 seconds timer. When the timer expires, the Shreks are going to explode. Anyone standing in the circle will receive a stack of
Taking periodic elemental [Jedipedia says it is Damage Type 9; Elemental damage would be Damage Type 3] damage. You are covered in a burning tar-like substance.
Impending Burst.
This is a small yellow circle with a 4 seconds timer. When the timer expires, the Shreks are going to explode. Anyone standing in the circle will receive a stack of
Taking periodic elemental [Jedipedia says it is Damage Type 9; Elemental damage would be Damage Type 3] damage. You are covered in a burning tar-like substance.
Attack Type: Tech (AoE, DoT)
Duration: 60 seconds
View on swtor.jedipedia.net
![]() Corrosive Rain
for each circle they were in during the explosion.
Taking periodic elemental [Jedipedia says it is Damage Type 9; Elemental damage would be Damage Type 3] damage. You are covered in a burning tar-like substance.
Corrosive Rain
for each circle they were in during the explosion.
Taking periodic elemental [Jedipedia says it is Damage Type 9; Elemental damage would be Damage Type 3] damage. You are covered in a burning tar-like substance.
Attack Type: Tech (AoE, DoT)
Duration: 60 seconds
View on swtor.jedipedia.net
![]() Corrosive Rain
lasts for 60 seconds, deals high periodic damage, and cannot be cleansed.
Corrosive Rain
lasts for 60 seconds, deals high periodic damage, and cannot be cleansed.
Therefore, it is important to place the flare so that the Shrieks are at the edge of the flare’s circle and not inside the players.
On Hard Mode,
This creature is going to explode into a loud of acid when this timer expires.
Duration: 4 seconds
View on swtor.jedipedia.net
![]() Impending Burst
is also triggered before they die to damage from the group.
Impending Burst
is also triggered before they die to damage from the group.
They also have an attack, called
Attack and Damage Type: Melee, Kinetic
View on swtor.jedipedia.net
![]() Bite,
dealing a bit of damage.
Bite,
dealing a bit of damage.
3 The Mutated Trandoshan Squad
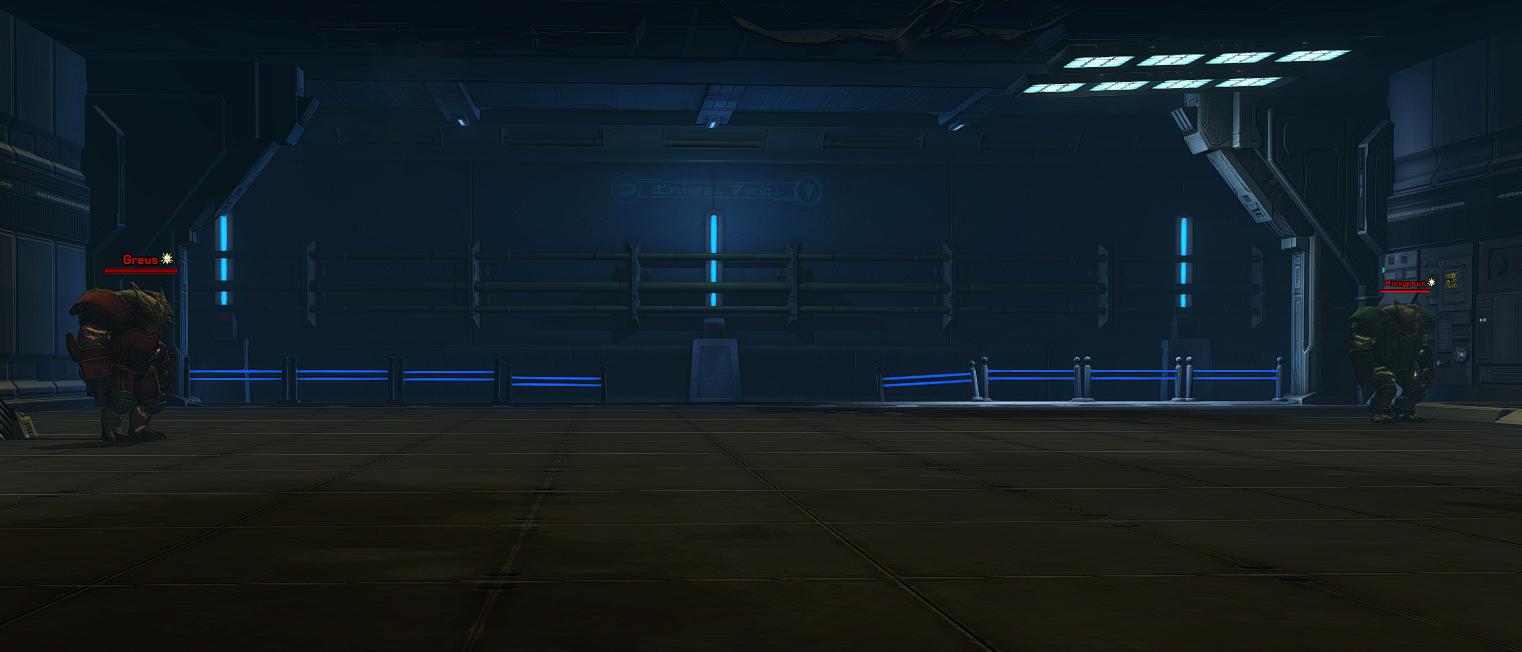
The Mutated Trandoshan Squad, aka. Kephess Squad aka. Thomas the Tank Engine Crossover is the fourth encounter and much more difficult than the previous ones – even on Story Mode. The group must manage four bosses at once and can only kill them by letting the train run over them.
3.1 Story Mode
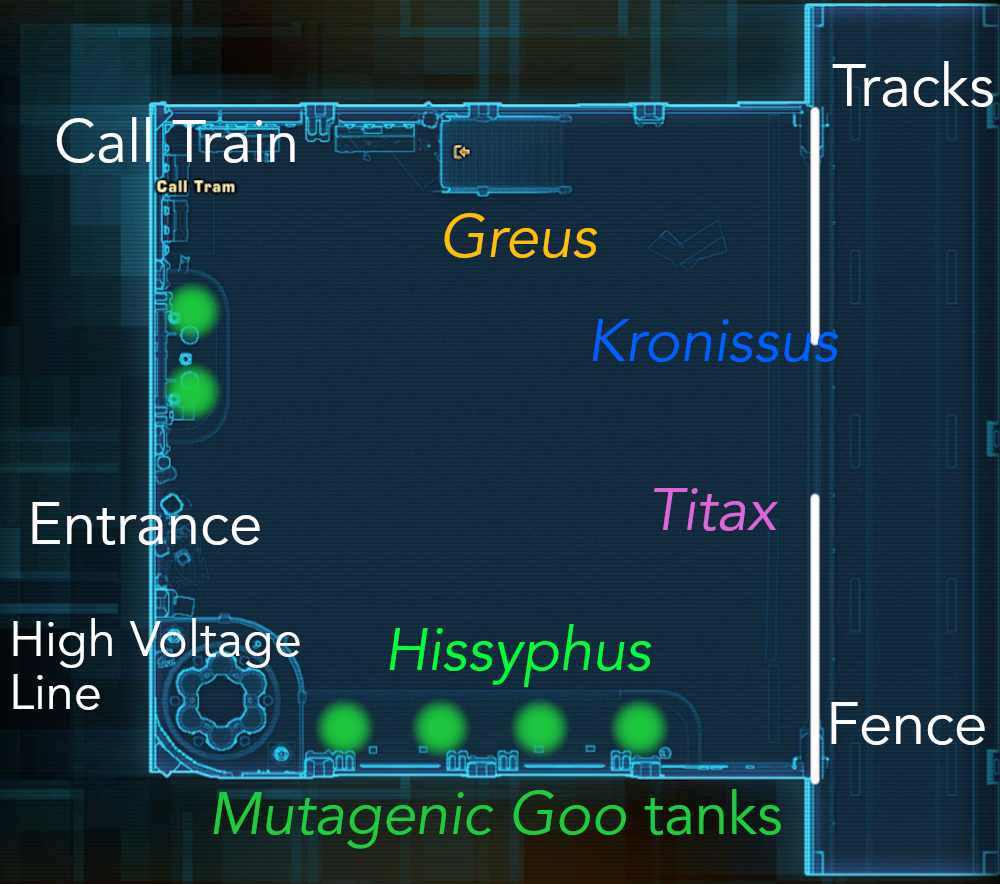
Any player or Trandoshan that is currently regenerating standing on the tracks will be killed when the train arrives.
The fence at the tracks blocks LoS and it is not possible to jump over it.
Getting knocked into the Mutagenic Goo tanks by Titax causes them to break and spread green AoE.
The High Voltage Line zaps anyone touching it, knocking them back and (almost) killing them. It therefore should be avoided.
Summary
When reaching 15% health, the Trandoshans enter a state of
![]() Torpor
and regenerate. This happens so fast that they cannot be killed the normal way. Instead, they need to be brought to the tracks before pushing them to 15%. The train console becomes active after 1 minute, that is also when Kronissus and Titax spawn. After clicking the console, the train comes after 15 seconds.
Torpor
and regenerate. This happens so fast that they cannot be killed the normal way. Instead, they need to be brought to the tracks before pushing them to 15%. The train console becomes active after 1 minute, that is also when Kronissus and Titax spawn. After clicking the console, the train comes after 15 seconds.
The four Trandoshans have different sets of abilities and health. Hissyphus is the Acid Trandoshan, doing an AoE puddle. Greus is a living flamethrower with a fire circle around himself and two cones which can be avoided. Titax is the Strength Trandoshan, doing a knockback and attacking the raid member with the lowest health. He also buffs the other Trandoshans when they are too close to him. Kronissus is the Ice Trandoshan, slowing players massively.
Greus and Kronissus have lower health than Hissyphus and Titax. On Story Mode, they are usually killed first. The kill order is therefore Greus -> Kronissus -> Hissyphus and Titax.
3.1.1 The Trandoshans’ abilities
All Trandoshans have the buff
![]() Death Pact.
If one Trandoshan dies, the remaining will receive a stack of
Death Pact.
If one Trandoshan dies, the remaining will receive a stack of
![]() Glory of the Hunt,
causing them to deal 20% more damage per stack.
Glory of the Hunt,
causing them to deal 20% more damage per stack.
Unless under the effect of
![]() Torpor,
the Trandoshans will evade any incoming train.
Torpor,
the Trandoshans will evade any incoming train.
Hissyphus, Kronissus and Titax have the ability
![]() No Escape.
This is a 2 seconds channel, pulling their tank to them if it is between 15 and 35 metres away. Greus however lacks this ability and can be tanked from range.
No Escape.
This is a 2 seconds channel, pulling their tank to them if it is between 15 and 35 metres away. Greus however lacks this ability and can be tanked from range.
Having
Movement speed reduced by 100%, Alacrity reduced by 15% per charge, threat generated increased by 15% per charge.
Attack and Damage Type: Force, Internal
Duration: 5 seconds
View on swtor.jedipedia.net
![]() Blistering Cold
(debuff applied by Kronissus) and
Overheated, vulnerable to sudden changes in temperature.
Blistering Cold
(debuff applied by Kronissus) and
Overheated, vulnerable to sudden changes in temperature.
Duration: 5 seconds
View on swtor.jedipedia.net
![]() Overheating
(debuff applied by Greus when getting hit with
Periodically dealing elemental damage to targets in a forward cone, applies Overheating. A jet of plasma burns through everything in its path.
Overheating
(debuff applied by Greus when getting hit with
Periodically dealing elemental damage to targets in a forward cone, applies Overheating. A jet of plasma burns through everything in its path.
Attack and Damage Type: Force, Elemental (AoE)
3 seconds channel
View on swtor.jedipedia.net
![]() Fire Blast
or
Attack and Damage type: Tech, Elemental (AoE)
Fire Blast
or
Attack and Damage type: Tech, Elemental (AoE)
2 seconds channel
View on swtor.jedipedia.net
![]() Ayhis & Eru
) at the same times gives a stack of
Ayhis & Eru
) at the same times gives a stack of
![]() Thermal Shock.
Each stack causes the affected to take 10% increased damage, stacking up to a maximum of 40%. This debuff lasts 20 seconds and should be avoided at all costs.
Thermal Shock.
Each stack causes the affected to take 10% increased damage, stacking up to a maximum of 40%. This debuff lasts 20 seconds and should be avoided at all costs.
Greus
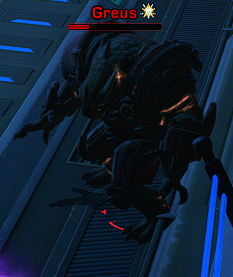
His mutagen is
The ‘Kronos Py-i2O’ mutagen imbues the thermal affinity. This target is immortal and will enter a regenerative state of Torpor if its health is reduced below 15%.
View on swtor.jedipedia.net
![]() Chaotic Evolution: ‘Kronos Py-i2O’ Mutagen,
causing him to enter a state of
Regenerating 0.614% of maximum health every 0.5s, damage received from all sources reduced by 80%. When this effect expires the Trandoshan reborn from Torpor will gain a charge of Chaotic Evolution. Severe injury triggeres a violent mutation and unparalleled biogenesis as the surviving tissue adapts.
Chaotic Evolution: ‘Kronos Py-i2O’ Mutagen,
causing him to enter a state of
Regenerating 0.614% of maximum health every 0.5s, damage received from all sources reduced by 80%. When this effect expires the Trandoshan reborn from Torpor will gain a charge of Chaotic Evolution. Severe injury triggeres a violent mutation and unparalleled biogenesis as the surviving tissue adapts.
Duration: 35 seconds
View on swtor.jedipedia.net
![]() Torpor
when reaching 15% health. During
Regenerating 0.614% of maximum health every 0.5s, damage received from all sources reduced by 80%. When this effect expires the Trandoshan reborn from Torpor will gain a charge of Chaotic Evolution. Severe injury triggeres a violent mutation and unparalleled biogenesis as the surviving tissue adapts.
Torpor
when reaching 15% health. During
Regenerating 0.614% of maximum health every 0.5s, damage received from all sources reduced by 80%. When this effect expires the Trandoshan reborn from Torpor will gain a charge of Chaotic Evolution. Severe injury triggeres a violent mutation and unparalleled biogenesis as the surviving tissue adapts.
Duration: 35 seconds
View on swtor.jedipedia.net
![]() Torpor,
Greus regenerates 0.614% health every 0.5 seconds (resulting in a total of 58% health when
Regenerating 0.614% of maximum health every 0.5s, damage received from all sources reduced by 80%. When this effect expires the Trandoshan reborn from Torpor will gain a charge of Chaotic Evolution. Severe injury triggeres a violent mutation and unparalleled biogenesis as the surviving tissue adapts.
Torpor,
Greus regenerates 0.614% health every 0.5 seconds (resulting in a total of 58% health when
Regenerating 0.614% of maximum health every 0.5s, damage received from all sources reduced by 80%. When this effect expires the Trandoshan reborn from Torpor will gain a charge of Chaotic Evolution. Severe injury triggeres a violent mutation and unparalleled biogenesis as the surviving tissue adapts.
Duration: 35 seconds
View on swtor.jedipedia.net
![]() Torpor
ends) and is stunned. This lasts for 35 seconds. In this time, the train can be used to kill Greus if he is on the tracks. If Greus is not killed before
Regenerating 0.614% of maximum health every 0.5s, damage received from all sources reduced by 80%. When this effect expires the Trandoshan reborn from Torpor will gain a charge of Chaotic Evolution. Severe injury triggeres a violent mutation and unparalleled biogenesis as the surviving tissue adapts.
Torpor
ends) and is stunned. This lasts for 35 seconds. In this time, the train can be used to kill Greus if he is on the tracks. If Greus is not killed before
Regenerating 0.614% of maximum health every 0.5s, damage received from all sources reduced by 80%. When this effect expires the Trandoshan reborn from Torpor will gain a charge of Chaotic Evolution. Severe injury triggeres a violent mutation and unparalleled biogenesis as the surviving tissue adapts.
Duration: 35 seconds
View on swtor.jedipedia.net
![]() Torpor
ends, he will receive a stack of
Torpor
ends, he will receive a stack of
![]() Chaotic Evolution
Each stack augments his ability
Periodically radiating elemental damage. The fires of Greus cannot be contained.
Chaotic Evolution
Each stack augments his ability
Periodically radiating elemental damage. The fires of Greus cannot be contained.
Attack and Damage Type: Force, Elemental (AoE)
Duration: 20 seconds
3 seconds cast
View on swtor.jedipedia.net
![]() The Fires of Greus:
The radius is increased by 3 metres, the duration of the circle is increased by 15 seconds, as well as the damage dealt by it is increased.
The Fires of Greus:
The radius is increased by 3 metres, the duration of the circle is increased by 15 seconds, as well as the damage dealt by it is increased.
![]() Chaotic Evolution
can stack up to 3 times.
Chaotic Evolution
can stack up to 3 times.
Greus has three attacks.
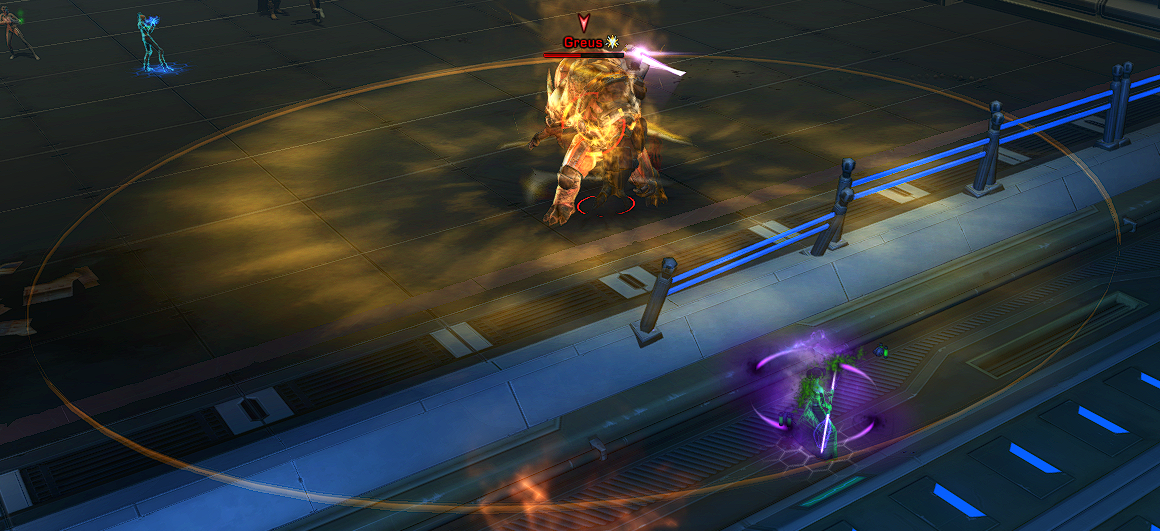
Attack and Damage Type: Force, Elemental (AoE)
Duration: 20 seconds
3 seconds cast
View on swtor.jedipedia.net
![]() The Fires of Greus,
an AoE circle of fire around him, dealing minor damage. It has 3 seconds cast and a 45 seconds cooldown. The circle itself lasts 20 seconds and deals damage every 2 seconds. It is augmented by
The Fires of Greus,
an AoE circle of fire around him, dealing minor damage. It has 3 seconds cast and a 45 seconds cooldown. The circle itself lasts 20 seconds and deals damage every 2 seconds. It is augmented by
![]() Chaotic Evolution
(see above).
Chaotic Evolution
(see above).
The remaining two abilities are conal. Neither one of them follows the player once started.
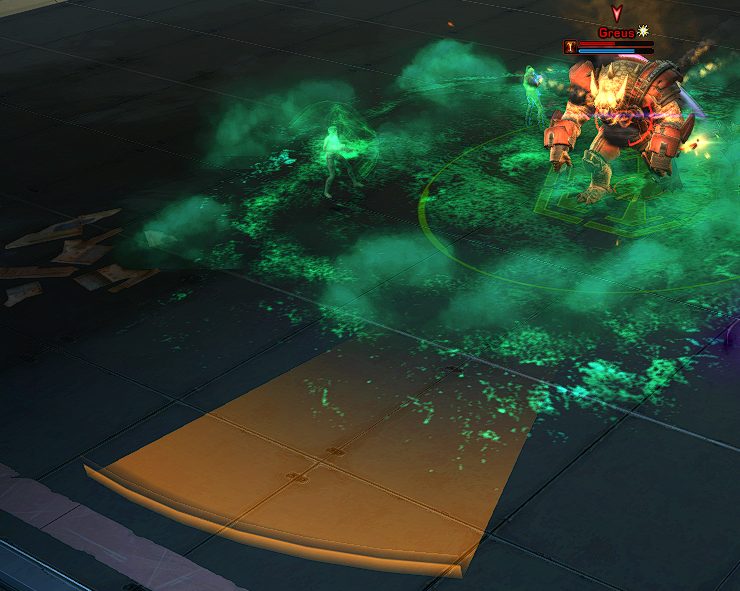
2 seconds channel
View on swtor.jedipedia.net
![]() Ayhis & Eru
is a 2 seconds channel with a 7 seconds cooldown and 11 metres range. It applies
Overheated, vulnerable to sudden changes in temperature.
Ayhis & Eru
is a 2 seconds channel with a 7 seconds cooldown and 11 metres range. It applies
Overheated, vulnerable to sudden changes in temperature.
Duration: 5 seconds
View on swtor.jedipedia.net
![]() Overheating
to anyone in the cone. Greus uses this attack quite frequently.
Overheating
to anyone in the cone. Greus uses this attack quite frequently.
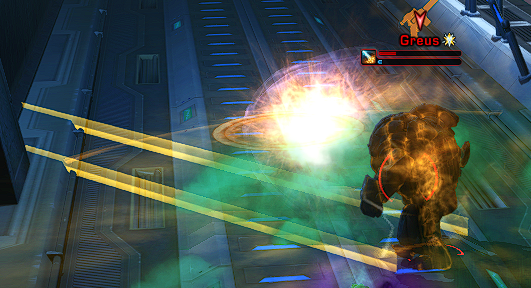
Attack and Damage Type: Force, Elemental (AoE)
3 seconds channel
View on swtor.jedipedia.net
![]() Fire Blast,
a 3 seconds channel. When Greus starts channelling, everyone should move out quickly. Shortly after the start of the channel, it will damage and knock down anyone caught in the cone. It also applies
Overheated, vulnerable to sudden changes in temperature.
Fire Blast,
a 3 seconds channel. When Greus starts channelling, everyone should move out quickly. Shortly after the start of the channel, it will damage and knock down anyone caught in the cone. It also applies
Overheated, vulnerable to sudden changes in temperature.
Duration: 5 seconds
View on swtor.jedipedia.net
![]() Overheating.
Overheating.
Hissyphus
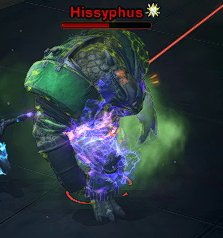
His mutagen is
The ‘Kronos Tx-1Cz’ mutagen imbues Caustic affinity. This target is immortal and will enter a regenerative state of Torpor if its health is reduced below 15%.
View on swtor.jedipedia.net
![]() Chaotic Evolution: ‘Kronos Tx-1Cz’ Mutagen.
Upon reaching 15% health, it causes him to enter a state of
Regenerating 0.614% of maximum health every 0.5s, damage received from all sources reduced by 80%. When this effect expires the Trandoshan reborn from Torpor will gain a charge of Chaotic Evolution. Severe injury triggeres a violent mutation and unparalleled biogenesis as the surviving tissue adapts.
Chaotic Evolution: ‘Kronos Tx-1Cz’ Mutagen.
Upon reaching 15% health, it causes him to enter a state of
Regenerating 0.614% of maximum health every 0.5s, damage received from all sources reduced by 80%. When this effect expires the Trandoshan reborn from Torpor will gain a charge of Chaotic Evolution. Severe injury triggeres a violent mutation and unparalleled biogenesis as the surviving tissue adapts.
Duration: 35 seconds
View on swtor.jedipedia.net
![]() Torpor.
This stuns him and causes him to regenerate 0.614% health every 0.5 seconds for 35 seconds (resulting in 58% health after
Regenerating 0.614% of maximum health every 0.5s, damage received from all sources reduced by 80%. When this effect expires the Trandoshan reborn from Torpor will gain a charge of Chaotic Evolution. Severe injury triggeres a violent mutation and unparalleled biogenesis as the surviving tissue adapts.
Torpor.
This stuns him and causes him to regenerate 0.614% health every 0.5 seconds for 35 seconds (resulting in 58% health after
Regenerating 0.614% of maximum health every 0.5s, damage received from all sources reduced by 80%. When this effect expires the Trandoshan reborn from Torpor will gain a charge of Chaotic Evolution. Severe injury triggeres a violent mutation and unparalleled biogenesis as the surviving tissue adapts.
Duration: 35 seconds
View on swtor.jedipedia.net
![]() Torpor
is finished). When on the tracks during
Regenerating 0.614% of maximum health every 0.5s, damage received from all sources reduced by 80%. When this effect expires the Trandoshan reborn from Torpor will gain a charge of Chaotic Evolution. Severe injury triggeres a violent mutation and unparalleled biogenesis as the surviving tissue adapts.
Torpor
is finished). When on the tracks during
Regenerating 0.614% of maximum health every 0.5s, damage received from all sources reduced by 80%. When this effect expires the Trandoshan reborn from Torpor will gain a charge of Chaotic Evolution. Severe injury triggeres a violent mutation and unparalleled biogenesis as the surviving tissue adapts.
Duration: 35 seconds
View on swtor.jedipedia.net
![]() Torpor,
a train can be called to kill him. If he is not killed by the train, he will receive a stack of
Torpor,
a train can be called to kill him. If he is not killed by the train, he will receive a stack of
![]() Chaotic Evolution
after
Regenerating 0.614% of maximum health every 0.5s, damage received from all sources reduced by 80%. When this effect expires the Trandoshan reborn from Torpor will gain a charge of Chaotic Evolution. Severe injury triggeres a violent mutation and unparalleled biogenesis as the surviving tissue adapts.
Chaotic Evolution
after
Regenerating 0.614% of maximum health every 0.5s, damage received from all sources reduced by 80%. When this effect expires the Trandoshan reborn from Torpor will gain a charge of Chaotic Evolution. Severe injury triggeres a violent mutation and unparalleled biogenesis as the surviving tissue adapts.
Duration: 35 seconds
View on swtor.jedipedia.net
![]() Torpor
ends. Each stack increases the rate of
Enables use of Envenomed Strike at 10 charges. The thrill of combat causes Hissyphus to synthesize venom at an alarming rate.
Torpor
ends. Each stack increases the rate of
Enables use of Envenomed Strike at 10 charges. The thrill of combat causes Hissyphus to synthesize venom at an alarming rate.
View on swtor.jedipedia.net
![]() Venom Synthesis
by 1 and the radius of
Attack and Damage Type: Tech, Internal (AoE)
Venom Synthesis
by 1 and the radius of
Attack and Damage Type: Tech, Internal (AoE)
View on swtor.jedipedia.net
![]() Tx-1Ch E. Gas
by 1 metre.
Tx-1Ch E. Gas
by 1 metre.
![]() Chaotic Evolution
can stack up to 3 times.
Chaotic Evolution
can stack up to 3 times.
His attack pattern consists out of building 10 stacks of
Enables use of Envenomed Strike at 10 charges. The thrill of combat causes Hissyphus to synthesize venom at an alarming rate.
View on swtor.jedipedia.net
![]() Venom Synthesis.
This allows him to do
Attack and Damage Type: Melee, Kinetic
Venom Synthesis.
This allows him to do
Attack and Damage Type: Melee, Kinetic
View on swtor.jedipedia.net
![]() Envenomed Strike,
dealing damage to the tank and applying the DoT
Periodically afflicted by internal damage. This effect can be cleansed. The essence of ruin flows through your veins.
Envenomed Strike,
dealing damage to the tank and applying the DoT
Periodically afflicted by internal damage. This effect can be cleansed. The essence of ruin flows through your veins.
Attack and Damage Type: Force, Internal
Duration: 18 seconds
View on swtor.jedipedia.net
![]() Venom of Hissyphus
to them.
Periodically afflicted by internal damage. This effect can be cleansed. The essence of ruin flows through your veins.
Venom of Hissyphus
to them.
Periodically afflicted by internal damage. This effect can be cleansed. The essence of ruin flows through your veins.
Attack and Damage Type: Force, Internal
Duration: 18 seconds
View on swtor.jedipedia.net
![]() Venom of Hissyphus
lasts 18 seconds, ticks every 3 seconds, and can be cleansed.
Venom of Hissyphus
lasts 18 seconds, ticks every 3 seconds, and can be cleansed.
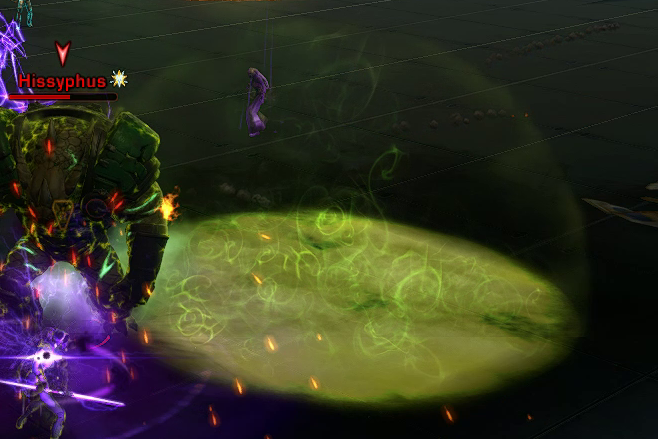
View on swtor.jedipedia.net
![]() Envenomed Strike,
Hissyphus does
Attack and Damage Type: Tech, Internal (AoE)
Envenomed Strike,
Hissyphus does
Attack and Damage Type: Tech, Internal (AoE)
View on swtor.jedipedia.net
![]() Tx-1Ch E. Gas
at the same time. This is a puddle of green acid, dealing damage to anyone inside.
Tx-1Ch E. Gas
at the same time. This is a puddle of green acid, dealing damage to anyone inside.
Another ability of Hissyphus is
Periodically radiating damage, applies the Brittle status effect. The noxious fumes of Hissyphus can overwhelm all but the strongest defenses.
Attack and Damage Type: Tech, Elemental (AoE)
Duration: 20 seconds
4 seconds cast
View on swtor.jedipedia.net
![]() Caustic Plume.
It has 4 seconds cast time and a 30 seconds cooldown. After the cast, Hissyphus receives
Periodically radiating damage, applies the Brittle status effect. The noxious fumes of Hissyphus can overwhelm all but the strongest defenses.
Caustic Plume.
It has 4 seconds cast time and a 30 seconds cooldown. After the cast, Hissyphus receives
Periodically radiating damage, applies the Brittle status effect. The noxious fumes of Hissyphus can overwhelm all but the strongest defenses.
Attack and Damage Type: Tech, Elemental (AoE)
Duration: 20 seconds
4 seconds cast
View on swtor.jedipedia.net
![]() Caustic Plume,
dealing damage every 2 seconds for 20 seconds to anyone closer than 20 metres to him.
Caustic Plume,
dealing damage every 2 seconds for 20 seconds to anyone closer than 20 metres to him.
It also applies the
Causes all sources of Kinetic damage to apply one charge of Damaged Defenses.
Duration: 2.1 seconds
View on swtor.jedipedia.net
![]() Brittle
debuff to players in range each time it ticks. The debuff lasts for 2.1 seconds if not refreshed by
Periodically radiating damage, applies the Brittle status effect. The noxious fumes of Hissyphus can overwhelm all but the strongest defenses.
Brittle
debuff to players in range each time it ticks. The debuff lasts for 2.1 seconds if not refreshed by
Periodically radiating damage, applies the Brittle status effect. The noxious fumes of Hissyphus can overwhelm all but the strongest defenses.
Attack and Damage Type: Tech, Elemental
Duration: 20 seconds
View on swtor.jedipedia.net
![]() Caustic Plume
again. When receiving Kinetic damage while having the debuff, they will receive a stack of
Decreases Defence rating against Melee and Ranged attacks by 3% per stack.
Caustic Plume
again. When receiving Kinetic damage while having the debuff, they will receive a stack of
Decreases Defence rating against Melee and Ranged attacks by 3% per stack.
Duration: 15 seconds
View on swtor.jedipedia.net
![]() Damage Defences.
Decreases Defence rating against Melee and Ranged attacks by 3% per stack.
Damage Defences.
Decreases Defence rating against Melee and Ranged attacks by 3% per stack.
Duration: 15 seconds
View on swtor.jedipedia.net
![]() Damage Defences
decreases Melee/ Ranged Defence by 3% per stack, stacking up to 10 times. This debuff lasts for 15 seconds. Kinetic damage is dealt by
Attack and Damage Type: Melee, Kinetic
Damage Defences
decreases Melee/ Ranged Defence by 3% per stack, stacking up to 10 times. This debuff lasts for 15 seconds. Kinetic damage is dealt by
Attack and Damage Type: Melee, Kinetic
View on swtor.jedipedia.net
![]() Pummel
(Hissyphus’ base attack),
Attack and Damage Type: Melee, Kinetic
Pummel
(Hissyphus’ base attack),
Attack and Damage Type: Melee, Kinetic
View on swtor.jedipedia.net
![]() Frigid Claws
(Kronissus’ base attack),
Attack and Damage Type: Tech, Kinetic when knocked in a Mutagenic Goo tank; else Tech, Internal
Frigid Claws
(Kronissus’ base attack),
Attack and Damage Type: Tech, Kinetic when knocked in a Mutagenic Goo tank; else Tech, Internal
3 seconds channel
View on swtor.jedipedia.net
![]() Titax Strike
(conal ability of Titax) and
Attack and Damage Type: Melee, Kinetic
Titax Strike
(conal ability of Titax) and
Attack and Damage Type: Melee, Kinetic
View on swtor.jedipedia.net
Brutal Fists
(Titax’ base attack).
Kronissus
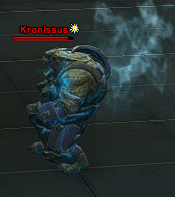
Kronissus’
mutagen is
The ‘Kronos Cz-1l’ mutagen imbues the Endothermic affinity. This target is immortal will enter a regenerative state of Torpor if its health is reduced below 15%.
View on swtor.jedipedia.net
![]() Chaotic Evolution: ‘Kronos Cz-1l’ Mutagen.
When at 15% health, he enters a state of
Regenerating 0.405% of maximum health every 0.5s, damage received from all sources reduced by 80%. When this effect expires the Trandoshan reborn from Torpor will gain a charge of Chaotic Evolution. Severe injury triggeres a violent mutation and unparalleled biogenesis as the surviving tissue adapts.
Chaotic Evolution: ‘Kronos Cz-1l’ Mutagen.
When at 15% health, he enters a state of
Regenerating 0.405% of maximum health every 0.5s, damage received from all sources reduced by 80%. When this effect expires the Trandoshan reborn from Torpor will gain a charge of Chaotic Evolution. Severe injury triggeres a violent mutation and unparalleled biogenesis as the surviving tissue adapts.
Duration: 35 seconds
View on swtor.jedipedia.net
![]() Torpor
for 35 seconds. During
Regenerating 0.405% of maximum health every 0.5s, damage received from all sources reduced by 80%. When this effect expires the Trandoshan reborn from Torpor will gain a charge of Chaotic Evolution. Severe injury triggeres a violent mutation and unparalleled biogenesis as the surviving tissue adapts.
Torpor
for 35 seconds. During
Regenerating 0.405% of maximum health every 0.5s, damage received from all sources reduced by 80%. When this effect expires the Trandoshan reborn from Torpor will gain a charge of Chaotic Evolution. Severe injury triggeres a violent mutation and unparalleled biogenesis as the surviving tissue adapts.
Duration: 35 seconds
View on swtor.jedipedia.net
![]() Torpor,
Kronissus is stunned and regenerates 0.405% health every 0.5 seconds for 35 seconds (resulting in 43% health after
Regenerating 0.405% of maximum health every 0.5s, damage received from all sources reduced by 80%. When this effect expires the Trandoshan reborn from Torpor will gain a charge of Chaotic Evolution. Severe injury triggeres a violent mutation and unparalleled biogenesis as the surviving tissue adapts.
Torpor,
Kronissus is stunned and regenerates 0.405% health every 0.5 seconds for 35 seconds (resulting in 43% health after
Regenerating 0.405% of maximum health every 0.5s, damage received from all sources reduced by 80%. When this effect expires the Trandoshan reborn from Torpor will gain a charge of Chaotic Evolution. Severe injury triggeres a violent mutation and unparalleled biogenesis as the surviving tissue adapts.
Duration: 35 seconds
View on swtor.jedipedia.net
![]() Torpor
is finished). When on the tracks during
Regenerating 0.405% of maximum health every 0.5s, damage received from all sources reduced by 80%. When this effect expires the Trandoshan reborn from Torpor will gain a charge of Chaotic Evolution. Severe injury triggeres a violent mutation and unparalleled biogenesis as the surviving tissue adapts.
Torpor
is finished). When on the tracks during
Regenerating 0.405% of maximum health every 0.5s, damage received from all sources reduced by 80%. When this effect expires the Trandoshan reborn from Torpor will gain a charge of Chaotic Evolution. Severe injury triggeres a violent mutation and unparalleled biogenesis as the surviving tissue adapts.
Duration: 35 seconds
View on swtor.jedipedia.net
![]() Torpor,
a train can be called to kill him. If he is not killed by the train, he will receive a stack of
Torpor,
a train can be called to kill him. If he is not killed by the train, he will receive a stack of
![]() Chaotic Evolution
after
Regenerating 0.405% of maximum health every 0.5s, damage received from all sources reduced by 80%. When this effect expires the Trandoshan reborn from Torpor will gain a charge of Chaotic Evolution. Severe injury triggeres a violent mutation and unparalleled biogenesis as the surviving tissue adapts.
Chaotic Evolution
after
Regenerating 0.405% of maximum health every 0.5s, damage received from all sources reduced by 80%. When this effect expires the Trandoshan reborn from Torpor will gain a charge of Chaotic Evolution. Severe injury triggeres a violent mutation and unparalleled biogenesis as the surviving tissue adapts.
Duration: 35 seconds
View on swtor.jedipedia.net
![]() Torpor
ends.
Torpor
ends.
![]() Chaotic Evolution
stacks up to 3 times, with each charge increasing the channel duration of
Periodically dealing elemental damage to targets in a forward cone, applies Blistering Cold. The bitter winds halt the growth of all life and cause even durasteel to shatter.
Chaotic Evolution
stacks up to 3 times, with each charge increasing the channel duration of
Periodically dealing elemental damage to targets in a forward cone, applies Blistering Cold. The bitter winds halt the growth of all life and cause even durasteel to shatter.
2 seconds channel
View on swtor.jedipedia.net
![]() Endothermic Blast
by 1 second.
Endothermic Blast
by 1 second.
His base attack is
Attack and Damage Type: Melee, Kinetic
View on swtor.jedipedia.net
![]() Frigid Claws,
applying stacks of
Movement speed reduced by 30/50/70%. The vapor in the air begins to freeze around you.
Frigid Claws,
applying stacks of
Movement speed reduced by 30/50/70%. The vapor in the air begins to freeze around you.
Duration: 5 seconds
View on swtor.jedipedia.net
![]() Sublimation
to the target.
Sublimation
to the target.
Movement speed reduced by 30/50/70%. The vapor in the air begins to freeze around you.
Duration: 5 seconds
View on swtor.jedipedia.net
![]() Sublimation
stacks up to 3 times, reducing movement speed by 30%/50%/70%. If Kronissus is under
Dramatically increases the potency of any existing mutagen affinity.
Sublimation
stacks up to 3 times, reducing movement speed by 30%/50%/70%. If Kronissus is under
Dramatically increases the potency of any existing mutagen affinity.
Duration: 2.1 seconds
View on swtor.jedipedia.net
![]() The Presence of Titax,
he will apply stacks of
Movement speed reduced by 100%, Alacrity reduced by 15% per charge, threat generated increased by 15% per charge.
The Presence of Titax,
he will apply stacks of
Movement speed reduced by 100%, Alacrity reduced by 15% per charge, threat generated increased by 15% per charge.
Attack and Damage Type: Force, Internal
Duration: 5 seconds
View on swtor.jedipedia.net
![]() Blistering Cold
instead.
Blistering Cold
instead.
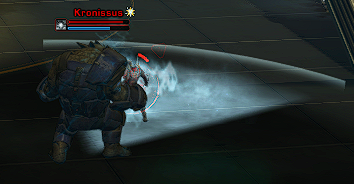
2 seconds channel
View on swtor.jedipedia.net
![]() Endothermic Blast,
a frontal cone being channelled for 2 seconds and with a 7 metres range and 12 seconds cooldown. During the channel, Kronissus will be immobilised. When standing in the cone, players will receive
Immobilised, gaining stacks of Blistering Cold.
Endothermic Blast,
a frontal cone being channelled for 2 seconds and with a 7 metres range and 12 seconds cooldown. During the channel, Kronissus will be immobilised. When standing in the cone, players will receive
Immobilised, gaining stacks of Blistering Cold.
Attack and Damage Type: Force, Elemental (AoE)
Duration: 1.1 seconds
View on swtor.jedipedia.net
![]() Hypothermia,
immobilising them and causing them to gain stacks of
Movement speed reduced by 100%, Alacrity reduced by 15% per charge, threat generated increased by 15% per charge.
Hypothermia,
immobilising them and causing them to gain stacks of
Movement speed reduced by 100%, Alacrity reduced by 15% per charge, threat generated increased by 15% per charge.
Attack and Damage Type: Force, Internal
Duration: 5 seconds
View on swtor.jedipedia.net
![]() Blistering Cold.
Blistering Cold.
Movement speed reduced by 100%, Alacrity reduced by 15% per charge, threat generated increased by 15% per charge.
Attack and Damage Type: Force, Internal
Duration: 5 seconds
View on swtor.jedipedia.net
![]() Blistering Cold
sets the movement speed of the affected player to 1% and reduces Alacrity by 15% per stack and increases threat generation by 15% per stack. It lasts for 5 seconds and stacks up to 3 times.
Movement speed reduced by 100%, Alacrity reduced by 15% per charge, threat generated increased by 15% per charge.
Blistering Cold
sets the movement speed of the affected player to 1% and reduces Alacrity by 15% per stack and increases threat generation by 15% per stack. It lasts for 5 seconds and stacks up to 3 times.
Movement speed reduced by 100%, Alacrity reduced by 15% per charge, threat generated increased by 15% per charge.
Attack and Damage Type: Force, Internal
Duration: 5 seconds
View on swtor.jedipedia.net
![]() Blistering Cold
can be cleansed.
Blistering Cold
can be cleansed.
A trick for Kronissus is to simply walk around him all the time to avoid his cone.
Titax
Titax’
mutagen is
The ‘Kronos CnA’ mutagen imbues the Might affinity. This target is immortal will enter a regenerative state of Torpor if its health is reduced below 15%.
View on swtor.jedipedia.net
![]() Chaotic Evolution: ‘Kronos CnA’ Mutagen.
When at 15% health, he enters a state of
Regenerating 0.614% of maximum health every 0.5s, damage received from all sources reduced by 80%. When this effect expires the Trandoshan reborn from Torpor will gain a charge of Chaotic Evolution. Severe injury triggeres a violent mutation and unparalleled biogenesis as the surviving tissue adapts.
Chaotic Evolution: ‘Kronos CnA’ Mutagen.
When at 15% health, he enters a state of
Regenerating 0.614% of maximum health every 0.5s, damage received from all sources reduced by 80%. When this effect expires the Trandoshan reborn from Torpor will gain a charge of Chaotic Evolution. Severe injury triggeres a violent mutation and unparalleled biogenesis as the surviving tissue adapts.
Duration: 35 seconds
View on swtor.jedipedia.net
![]() Torpor
for 35 seconds. During
Regenerating 0.614% of maximum health every 0.5s, damage received from all sources reduced by 80%. When this effect expires the Trandoshan reborn from Torpor will gain a charge of Chaotic Evolution. Severe injury triggeres a violent mutation and unparalleled biogenesis as the surviving tissue adapts.
Torpor
for 35 seconds. During
Regenerating 0.614% of maximum health every 0.5s, damage received from all sources reduced by 80%. When this effect expires the Trandoshan reborn from Torpor will gain a charge of Chaotic Evolution. Severe injury triggeres a violent mutation and unparalleled biogenesis as the surviving tissue adapts.
Duration: 35 seconds
View on swtor.jedipedia.net
![]() Torpor,
Titax is stunned and regenerates 0.614% health every 0.5 seconds for 35 seconds (resulting in 58% health after
Regenerating 0.614% of maximum health every 0.5s, damage received from all sources reduced by 80%. When this effect expires the Trandoshan reborn from Torpor will gain a charge of Chaotic Evolution. Severe injury triggeres a violent mutation and unparalleled biogenesis as the surviving tissue adapts.
Torpor,
Titax is stunned and regenerates 0.614% health every 0.5 seconds for 35 seconds (resulting in 58% health after
Regenerating 0.614% of maximum health every 0.5s, damage received from all sources reduced by 80%. When this effect expires the Trandoshan reborn from Torpor will gain a charge of Chaotic Evolution. Severe injury triggeres a violent mutation and unparalleled biogenesis as the surviving tissue adapts.
Duration: 35 seconds
View on swtor.jedipedia.net
![]() Torpor
is finished). When on the tracks during
Regenerating 0.614% of maximum health every 0.5s, damage received from all sources reduced by 80%. When this effect expires the Trandoshan reborn from Torpor will gain a charge of Chaotic Evolution. Severe injury triggeres a violent mutation and unparalleled biogenesis as the surviving tissue adapts.
Torpor
is finished). When on the tracks during
Regenerating 0.614% of maximum health every 0.5s, damage received from all sources reduced by 80%. When this effect expires the Trandoshan reborn from Torpor will gain a charge of Chaotic Evolution. Severe injury triggeres a violent mutation and unparalleled biogenesis as the surviving tissue adapts.
Duration: 35 seconds
View on swtor.jedipedia.net
![]() Torpor,
a train can be called to kill him. If he is not killed by the train, he will receive a stack of
Torpor,
a train can be called to kill him. If he is not killed by the train, he will receive a stack of
![]() Chaotic Evolution
after
Regenerating 0.614% of maximum health every 0.5s, damage received from all sources reduced by 80%. When this effect expires the Trandoshan reborn from Torpor will gain a charge of Chaotic Evolution. Severe injury triggeres a violent mutation and unparalleled biogenesis as the surviving tissue adapts.
Chaotic Evolution
after
Regenerating 0.614% of maximum health every 0.5s, damage received from all sources reduced by 80%. When this effect expires the Trandoshan reborn from Torpor will gain a charge of Chaotic Evolution. Severe injury triggeres a violent mutation and unparalleled biogenesis as the surviving tissue adapts.
Duration: 35 seconds
View on swtor.jedipedia.net
![]() Torpor
ends.
Torpor
ends.
![]() Chaotic Evolution
stacks up to 3 times, with each charge increasing the range of
Increases the effectiveness of nearby allies. Fear those who stand upon the shoulders of Titax!
Chaotic Evolution
stacks up to 3 times, with each charge increasing the range of
Increases the effectiveness of nearby allies. Fear those who stand upon the shoulders of Titax!
3 seconds cast
View on swtor.jedipedia.net
![]() The Presence of Titax
by 3 metres.
The Presence of Titax
by 3 metres.
Increases the effectiveness of nearby allies. Fear those who stand upon the shoulders of Titax!
3 seconds cast
View on swtor.jedipedia.net
![]() The Presence of Titax
is Titax’ buff which improves other Trandoshans close to him. They will receive
Dramatically increases the potency of any existing mutagen affinity.
The Presence of Titax
is Titax’ buff which improves other Trandoshans close to him. They will receive
Dramatically increases the potency of any existing mutagen affinity.
Duration: 2.1 seconds
View on swtor.jedipedia.net
![]() The Presence of Titax
for 2.1 seconds which will be reapplied when they continue standing next to Titax. On Greus, it increases the damage dealt by
Periodically radiating elemental damage. The fires of Greus cannot be contained.
The Presence of Titax
for 2.1 seconds which will be reapplied when they continue standing next to Titax. On Greus, it increases the damage dealt by
Periodically radiating elemental damage. The fires of Greus cannot be contained.
Attack and Damage Type: Force, Elemental (AoE)
Duration: 20 seconds
3 seconds cast
View on swtor.jedipedia.net
![]() The Fires of Greus
by 200%, making it more noticeable. On Hissyphus, the damage of
Attack and Damage Type: Melee, Kinetic
The Fires of Greus
by 200%, making it more noticeable. On Hissyphus, the damage of
Attack and Damage Type: Melee, Kinetic
View on swtor.jedipedia.net
![]() Envenomed Strike
is increased by 33%. On Kronissus,
Attack and Damage Type: Melee, Kinetic
Envenomed Strike
is increased by 33%. On Kronissus,
Attack and Damage Type: Melee, Kinetic
View on swtor.jedipedia.net
![]() Frigid Claws
applies stacks of
Movement speed reduced by 100%, Alacrity reduced by 15% per charge, threat generated increased by 15% per charge.
Frigid Claws
applies stacks of
Movement speed reduced by 100%, Alacrity reduced by 15% per charge, threat generated increased by 15% per charge.
Attack and Damage Type: Force, Internal
Duration: 5 seconds
View on swtor.jedipedia.net
![]() Blistering Cold
instead of
Movement speed reduced by 30/50/70%. The vapor in the air begins to freeze around you.
Blistering Cold
instead of
Movement speed reduced by 30/50/70%. The vapor in the air begins to freeze around you.
Duration: 5 seconds
View on swtor.jedipedia.net
![]() Sublimation.
Sublimation.
Titax has two special abilities.

3 seconds channel
View on swtor.jedipedia.net
![]() Titax Strike
is a 3 seconds channel stunning the target and knocking it back through the whole room. Getting knocked back in one of the Mutagenic Goo tanks deals less damage than getting knocked in a wall. It also causes the tank to break, spilling an expanding green puddle on the floor (see Hard Mode).
Attack and Damage Type: Tech, Kinetic when knocked in a Mutagenic Goo tank; else Tech, Internal
Titax Strike
is a 3 seconds channel stunning the target and knocking it back through the whole room. Getting knocked back in one of the Mutagenic Goo tanks deals less damage than getting knocked in a wall. It also causes the tank to break, spilling an expanding green puddle on the floor (see Hard Mode).
Attack and Damage Type: Tech, Kinetic when knocked in a Mutagenic Goo tank; else Tech, Internal
3 seconds channel
View on swtor.jedipedia.net
![]() Titax Strike
happens
every 35 seconds.
Titax Strike
happens
every 35 seconds.
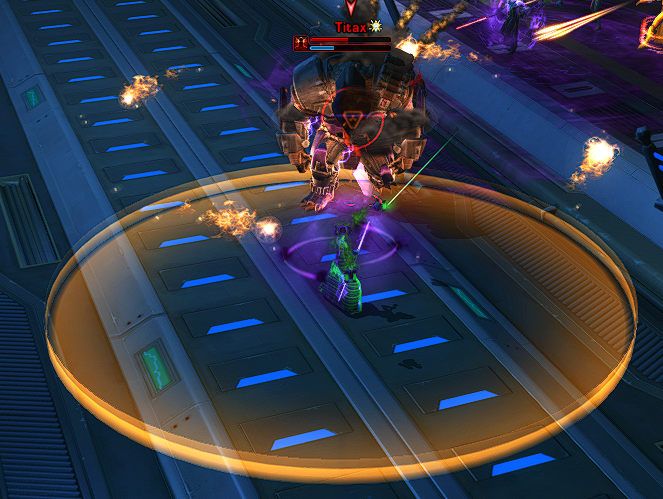
Attack and Damage Type: Tech, Kinetic (AoE)
5 seconds channel
View on swtor.jedipedia.net
![]() Crush the Weak.
It has a 5 seconds channel after which Titax will leap to the player, knock them down and return to the tank. The player targeted by
Lunges toward the target nearest to death [it seems to be rather random] at the end of this channel. Titax cannot forgive weakness.
Crush the Weak.
It has a 5 seconds channel after which Titax will leap to the player, knock them down and return to the tank. The player targeted by
Lunges toward the target nearest to death [it seems to be rather random] at the end of this channel. Titax cannot forgive weakness.
Attack and Damage Type: Tech, Kinetic (AoE)
5 seconds channel
View on swtor.jedipedia.net
![]() Crush the Weak
will receive an orange circle underneath them. This ability has a 40 seconds cooldown.
Crush the Weak
will receive an orange circle underneath them. This ability has a 40 seconds cooldown.
3.1.2 Strategy
Please note before you read this that there are multiple strategies for this encounter. Also please note that the following strategy only works on Story Mode. If you are interested in Hard Mode strategies (for instance if you want to do it the “right” (Hard Mode compatible) way even on Story mode), please refer to the Hard Mode part.
That said, onwards to the Story Mode only strategy.
The fight can become quite messy having to fight four bosses at the same time, therefore two should be eliminated. On Story Mode this is usually Greus -> Kronissus -> Hissyphus and Titax.
Greus is killed first since he has low health and is together with Hissyphus there at the beginning of the fight. Kronissus is killed second since he has low health and is probably the most dangerous one on Story Mode, but only spawns after 1 minute together with Titax. Hissyphus and Titax are killed last. They can be killed together to prevent 3 charges of
![]() Glory of the Hunt;
that is not that important on Story Mode though.
Glory of the Hunt;
that is not that important on Story Mode though.
Part 1: Greus
Especially on Greus in the beginning, the DPS must not push Greus’ health too low too soon. The tank should move him to the tracks right away and the DPS should switch to Hissyphus at ~ 20%. Hissyphus is meanwhile tanked by the other tank.
Duration: 35 seconds
View on swtor.jedipedia.net
![]() Torpor.
At 1 minute, the train console will become active and a healer or ranged DPS must click it.
Torpor.
At 1 minute, the train console will become active and a healer or ranged DPS must click it.
When the facility AI says “Transport request acknowledged. Your train will arrive in six minutes.”, there are 15 seconds left to clear the tracks. When she says “Update: Your train will arrive in Error minutes.”, there are 7 seconds left. After that, the train will kill everything on the tracks – except Trandoshans not under the effect of
Regenerating 0.614% of maximum health every 0.5s, damage received from all sources reduced by 80%. When this effect expires the Trandoshan reborn from Torpor will gain a charge of Chaotic Evolution. Severe injury triggeres a violent mutation and unparalleled biogenesis as the surviving tissue adapts.
Duration: 35 seconds
View on swtor.jedipedia.net
![]() Torpor.
Torpor.
Part 2: Kronissus
While Greus is about to have a little accident with a train, the tanks must tank the remaining 3 Trandoshans. The Hissyphus-tank takes Titax while the Greus-tank takes Kronissus. Should Greus still be alive, it would probably be better to let a ranged DPS take Greus and kite him to prevent the Kronissus-tank from receiving
![]() Thermal Shock.
Thermal Shock.
Should there be a third tank (possible option when with 16 people), each tank can take one boss. The Titax-tank then must make sure to tank Titax afar from the other Trandoshans, so they do not receive
Dramatically increases the potency of any existing mutagen affinity.
Duration: 2.1 seconds
View on swtor.jedipedia.net
![]() The Presence of Titax.
If there is only to tanks, Titax must be away from Kronissus.
The Presence of Titax.
If there is only to tanks, Titax must be away from Kronissus.
The Kronissus-tank must get Kronissus to the tracks. The DPS must push him to 15%, triggering
Regenerating 0.405% of maximum health every 0.5s, damage received from all sources reduced by 80%. When this effect expires the Trandoshan reborn from Torpor will gain a charge of Chaotic Evolution. Severe injury triggeres a violent mutation and unparalleled biogenesis as the surviving tissue adapts.
Duration: 35 seconds
View on swtor.jedipedia.net
![]() Torpor.
The train-caller then calls another train to finish Kronissus for good.
Torpor.
The train-caller then calls another train to finish Kronissus for good.
Part 3: Hissyphus and Titax
The Kronissus-tank now can take one of the remaining two Trandoshans to make it easier for the Hissyphus-tank. In the last part, either both Trandoshans are killed with one train or one after another.
If both should be killed with the same train, both Trandoshans must be brought to the tracks, and one should be brought to 20%. Then the other Trandoshan is brought to 20% as well. After that, both are pushed to 15% so they trigger their
Regenerating 0.614% of maximum health every 0.5s, damage received from all sources reduced by 80%. When this effect expires the Trandoshan reborn from Torpor will gain a charge of Chaotic Evolution. Severe injury triggeres a violent mutation and unparalleled biogenesis as the surviving tissue adapts.
Duration: 35 seconds
View on swtor.jedipedia.net
![]() Torpor.
The train caller calls a train, and the Trandoshans will be killed.
Torpor.
The train caller calls a train, and the Trandoshans will be killed.
If they are to be killed one by one, one Trandoshans must be brought to the tracks and is pushed to 15%, the train is called, and he dies. After that, the last Trandoshan is brought to the tracks, pushed to 15% and killed by another train.
3.2 Hard Mode
The Hard Mode version is a bit messier than the one on Story Mode and requires a bit more coordination.
3.2.1 New Mechanics
The effects of
![]() Glory of the Hunt,
which get applied to the other Trandoshans as soon as one of them dies, are now modified. At one stack, the remaining receive 5% more damage and deal 15% more damage. At two stacks 10% more damage received and 50% more damage dealt and at three stacks 25% more damage received and 300% more damage dealt.
Glory of the Hunt,
which get applied to the other Trandoshans as soon as one of them dies, are now modified. At one stack, the remaining receive 5% more damage and deal 15% more damage. At two stacks 10% more damage received and 50% more damage dealt and at three stacks 25% more damage received and 300% more damage dealt.
It is therefore important that the last two (or three) Trandoshans die at the same time.
The health regeneration from
![]() Torpor
is doubled, so 1.214% every half a second.
Torpor
is doubled, so 1.214% every half a second.
The train now takes longer to arrive. 15 seconds after it was called, the AI will say “Update: Transport will arrive in three minutes.” At 35 seconds it will say error minutes and at 45 seconds the train will arrive. With
![]() Torpor
lasting 35 seconds, a Trandoshan should not be pushed to 15% before the facility AI says that the train will arrive in three minutes.
Torpor
lasting 35 seconds, a Trandoshan should not be pushed to 15% before the facility AI says that the train will arrive in three minutes.
Greus
Greus does not have any new mechanics on Hard Mode.
Kronissus
Movement speed reduced by 100%, Alacrity reduced by 15% per charge, threat generated increased by 15% per charge. Applies Frozen upon reaching 3 charges.
Attack and Damage Type: Force, Internal
Duration: 5 seconds
View on swtor.jedipedia.net
![]() Blistering Cold
applies
Frozen, unable to act.
Blistering Cold
applies
Frozen, unable to act.
Attack and Damage Type: Force, Internal
Duration: 6 seconds
View on swtor.jedipedia.net
![]() Frozen
at 3 stacks, stunning the player for 6 seconds.
Frozen
at 3 stacks, stunning the player for 6 seconds.
Hissyphus
Hissyphus only needs 5 stacks (instead of 10) of
Enables use of Envenomed Strike at 5 charges. The thrill of combat causes Hissyphus to synthesize venom at an alarming rate.
View on swtor.jedipedia.net
![]() Venom Synthesis
to do
Attack and Damage Type: Melee, Kinetic
Venom Synthesis
to do
Attack and Damage Type: Melee, Kinetic
View on swtor.jedipedia.net
![]() Envenomed Strike.
Healers should cleanse
Periodically afflicted by internal damage. This effect can be cleansed. The essence of ruin flows through your veins.
Envenomed Strike.
Healers should cleanse
Periodically afflicted by internal damage. This effect can be cleansed. The essence of ruin flows through your veins.
Attack and Damage Type: Force, Internal
Duration: 18 seconds
View on swtor.jedipedia.net
![]() Venom of Hissyphus,
the DoT applied by it, as fast as possible.
Venom of Hissyphus,
the DoT applied by it, as fast as possible.
Titax
Titax is the one requiring different tactics on Hard Mode.
Attack and Damage Type: Tech, Kinetic when knocked in a Mutagenic Goo tank; else Tech, Internal
3 seconds channel
View on swtor.jedipedia.net
![]() Titax Strike
now must be aimed at one of the Mutagenic Goo tanks, else the tank dies. As the tank will be stunned during the channel, Titax must be aimed at a tank before he does
Attack and Damage Type: Tech, Kinetic when knocked in a Mutagenic Goo tank; else Tech, Internal
Titax Strike
now must be aimed at one of the Mutagenic Goo tanks, else the tank dies. As the tank will be stunned during the channel, Titax must be aimed at a tank before he does
Attack and Damage Type: Tech, Kinetic when knocked in a Mutagenic Goo tank; else Tech, Internal
3 seconds channel
View on swtor.jedipedia.net
![]() Titax Strike.
In between, he does
Crush the Weak,
giving the tank time for repositioning if needed.
Titax Strike.
In between, he does
Crush the Weak,
giving the tank time for repositioning if needed.
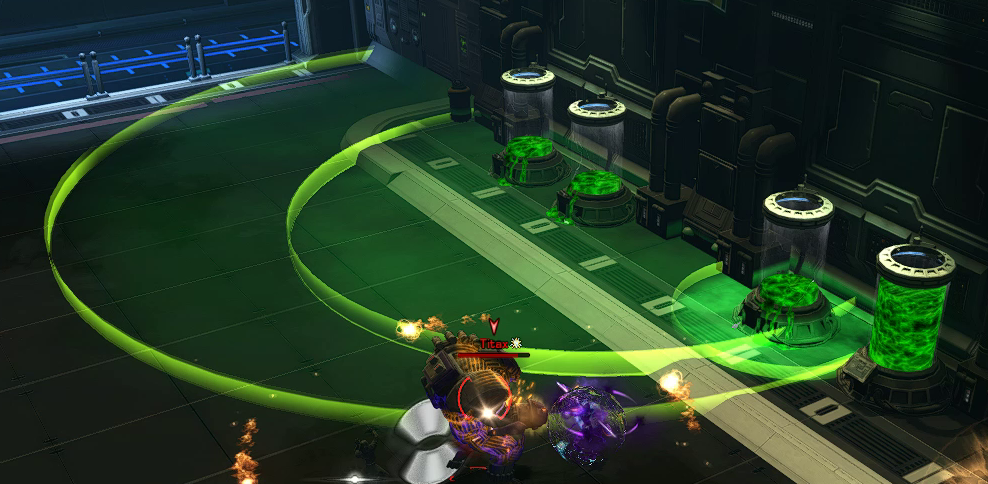
3 seconds channel
View on swtor.jedipedia.net
![]() Titax Strike
is aimed slightly next to the tank), the tank will break and spill its Goo on the floor. The spill will increase slowly and flood half the room. Anyone standing inside it receives
Periodically taking elemental damage. The mutagen is causing your cells to tear themselves apart!
Titax Strike
is aimed slightly next to the tank), the tank will break and spill its Goo on the floor. The spill will increase slowly and flood half the room. Anyone standing inside it receives
Periodically taking elemental damage. The mutagen is causing your cells to tear themselves apart!
Attack and Damage Type: Force, Elemental
Duration: 1.1 seconds
View on swtor.jedipedia.net
![]() Rampant Mutation,
dealing damage over time.
Rampant Mutation,
dealing damage over time.
It can happen that a tank bugs and appears intact but is not. It helps to go from tank to tank instead of randomly choosing one.
3.2.2 Strategy
This strategy requires a mobile ranged DPS (Merc or Sorcerer for instance) and a DwT.
With Titax’ tank only having 6 Mutagenic Goo tanks available, Titax must be killed fast.
Part 1: First 60 seconds
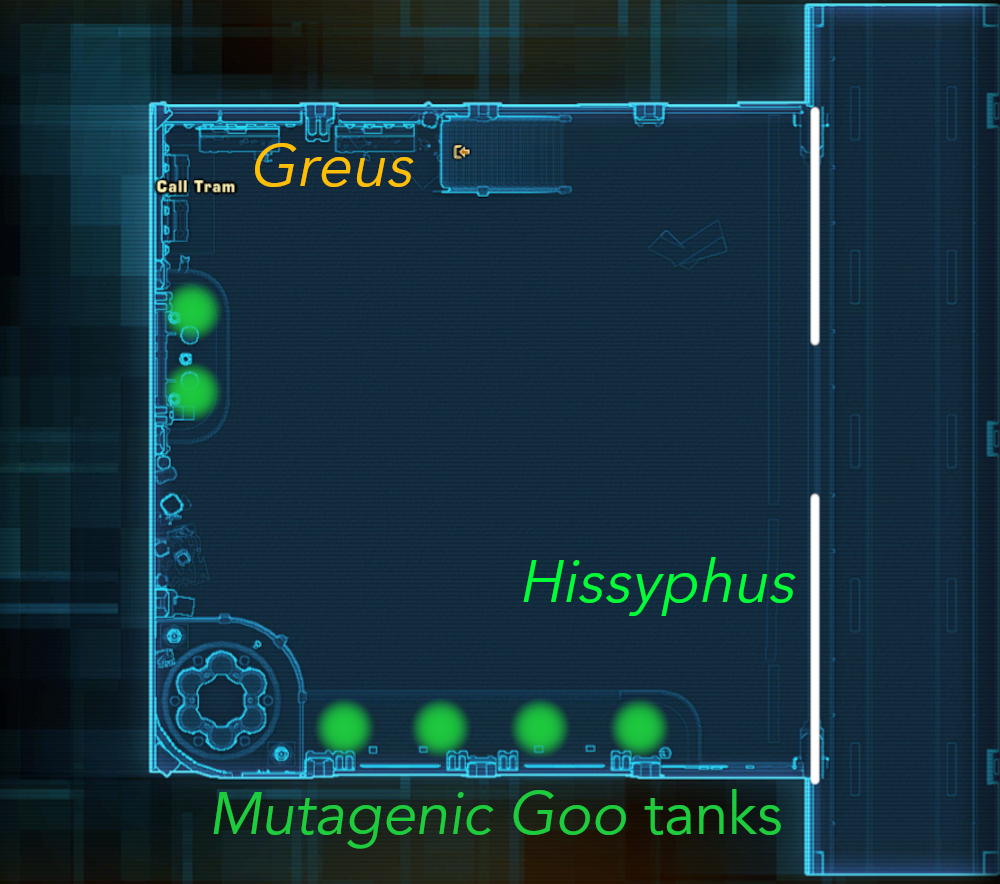
The ranged DPS assigned to kite Greus takes him and kites him under the stairs; there should be enough space for that. By kiting there, someone will always be close to the console to call the train. Try to not aim Greus’ cones at the raid.
At around 55 seconds, the DwT assigned to tank Hissyphus takes him and the two tanks can go to pick up Kronissus and Titax.
Part 2: Hissyphus
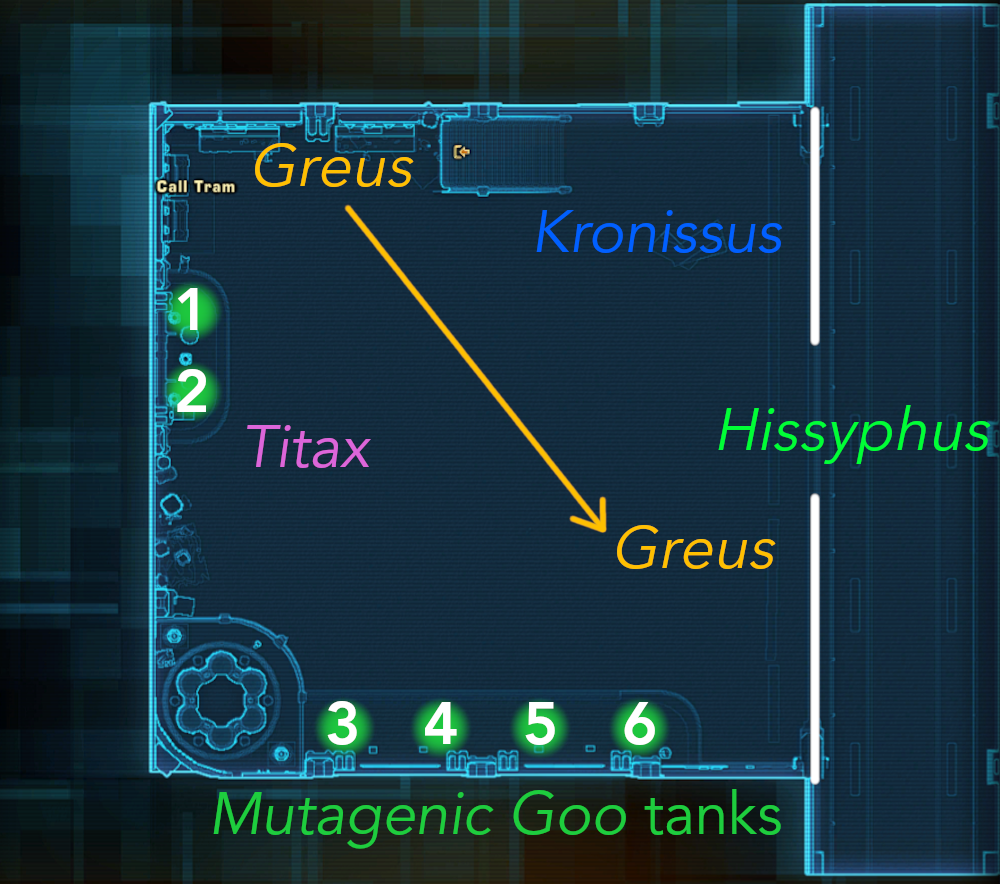
Duration: 35 seconds
View on swtor.jedipedia.net
![]() Torpor,
then clear the tracks.
Torpor,
then clear the tracks.
Meanwhile, one tank takes Kronissus, the other one Titax.
Kronissus is tanked in the North near the stairs.
The Titax tank takes him near the Mutagenic Goo for
Attack and Damage Type: Tech, Kinetic when knocked in a Mutagenic Goo tank; else Tech, Internal
3 seconds channel
View on swtor.jedipedia.net
![]() Titax Strike.
Start with the one closest to the console. A DPS can switch from Hissyphus to Titax. The Greus kiter can attack Titax as well when he is in range.
Titax Strike.
Start with the one closest to the console. A DPS can switch from Hissyphus to Titax. The Greus kiter can attack Titax as well when he is in range.
Part 3: Titax
The Greus kiter can take Greus to where Hissyphus used to be in the beginning.
When Titax’ health is low enough, his tank should take him to the tracks. This should happen right after a
Attack and Damage Type: Tech, Kinetic when knocked in a Mutagenic Goo tank; else Tech, Internal
3 seconds channel
View on swtor.jedipedia.net
![]() Titax Strike.
While it is possible to aim at the tanks from the tracks, it is more difficult, and sometimes it can happen that
Attack and Damage Type: Tech, Kinetic when knocked in a Mutagenic Goo tank; else Tech, Internal
Titax Strike.
While it is possible to aim at the tanks from the tracks, it is more difficult, and sometimes it can happen that
Attack and Damage Type: Tech, Kinetic when knocked in a Mutagenic Goo tank; else Tech, Internal
3 seconds channel
View on swtor.jedipedia.net
![]() Titax Strike
is aimed at a Mutagenic Goo tank, but the tank still dies.
Titax Strike
is aimed at a Mutagenic Goo tank, but the tank still dies.
As on Hissyphus, when Titax reaches circa 20% health, somebody must call the train. At the three-minutes announcement, Titax should be pushed to 15% and the tracks cleared.
Part 4: Greus and Kronissus
DPS now distribute on Greus and Kronissus and keep both at around the same health. When the health of both is low enough, they should be brought to the tracks. When they are at circa 20%, the train must be called and at the three-minutes announcement they must be pushed to 15%.
After that, sit back, relax, and ignore for a second that there are still two more bosses to go.
Alternative Strategies and Ideas
An alternative strategy would be to kill Titax first to not run out of Mutagenic Goo tanks.
After Titax is dead, you can kill Hissyphus and then Kronissus and Greus or just kill all three with the same time.
4 The Huntmaster
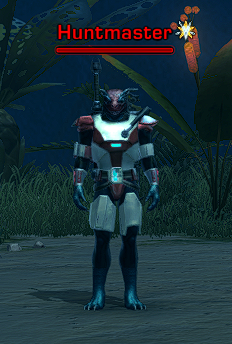
The fight follows a set pattern. When the Huntmaster is brought 35% health, he becomes the snack of Shelleigh, a crab living in the pond (that is also the reason why it might be a good idea not to go swimming in there).
4.1 Story Mode
As mentioned before, the encounter can be divided into two parts: The Huntmaster and Shelleigh.
4.1.1 The Huntmaster 100% - 35%
The Huntmaster part of the encounter features three phases that repeat until he reaches 35% health.
Phase 1: Spotlight
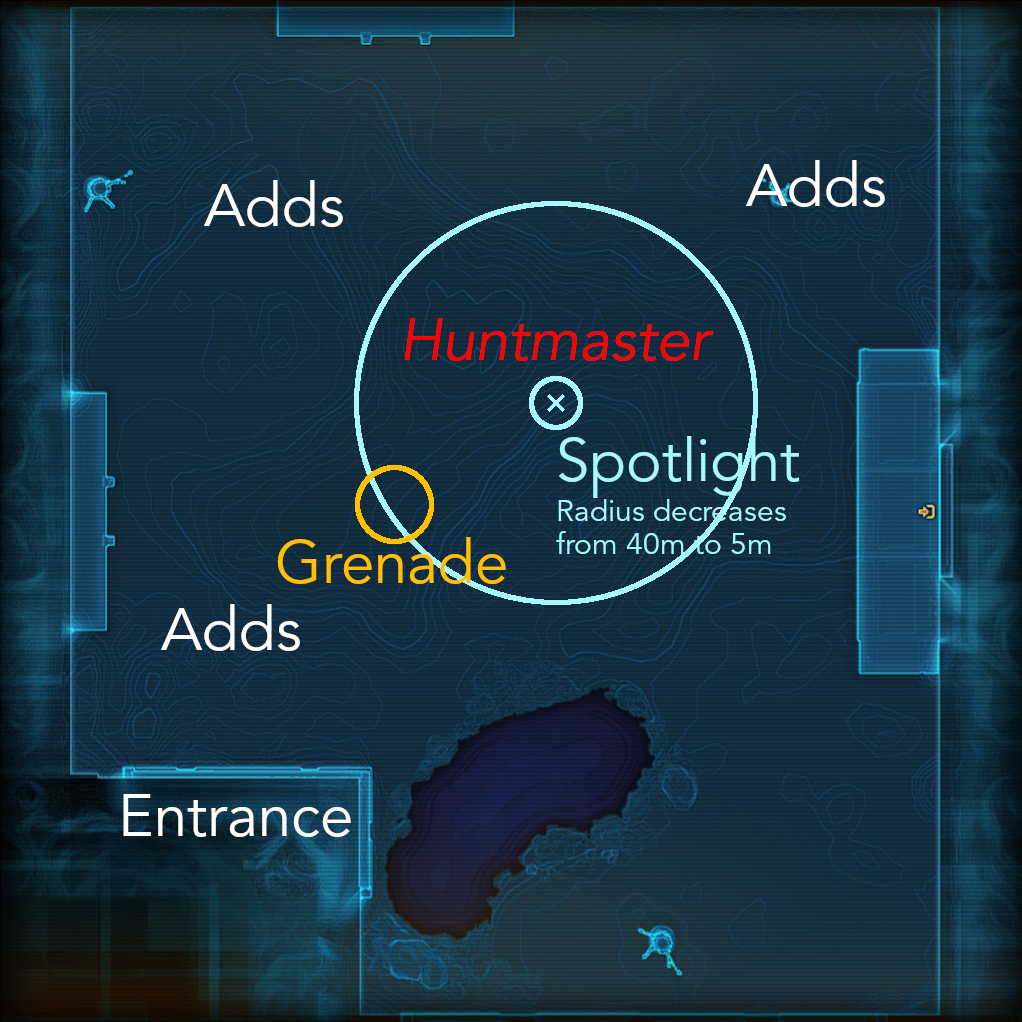
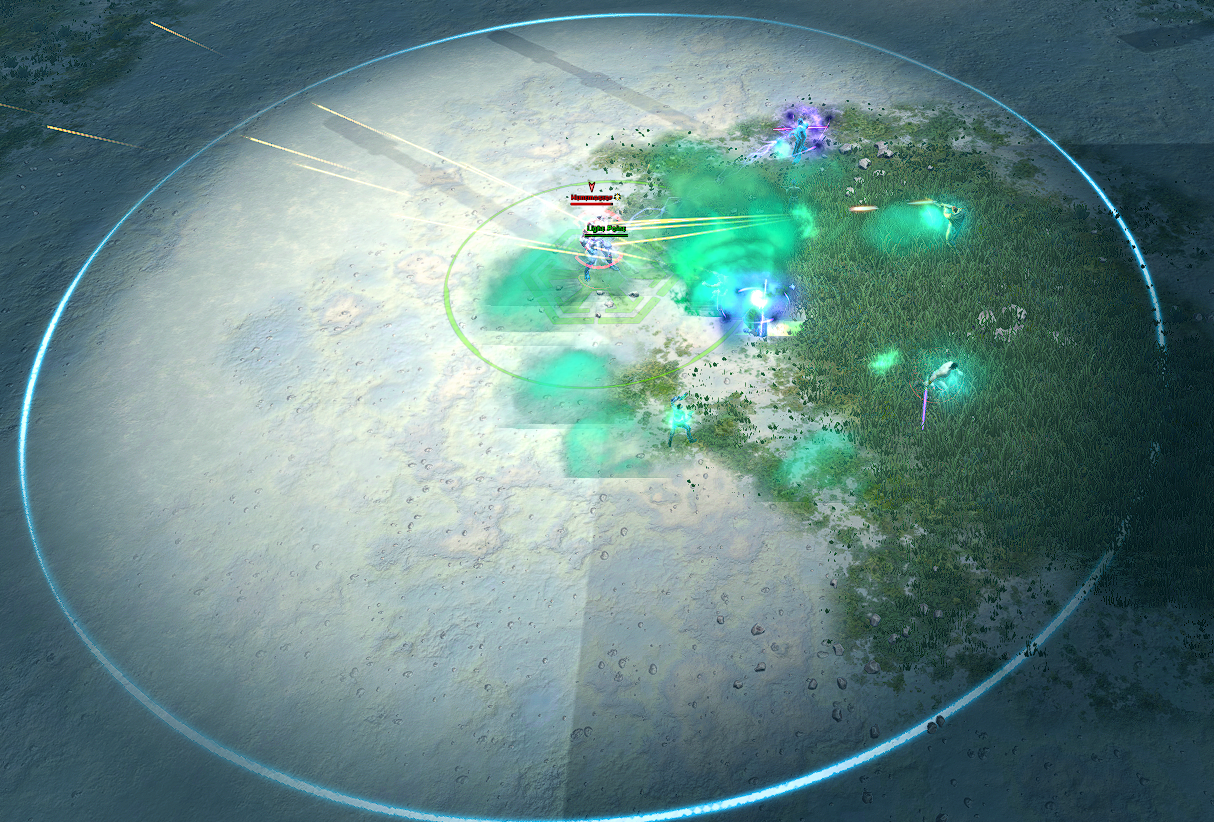
During the first phase, the Huntmaster stands in a spotlight. The illuminated circle starts with a 40 metres radius and gradually decreases to 5 metres over time. Outside of the circle, Lurking Beasts will gather. The beasts cannot enter the spotlight. The raid must make sure to stand in the spotlight, so they do not get attacked by the beasts. When inside the spotlight, raid members, as well as the Huntmaster, receive the buff
Standing within a safety field.
Duration: 1.1 seconds
View on swtor.jedipedia.net
![]() Safety Field,
indicating that they are standing inside.
Safety Field,
indicating that they are standing inside.
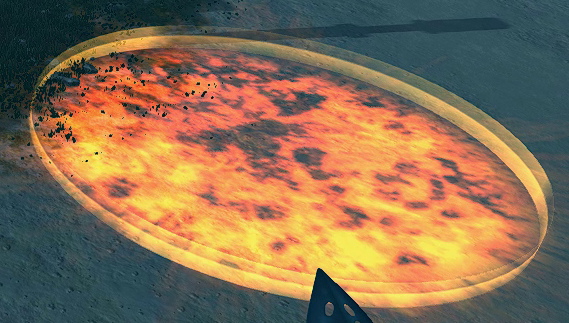
The Huntmaster’s most dangerous ability is
Throws an incendiary grenade at the primary target’s location. Creates a large patch of immolated ground at the impact site, which deals continual elemental damage to all enemies within the area.
3 seconds channel
View on swtor.jedipedia.net
![]() Firestorm Grenade,
placing an area of Czerka Interstellar Invisible Fire™ on the floor beneath a random raid member. The fire is placed at the end of a 4.5 seconds channel; until then the circle moves with the targeted raid member. When standing in the – most of the time invisible – fire, players receive the debuff
Standing in the fire. Probably shouldn’t do that.
Firestorm Grenade,
placing an area of Czerka Interstellar Invisible Fire™ on the floor beneath a random raid member. The fire is placed at the end of a 4.5 seconds channel; until then the circle moves with the targeted raid member. When standing in the – most of the time invisible – fire, players receive the debuff
Standing in the fire. Probably shouldn’t do that.
Attack and Damage Type: Tech, Elemental (AoE)
Duration: 1.1 seconds
View on swtor.jedipedia.net
![]() Firestorm
dealing high damage when standing too long in it. They must move out as quickly as possible.
Firestorm
dealing high damage when standing too long in it. They must move out as quickly as possible.
It is important that the grenade is placed outside of the group. When exiting the spotlight however, the beasts will with a leap attack which can be fatal unless defensives are used. If the spotlight is big enough, the grenade can be placed at the edge (as in the map), else the player must move out a bit and back inside the spotlight as soon as the grenade dropped.
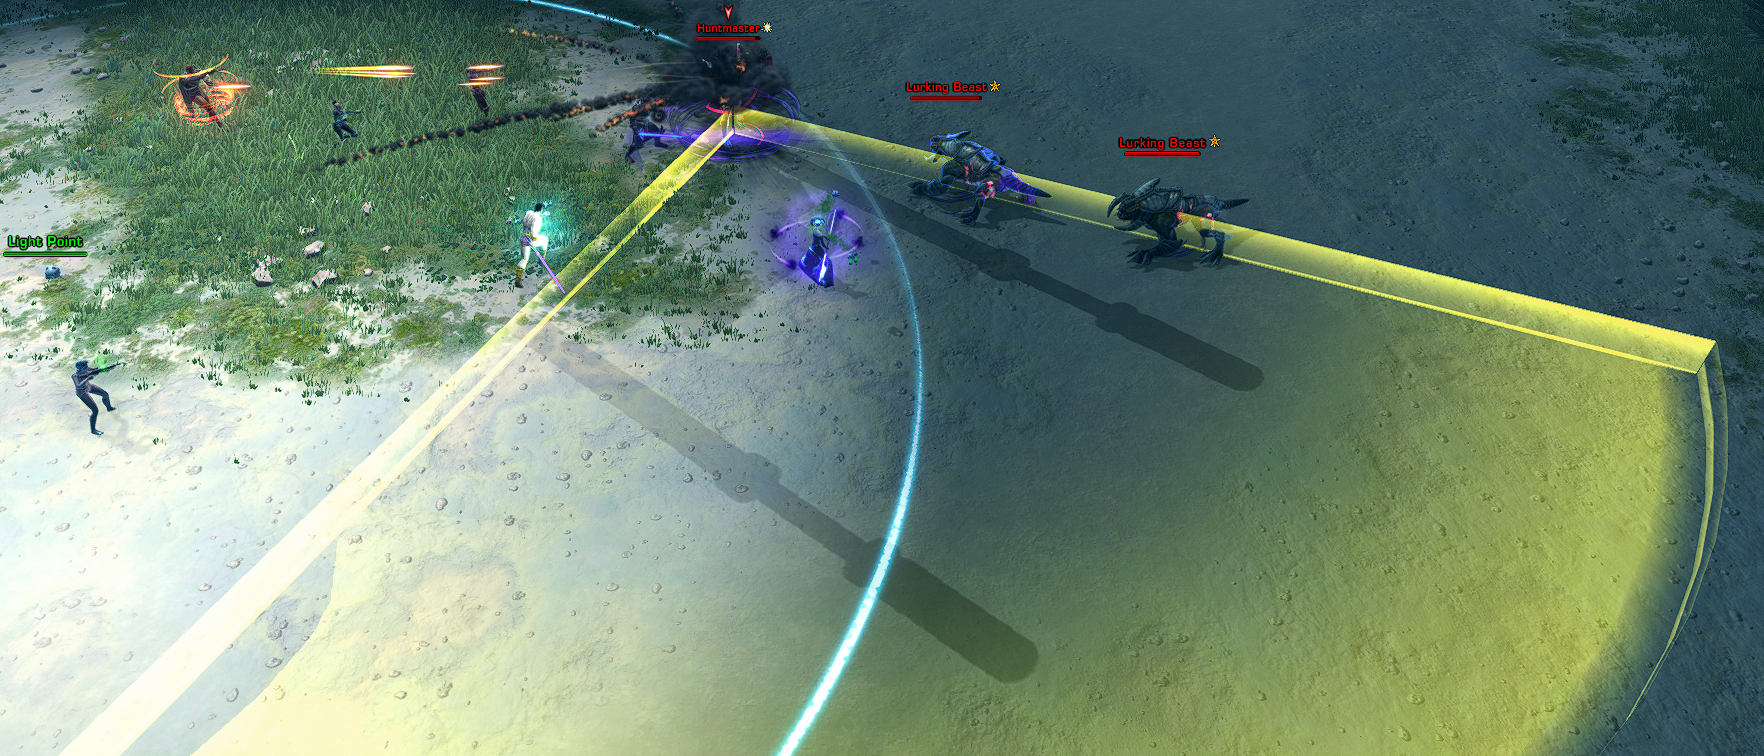
Another noteworthy attack is
Attack and Damage Type: Tech, Kinetic (AoE)
5 seconds channel
View on swtor.jedipedia.net
![]() Scatterblast,
a frontal cleave with a 5 seconds channel that deals damage when the channel ends. Lurking Beasts hit by the cleave receive
This creature has been recently hit by an attack from the Huntmaster and is waiting for an opportunity to exact revenge.
Scatterblast,
a frontal cleave with a 5 seconds channel that deals damage when the channel ends. Lurking Beasts hit by the cleave receive
This creature has been recently hit by an attack from the Huntmaster and is waiting for an opportunity to exact revenge.
Duration: 40 seconds
View on swtor.jedipedia.net
![]() Recently hit by Huntmaster
for 40 seconds. Those beasts are marked with a
Recently hit by Huntmaster
for 40 seconds. Those beasts are marked with a
![]() above their head. While this buff does nothing particular in the first phase, it will become relevant in the second phase.
above their head. While this buff does nothing particular in the first phase, it will become relevant in the second phase.
His two remaining attacks are
Attack and Damage Type: Tech, Kinetic (AoE)
5 seconds channel
View on swtor.jedipedia.net
![]() Penetrating Shot
and
Attack and Damage Type: Tech, Kinetic
Penetrating Shot
and
Attack and Damage Type: Tech, Kinetic
5 seconds channel
View on swtor.jedipedia.net
![]() Powershot Volley.
The former is a cone on the tank (this attack also applies the
This creature has been recently hit by an attack from the Huntmaster and is waiting for an opportunity to exact revenge.
Powershot Volley.
The former is a cone on the tank (this attack also applies the
This creature has been recently hit by an attack from the Huntmaster and is waiting for an opportunity to exact revenge.
Duration: 40 seconds
View on swtor.jedipedia.net
![]() Recently hit by Huntmaster
buff to beasts it hits). The latter is a 5 seconds channel on a random raid member who will be targeted until
Attack and Damage Type: Tech, Kinetic
Recently hit by Huntmaster
buff to beasts it hits). The latter is a 5 seconds channel on a random raid member who will be targeted until
Attack and Damage Type: Tech, Kinetic
5 seconds channel
View on swtor.jedipedia.net
![]() Powershot Volley
ends. The player closest to the Huntmaster and between Huntmaster and his target will receive a bit of damage and get knocked back a bit.
Powershot Volley
ends. The player closest to the Huntmaster and between Huntmaster and his target will receive a bit of damage and get knocked back a bit.
Another ability done by the Huntmaster is
Damage dealt decreased by 70%. Duration tripled against beasts.
Duration: 6 seconds (players); 18 seconds (beasts)
4 seconds cast
View on swtor.jedipedia.net
![]() Primal Fear,
a 4 seconds cast causing everyone except the Huntmaster to deal 70% less damage. The duration of the
Damage dealt decreased by 70%. Duration tripled against beasts.
Primal Fear,
a 4 seconds cast causing everyone except the Huntmaster to deal 70% less damage. The duration of the
Damage dealt decreased by 70%. Duration tripled against beasts.
Duration: 6 seconds (players); 18 seconds (beasts)
4 seconds cast
View on swtor.jedipedia.net
![]() Primal Fear
debuff is 6 seconds for players and 18 seconds for Lurking Beasts. When the Huntmaster does this ability, the off tank can move out of the circle and gather some of the Lurking Beasts so that they can be killed while they deal less damage.
Primal Fear
debuff is 6 seconds for players and 18 seconds for Lurking Beasts. When the Huntmaster does this ability, the off tank can move out of the circle and gather some of the Lurking Beasts so that they can be killed while they deal less damage.
After two casts of
Damage dealt decreased by 70%. Duration tripled against beasts.
Duration: 6 seconds (players); 18 seconds (beasts)
4 seconds cast
View on swtor.jedipedia.net
![]() Primal Fear,
the Huntmaster will deploy his fortress shield, which is announced on the screen. Then – which is after 80 seconds –, the Spotlight Phase ends, and the next phase starts.
Primal Fear,
the Huntmaster will deploy his fortress shield, which is announced on the screen. Then – which is after 80 seconds –, the Spotlight Phase ends, and the next phase starts.
Phase 2: Fortress Shield Phase
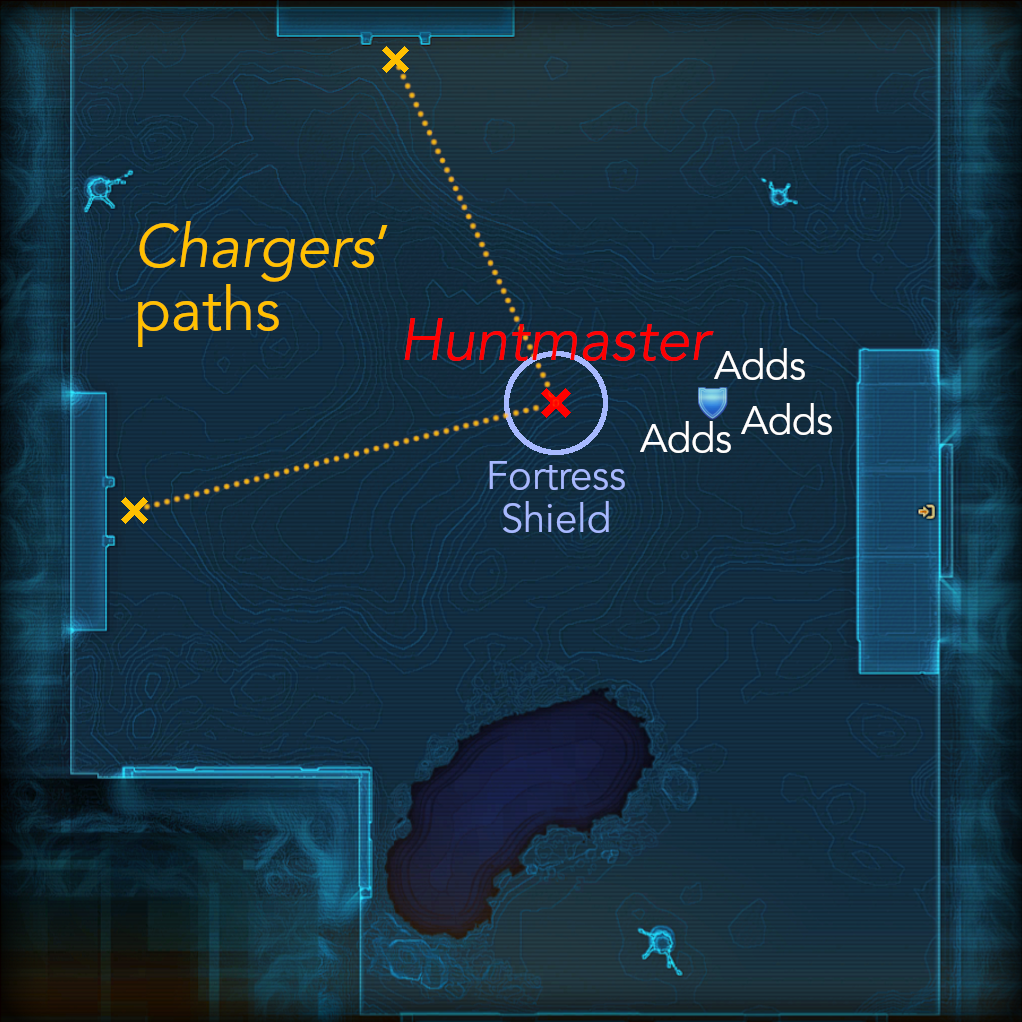
In the second phase, the Huntmaster is in his
Within a fortress shield. Reflecting damage.
0.5 seconds cast
View on swtor.jedipedia.net
![]() Fortress.
The shield causes him to reflect all damage.
Fortress.
The shield causes him to reflect all damage.
If there are enemies (group members or beasts) closer than 10 metres to him, the Huntmaster will cast
Briefly overcharges the Fortress Bunker, knocking all nearby targets back several metres and dealing heavy kinetic damage. Only usable from Fortress cover.
Attack and Damage Type: Tech, Kinetic (AoE)
0.5 seconds cast
View on swtor.jedipedia.net
![]() Concussive Shockwave
for 0.5 seconds, knocking back everyone close to him dealing heavy damage.
Concussive Shockwave
for 0.5 seconds, knocking back everyone close to him dealing heavy damage.
The group meanwhile focuses on killing the remaining adds.
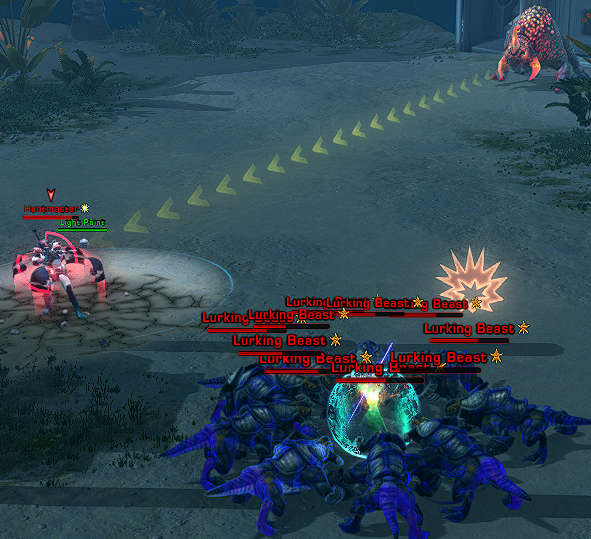
Shortly after the Huntmaster deploys his
Within a fortress shield. Reflecting damage.
0.5 seconds cast
View on swtor.jedipedia.net
![]() Fortress,
a Deliberate Charger enters at one of the marked locations in the graphic. The Charger channels
Attack and Damage Type: Force, Kinetic (AoE)
Fortress,
a Deliberate Charger enters at one of the marked locations in the graphic. The Charger channels
Attack and Damage Type: Force, Kinetic (AoE)
5 seconds channel
View on swtor.jedipedia.net
![]() Deliberate Charge
for 5 seconds. After the channel, it will charge into the Huntmaster’s
Within a fortress shield. Reflecting damage.
Deliberate Charge
for 5 seconds. After the channel, it will charge into the Huntmaster’s
Within a fortress shield. Reflecting damage.
0.5 seconds cast
View on swtor.jedipedia.net
![]() Fortress,
overloading the shield and knocking itself and the Huntmaster to the ground. The Charger’s path is indicated by yellow arrows on the ground, group members must not stand in it.
Fortress,
overloading the shield and knocking itself and the Huntmaster to the ground. The Charger’s path is indicated by yellow arrows on the ground, group members must not stand in it.
The Charger receives
Knocked down and unable to act.
Duration: 8 seconds
View on swtor.jedipedia.net
![]() Impact Stun
for 8 seconds, causing it to be stunned as well as taking damage at the beginning of the effect. The raid must use the time to kill the Charger as fast as possible.
Impact Stun
for 8 seconds, causing it to be stunned as well as taking damage at the beginning of the effect. The raid must use the time to kill the Charger as fast as possible.
After
Knocked down and unable to act.
Duration: 8 seconds
View on swtor.jedipedia.net
![]() Impact Stun
ends, the Charger will cast
Damage dealt massively increased. This charger has no idea what just happened but it is VERY mad about it.
Impact Stun
ends, the Charger will cast
Damage dealt massively increased. This charger has no idea what just happened but it is VERY mad about it.
1.5 seconds cast
View on swtor.jedipedia.net
![]() Confused and Infuriated
for 1.5 seconds, increasing its damage by 300%. Therefore, it should already be killed before
Knocked down and unable to act.
Confused and Infuriated
for 1.5 seconds, increasing its damage by 300%. Therefore, it should already be killed before
Knocked down and unable to act.
Duration: 8 seconds
View on swtor.jedipedia.net
![]() Impact Stun
ends.
Impact Stun
ends.
The Huntmaster gets stunned for 6 seconds on impact. After that, and if there are no Lurking Beasts with
This creature has been recently hit by an attack from the Huntmaster and is waiting for an opportunity to exact revenge.
Duration: 40 seconds
View on swtor.jedipedia.net
![]() Recently hit by Huntmaster
buff, he will retreat to his
In cover and waiting to ambush whatever comes into range. Immune to taunts.
Recently hit by Huntmaster
buff, he will retreat to his
In cover and waiting to ambush whatever comes into range. Immune to taunts.
View on swtor.jedipedia.net
![]() Holdout Cover
and the third phase starts.
Holdout Cover
and the third phase starts.
Should there be any Lurking Beasts with
This creature has been recently hit by an attack from the Huntmaster and is waiting for an opportunity to exact revenge.
Duration: 40 seconds
View on swtor.jedipedia.net
![]() Recently hit by Huntmaster
buff up, they will attack the Huntmaster who then switches his stance from
Using a rifle.
Recently hit by Huntmaster
buff up, they will attack the Huntmaster who then switches his stance from
Using a rifle.
1 second cast
View on swtor.jedipedia.net
![]() Stance: Rifle Combat
– the stance he uses for the rest of the fight; during that he fights with his rifle – to
Any good hunter knows that sometimes you've got to get your hands dirty...
Stance: Rifle Combat
– the stance he uses for the rest of the fight; during that he fights with his rifle – to
Any good hunter knows that sometimes you've got to get your hands dirty...
1 second cast
View on swtor.jedipedia.net
![]() Stance: Bladed Combat
where he fights with a vibroblade. This switch is indicated a 1 second cast.
Stance: Bladed Combat
where he fights with a vibroblade. This switch is indicated a 1 second cast.
After he switches to
Any good hunter knows that sometimes you've got to get your hands dirty...
1 second cast
View on swtor.jedipedia.net
![]() Stance: Bladed Combat,
he will cast
Having a bit of a flip out. Damage and Alacrity increased substantially. Immune to taunts (not that you would want his attention right now). This ability taunts all enemies within 5m when used.
Stance: Bladed Combat,
he will cast
Having a bit of a flip out. Damage and Alacrity increased substantially. Immune to taunts (not that you would want his attention right now). This ability taunts all enemies within 5m when used.
1 second cast
View on swtor.jedipedia.net
![]() Melee Frenzy
increasing his Alacrity, as well as damage dealt. In addition to that, he will taunt all Lurking Beasts withing 5 metres radius.
Melee Frenzy
increasing his Alacrity, as well as damage dealt. In addition to that, he will taunt all Lurking Beasts withing 5 metres radius.
The raid must make sure to stay away from the Huntmaster to not take massive damage. After all Lurking Beasts with
This creature has been recently hit by an attack from the Huntmaster and is waiting for an opportunity to exact revenge.
Duration: 40 seconds
View on swtor.jedipedia.net
![]() Recently hit by Huntmaster
buff are killed, the Huntmaster will switch back to
Using a rifle.
Recently hit by Huntmaster
buff are killed, the Huntmaster will switch back to
Using a rifle.
1 second cast
View on swtor.jedipedia.net
![]() Stance: Rifle Combat
and retreat to his
In cover and waiting to ambush whatever comes into range. Immune to taunts.
Stance: Rifle Combat
and retreat to his
In cover and waiting to ambush whatever comes into range. Immune to taunts.
View on swtor.jedipedia.net
![]() Holdout Cover,
starting the third phase.
Holdout Cover,
starting the third phase.
Phase 3: Holdout Cover
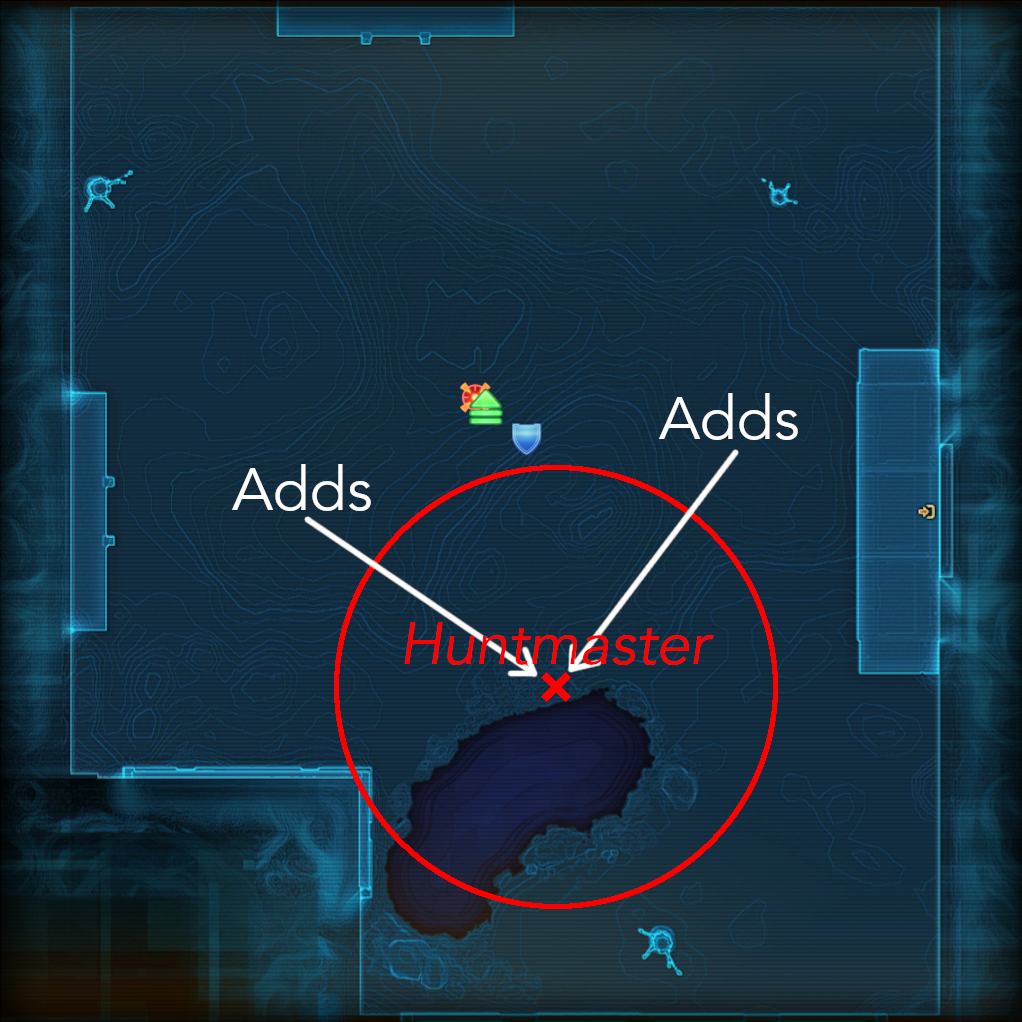
In the third phase, the Huntmaster is in his
In cover and waiting to ambush whatever comes into range. Immune to taunts.
View on swtor.jedipedia.net
![]() Holdout Cover.
At the beginning of the phase, the Huntmaster will cast
Using a flare to lure beasts that have an aversion towards light? Yeah, that makes sense ...
Holdout Cover.
At the beginning of the phase, the Huntmaster will cast
Using a flare to lure beasts that have an aversion towards light? Yeah, that makes sense ...
3 seconds cast
View on swtor.jedipedia.net
![]() CI-Light Flare
causing all adds – including those that will spawn during the phase – to go and attack the Huntmaster, unless they are aggroed by the group.
CI-Light Flare
causing all adds – including those that will spawn during the phase – to go and attack the Huntmaster, unless they are aggroed by the group.
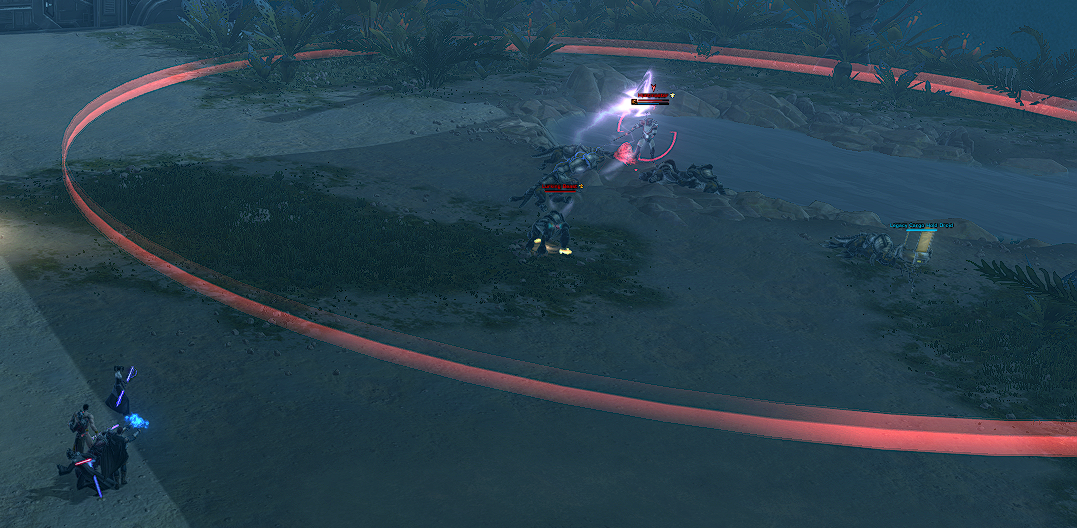
Shortly afterwards, a large red circle with a radius of 30 metres will appear around him. This indicates the range of
Attack and Damage Type: God Damage
1 second cast
View on swtor.jedipedia.net
![]() Culling Shot,
a 1 second cast one-shotting the target. The group must therefore make sure not to stand in the circle. Snipers and Lightning Sorcerers with their 35 metres range can continue attacking the boss from range.
Culling Shot,
a 1 second cast one-shotting the target. The group must therefore make sure not to stand in the circle. Snipers and Lightning Sorcerers with their 35 metres range can continue attacking the boss from range.
Tanks can stay closer to the circle, so they are more likely to be targeted by the regular ranged attack the Huntmaster does. The rest of the raid stays close together for AoE healing that might be required.
As in the Spotlight Phase, the Huntmaster will cast
Throws an incendiary grenade at the primary target’s location. Creates a large patch of immolated ground at the impact site, which deals continual elemental damage to all enemies within the area.
3 seconds channel
View on swtor.jedipedia.net
![]() Firestorm Grenade,
on a random raid member throughout the Holdout Cover Phase.
Firestorm Grenade,
on a random raid member throughout the Holdout Cover Phase.
After 50 seconds, the Holdout Cover Phase ends and the encounter continues with the Spotlight Phase. This cycle repeats until the Huntmaster either reaches 35% health or enrages and wipes the group.
Transition to Part 2
The Huntmaster has the passive
Triggers an Adrenaline Rush when damage brings your health low.
View on swtor.jedipedia.net
![]() Fired Up.
When reaching 35% health, this causes him to trigger
Maintaining health level.
Fired Up.
When reaching 35% health, this causes him to trigger
Maintaining health level.
Duration: 10 seconds
View on swtor.jedipedia.net
![]() Adrenaline Rush.
During
Maintaining health level.
Adrenaline Rush.
During
Maintaining health level.
Duration: 10 seconds
View on swtor.jedipedia.net
![]() Adrenaline Rush,
he regenerates health, retreats to his Holdout Position (where he is during the Holdout Cover Phase) and deploys his
Within a fortress shield. Reflecting damage.
Adrenaline Rush,
he regenerates health, retreats to his Holdout Position (where he is during the Holdout Cover Phase) and deploys his
Within a fortress shield. Reflecting damage.
0.5 seconds cast
View on swtor.jedipedia.net
![]() Fortress.
Then, Part 2 starts.
Fortress.
Then, Part 2 starts.
Enrage
The Huntmaster has the buff
With every kill, the Huntmaster’s senses sharpen. With enough kills, he will enter a state of transcendent focus.
View on swtor.jedipedia.net
![]() Master of the Hunt.
At the beginning of the fight, he will start with 50 stacks. Each time he kills a beast, one stack is removed. When reaching 0 stacks, the Huntmaster will cast
In a transcendent state of lethal focus. Attacks cannot miss. Damage dealt massively increased.
Master of the Hunt.
At the beginning of the fight, he will start with 50 stacks. Each time he kills a beast, one stack is removed. When reaching 0 stacks, the Huntmaster will cast
In a transcendent state of lethal focus. Attacks cannot miss. Damage dealt massively increased.
6 seconds cast
View on swtor.jedipedia.net
![]() The Ultimate Hunter.
This causes him to have 300% increased Accuracy and 300% increased damage dealt.
The Ultimate Hunter.
This causes him to have 300% increased Accuracy and 300% increased damage dealt.
Remaining beasts will receive
Will not engage the Huntmaster unless no other targets are available.
View on swtor.jedipedia.net
![]() Aversion
causing them to attack the raid instead of the Huntmaster.
Aversion
causing them to attack the raid instead of the Huntmaster.
4.1.2 Shelleigh
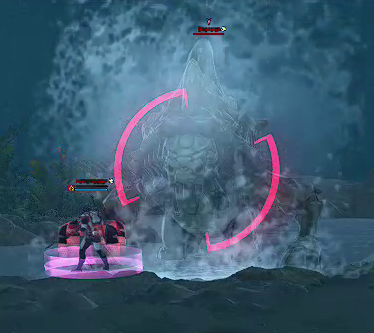
Duration: 10 seconds
View on swtor.jedipedia.net
![]() Adrenaline Rush,
retreats to his Holdout Position and deploys his
Within a fortress shield. Reflecting damage.
Adrenaline Rush,
retreats to his Holdout Position and deploys his
Within a fortress shield. Reflecting damage.
0.5 seconds cast
View on swtor.jedipedia.net
![]() Fortress,
Shelleigh, a huge crab, emerges from the pond.
Fortress,
Shelleigh, a huge crab, emerges from the pond.
Shelleigh then proceeds to eat the Huntmaster, killing him instantly. Now, the group must kill Shelleigh to win the encounter – preferably without becoming crab food.
Shelleigh is a straightforward fight with one important mechanic.
The mechanic consists out of two attacks,
Attack and Damage Type: Melee, Kinetic (AoE)
1 second channel
View on swtor.jedipedia.net
![]() Pulverize
and
Going in for a snack!
Pulverize
and
Going in for a snack!
Duration: 1.8 seconds
View on swtor.jedipedia.net
![]() Nom.
Nom.
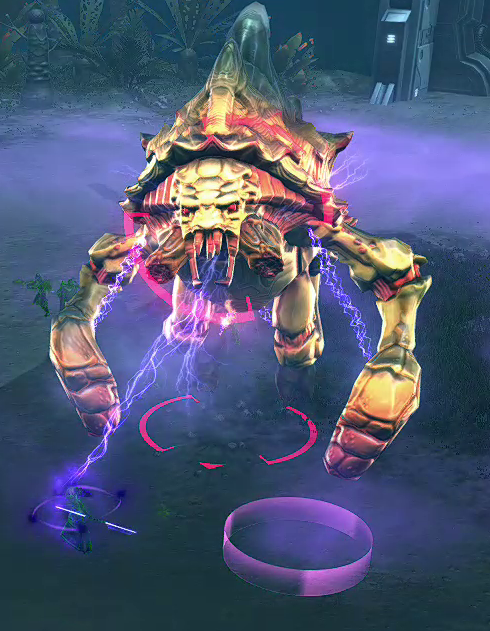
1 second channel
View on swtor.jedipedia.net
![]() Pulverize
is a 1 second channel on the tank. After the channel is completed, the tank will receive
Unable to act. This effect cannot be broken. You are both helpless and delicious. Like a sandwich.
Pulverize
is a 1 second channel on the tank. After the channel is completed, the tank will receive
Unable to act. This effect cannot be broken. You are both helpless and delicious. Like a sandwich.
Duration: 4 seconds (1 second on 8 person Story Mode)
View on swtor.jedipedia.net
![]() Pulverize Stun
stunning them for 4 seconds. Shortly after, Shelleigh receives the buff
Going in for a snack!
Pulverize Stun
stunning them for 4 seconds. Shortly after, Shelleigh receives the buff
Going in for a snack!
Duration: 1.8 seconds
View on swtor.jedipedia.net
![]() Nom
for 1.8 seconds and a small pink circle appears around the tank. Anyone standing in the circle as soon as
Going in for a snack!
Nom
for 1.8 seconds and a small pink circle appears around the tank. Anyone standing in the circle as soon as
Going in for a snack!
Duration: 1.8 seconds
View on swtor.jedipedia.net
![]() Nom
runs out will get eaten, meaning that die instantly. In addition to that, they receive the debuff
Target has been eaten, and cannot be resurrected.
Nom
runs out will get eaten, meaning that die instantly. In addition to that, they receive the debuff
Target has been eaten, and cannot be resurrected.
View on swtor.jedipedia.net
![]() Lunch,
preventing them from being resurrected.
Lunch,
preventing them from being resurrected.
Since the tank is stunned, the off tank must taunt right after
Attack and Damage Type: Melee, Kinetic (AoE)
1 second channel
View on swtor.jedipedia.net
![]() Pulverize
to be the one targeted with
Going in for a snack!
Pulverize
to be the one targeted with
Going in for a snack!
Duration: 1.8 seconds
View on swtor.jedipedia.net
![]() Nom.
Nom.
On 8-person Story Mode
Unable to act. This effect cannot be broken. You are both helpless and delicious. Like a sandwich.
Duration: 4 seconds (1 second on 8 person Story Mode)
View on swtor.jedipedia.net
![]() Pulverize Stun
appears to only last 1 second (which does not seem intended but hey, it works). Therefore, a tank swap is not needed there.
Pulverize Stun
appears to only last 1 second (which does not seem intended but hey, it works). Therefore, a tank swap is not needed there.
In addition to her ambition to eat the whole group for lunch, Shelleigh has two passives.
The first one is
Passively emits a toxic cloud that deals ramping internal damage to enemies in a massive area.
View on swtor.jedipedia.net
![]() Toxic Cloud,
causing the raid to gain stacks of
Taking internal damage over time.
Toxic Cloud,
causing the raid to gain stacks of
Taking internal damage over time.
Attack and Damage Type: Tech, Internal (AoE, DoT)
View on swtor.jedipedia.net
![]() Toxic Cloud
that deal damage over time.
Toxic Cloud
that deal damage over time.
The second one is
Increases maximum health a small amount with each stack. Perhaps you shouldn’t have fed the lake monster...
View on swtor.jedipedia.net
![]() Crabby Demeanor
which increases Shelleigh’s maximum health each time something dies in the pond during the first part of the encounter.
Crabby Demeanor
which increases Shelleigh’s maximum health each time something dies in the pond during the first part of the encounter.
4.2 Hard Mode
On Hard Mode, everything becomes a bit messier and requires more coordination.
Part 1: The Huntmaster 100% - 35%
The first important thing to note is that the Huntmaster now only has 30
With every kill, the Huntmaster’s senses sharpen. With enough kills, he will enter a state of transcendent focus.
View on swtor.jedipedia.net
![]() Master of the Hunt
stacks instead of the 50 on Story Mode. This forces the group to get rid of the adds so that the Huntmaster cannot do that himself.
Master of the Hunt
stacks instead of the 50 on Story Mode. This forces the group to get rid of the adds so that the Huntmaster cannot do that himself.
Phase 1: Spotlight
The channel time of
Throws an incendiary grenade at the primary target’s location. Creates a large patch of immolated ground at the impact site, which deals continual elemental damage to all enemies within the area.
3 seconds channel
View on swtor.jedipedia.net
![]() Firestorm Grenade
is reduced from 4.5 seconds to 3 seconds. At least the fire is now visible.
Firestorm Grenade
is reduced from 4.5 seconds to 3 seconds. At least the fire is now visible.
Attack and Damage Type: Tech, Kinetic (AoE)
5 seconds channel
View on swtor.jedipedia.net
![]() Penetrating Shot
applies
Armor reduced to 0.
Penetrating Shot
applies
Armor reduced to 0.
Duration: 24 seconds
View on swtor.jedipedia.net
![]() Armor Break
to anyone hit by it, reducing their Armor by 100% for 24 seconds and forcing a tank swap. As it is a cone, nobody should stand behind the tank at any time.
Armor Break
to anyone hit by it, reducing their Armor by 100% for 24 seconds and forcing a tank swap. As it is a cone, nobody should stand behind the tank at any time.
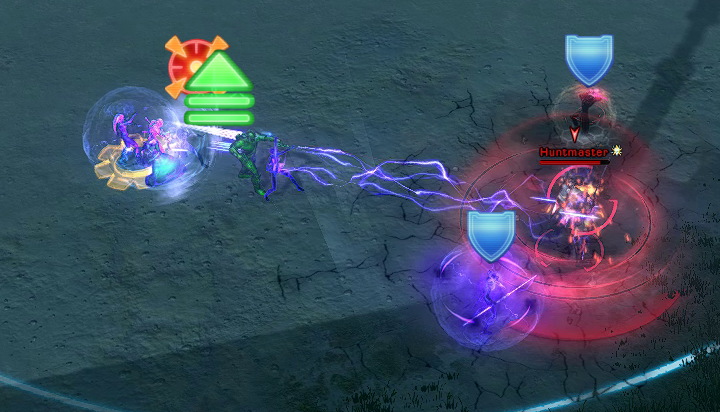
5 seconds channel
View on swtor.jedipedia.net
![]() Powershot Volley
deals much more damage and knocks back the first player it hits. This happens multiple times during the channel. Everyone except the tank should stand in a line. That way, the first player in line will get knocked back, then the second one and so on. During
Attack and Damage Type: Tech, Kinetic
Powershot Volley
deals much more damage and knocks back the first player it hits. This happens multiple times during the channel. Everyone except the tank should stand in a line. That way, the first player in line will get knocked back, then the second one and so on. During
Attack and Damage Type: Tech, Kinetic
5 seconds channel
View on swtor.jedipedia.net
![]() Powershot Volley,
the tanks stay in line as well. This is required since
Attack and Damage Type: Tech, Kinetic
Powershot Volley,
the tanks stay in line as well. This is required since
Attack and Damage Type: Tech, Kinetic
5 seconds channel
View on swtor.jedipedia.net
![]() Powershot Volley
applies the debuff
Additional hits from Powershot Volley will penetrate ballistic immunity effects. Target has been recently hit by Powershot Volley and is off balance.
Powershot Volley
applies the debuff
Additional hits from Powershot Volley will penetrate ballistic immunity effects. Target has been recently hit by Powershot Volley and is off balance.
Duration: 3 seconds
View on swtor.jedipedia.net
![]() Off Balance,
causing further
Attack and Damage Type: Tech, Kinetic
Off Balance,
causing further
Attack and Damage Type: Tech, Kinetic
5 seconds channel
View on swtor.jedipedia.net
![]() Powershot Volley
hits to deal more damage and having a stronger knockback.
Powershot Volley
hits to deal more damage and having a stronger knockback.
When the Huntmaster casts his first
Damage dealt decreased by 70%. Duration tripled against beasts.
Duration: 6 seconds (players); 18 seconds (beasts)
4 seconds cast
View on swtor.jedipedia.net
![]() Primal Fear,
the off tank should step outside the spotlight and get the adds to the pond. A DPS with knockback must follow soon after and knock the adds in the pond. This causes them to die without the Huntmaster losing
With every kill, the Huntmaster’s senses sharpen. With enough kills, he will enter a state of transcendent focus.
Primal Fear,
the off tank should step outside the spotlight and get the adds to the pond. A DPS with knockback must follow soon after and knock the adds in the pond. This causes them to die without the Huntmaster losing
With every kill, the Huntmaster’s senses sharpen. With enough kills, he will enter a state of transcendent focus.
View on swtor.jedipedia.net
![]() Master of the Hunt
stacks.
Master of the Hunt
stacks.
Phase 2: Fortress Shield
As in the Spotlight Phase, a tank should taunt the adds and have a DPS knock them in the pond.
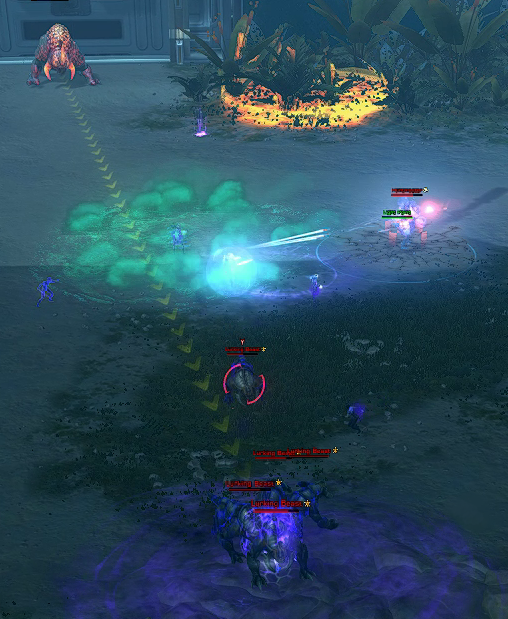
This mechanic does not always work well: Sometimes, not a healer but another player will be targeted (in the image for instance, the tank got targeted). Additionally, some Chargers appear to be so drunk that they can no longer walk in a straight line. Instead, they “drift”, making it more difficult for the player to aim the Charger at the Huntmaster.
Phase 3: Holdout Cover
There is nothing new in this phase. However, it helps having DPS with 35 metres range (Lightning Sorcerers and Snipers) for more DPS in this phase.
Part 2: Shelleigh
The
Taking internal damage over time.
Attack and Damage Type: Tech, Internal (AoE, DoT)
View on swtor.jedipedia.net
![]() Toxic Cloud
stacks deal much more damage.
Toxic Cloud
stacks deal much more damage.
5 The Apex Vanguard
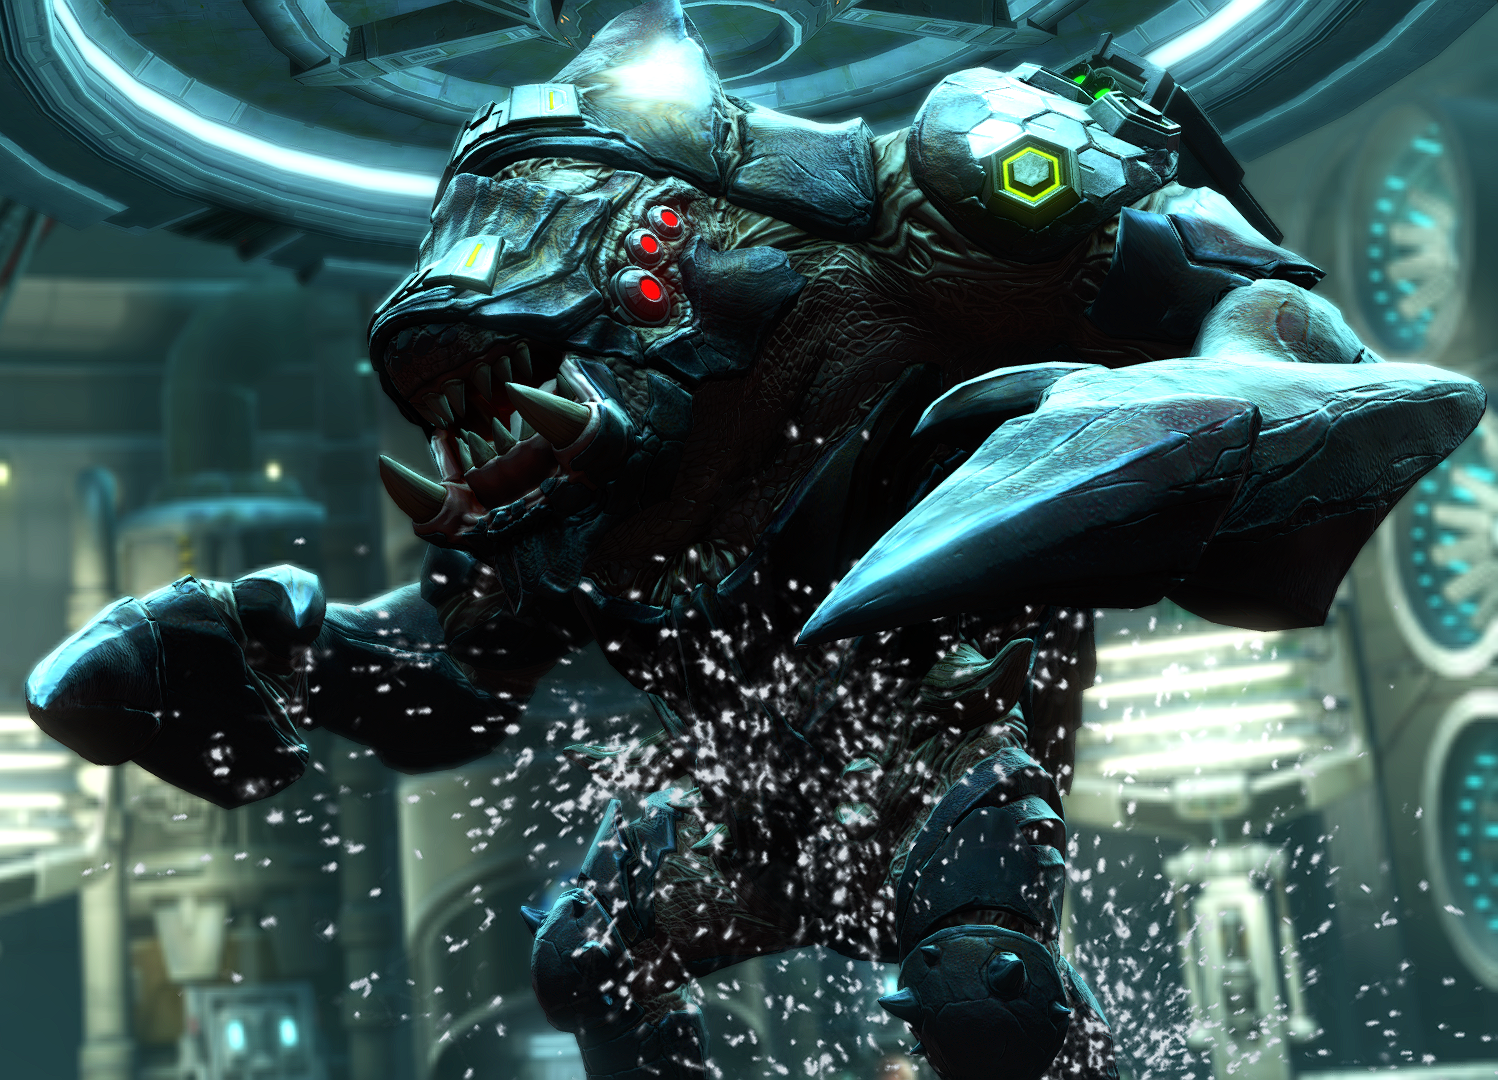
5.1 Story Mode
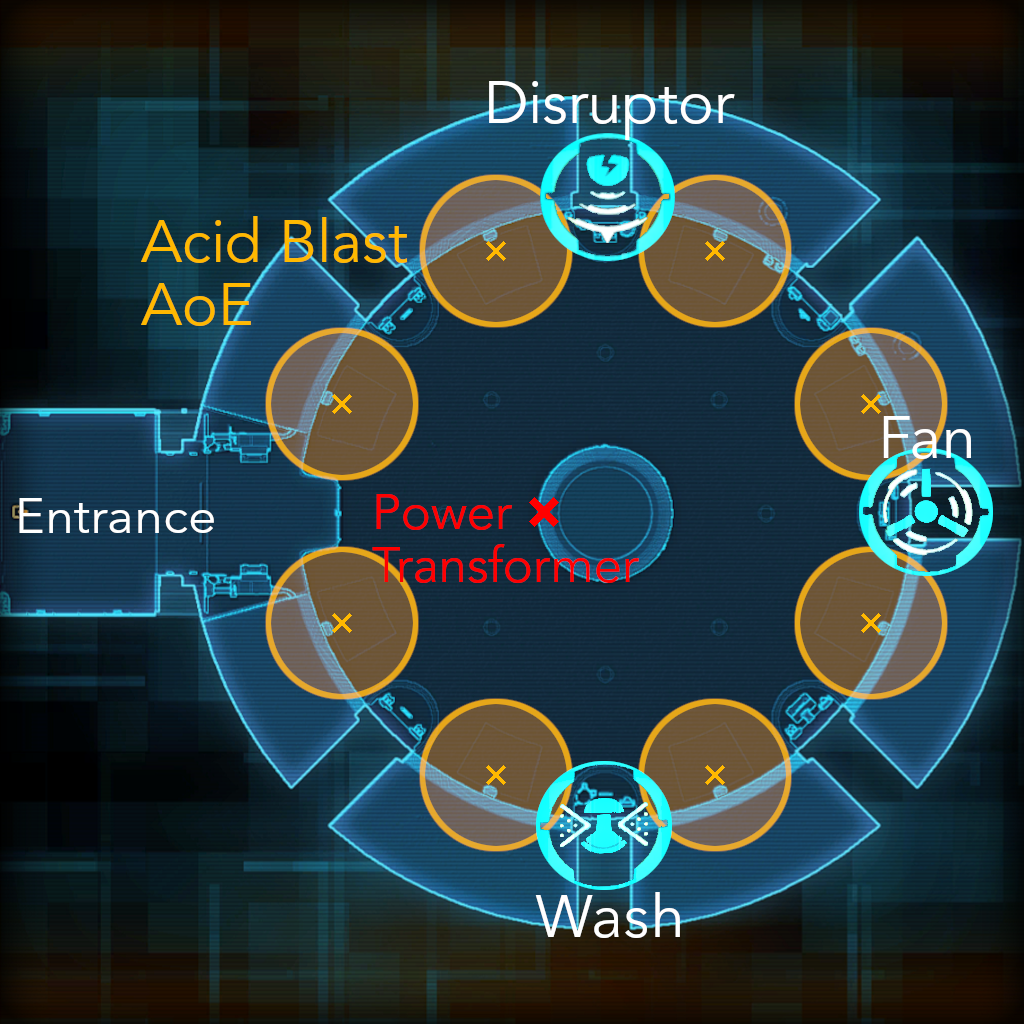
Compared to the previous two encounters, the Apex Vanguard is easier but still has some mechanics, especially since it requires a player to carry a battery to different stations across the room.
5.1.1 Fighting the Apex Vanguard
The fight can be divided into two phases. Listening to the quest givers talking in the background helps since most of the mechanics will be explained when they first happen.
Phase 1: Apex Vanguard 100% - 93%
The first phase is more like a short introduction and is about bringing the Apex Vanguard to 93%.
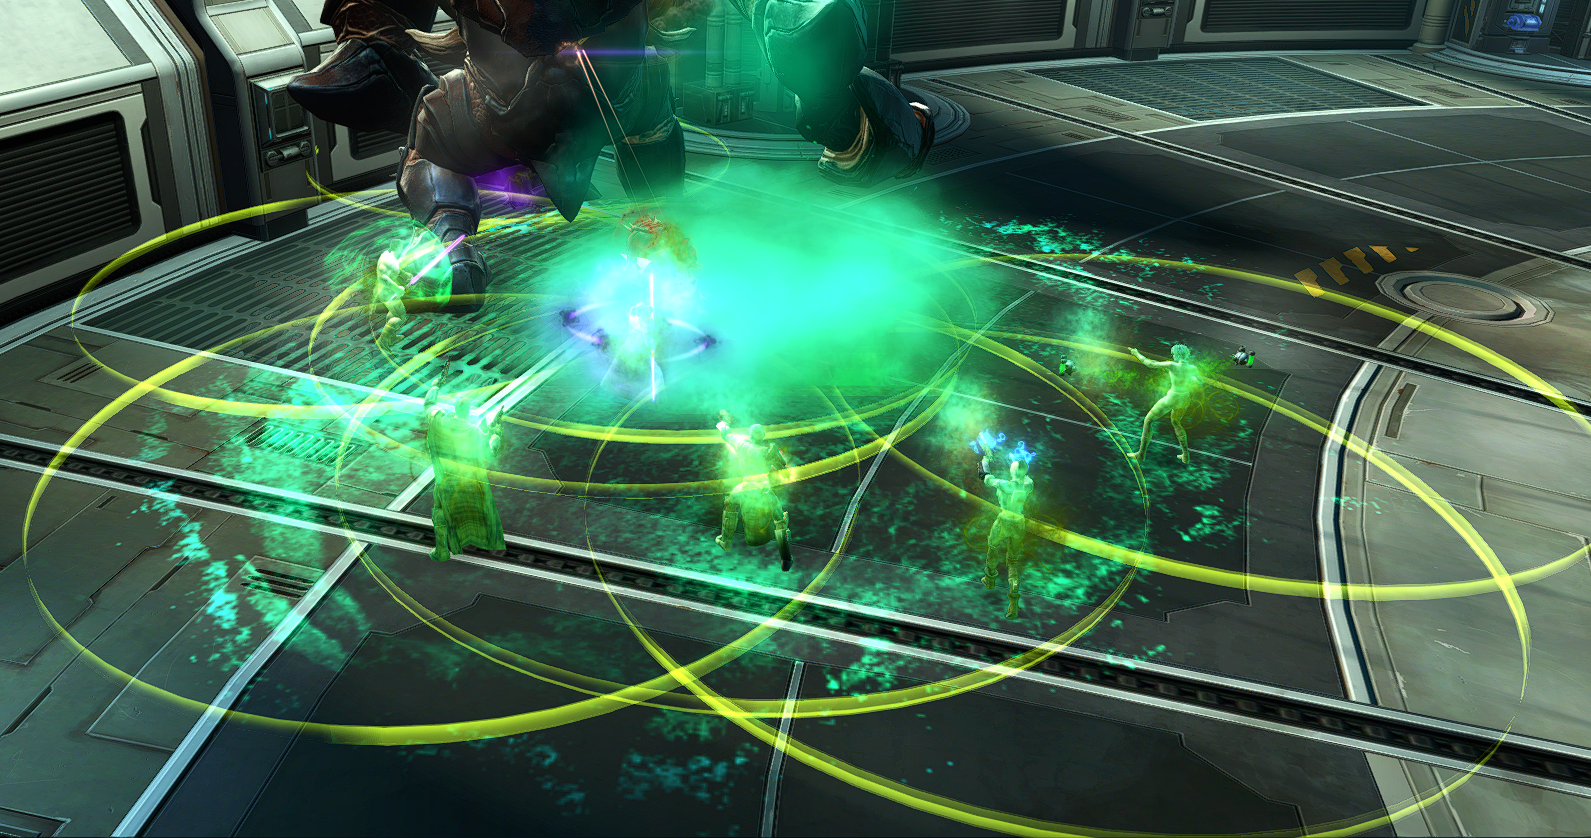
At around 30 seconds into the fight, the Apex Vanguard will cast
Deals internal damage over time to the target, and anyone standing nearby. Why bother eliminating enemy forces yourself when you can have them eliminate each other through the convenience of Czerka’s advanced Bio-warfare solutions!
Attack and Damage Type: Tech, Internal (DoT)
Duration: 12 seconds
3 seconds cast
View on swtor.jedipedia.net
![]() Contagion,
a 3 seconds cast. This will place a green circle around each player in its LoS, damaging anyone standing in the circle.
Deals internal damage over time to the target, and anyone standing nearby. Why bother eliminating enemy forces yourself when you can have them eliminate each other through the convenience of Czerka’s advanced Bio-warfare solutions!
Contagion,
a 3 seconds cast. This will place a green circle around each player in its LoS, damaging anyone standing in the circle.
Deals internal damage over time to the target, and anyone standing nearby. Why bother eliminating enemy forces yourself when you can have them eliminate each other through the convenience of Czerka’s advanced Bio-warfare solutions!
Attack and Damage Type: Tech, Internal (DoT)
Duration: 12 seconds
3 seconds cast
View on swtor.jedipedia.net
![]() Contagion
happens roughly every 35 – 90 seconds.
Contagion
happens roughly every 35 – 90 seconds.
The best way to deal with
Deals internal damage over time to the target, and anyone standing nearby. Why bother eliminating enemy forces yourself when you can have them eliminate each other through the convenience of Czerka’s advanced Bio-warfare solutions!
Attack and Damage Type: Tech, Internal (DoT)
Duration: 12 seconds
3 seconds cast
View on swtor.jedipedia.net
![]() Contagion
is having everyone with a cleanse cleansing themselves. Almost every class can cleanse themselves, either with a designated cleanse ability or through a Utility.
Contagion
is having everyone with a cleanse cleansing themselves. Almost every class can cleanse themselves, either with a designated cleanse ability or through a Utility.

Right after the first
Deals internal damage over time to the target, and anyone standing nearby. Why bother eliminating enemy forces yourself when you can have them eliminate each other through the convenience of Czerka’s advanced Bio-warfare solutions!
Attack and Damage Type: Tech, Internal (DoT)
Duration: 12 seconds
3 seconds cast
View on swtor.jedipedia.net
![]() Contagion,
the Apex Vanguard will do
Attack and Damage Type: Tech, Internal (AoE)
Contagion,
the Apex Vanguard will do
Attack and Damage Type: Tech, Internal (AoE)
0.5 seconds channel
View on swtor.jedipedia.net
![]() Acid Blast,
a 0.5 seconds channel that will put an orange puddle on the floor, dealing low damage.
Attack and Damage Type: Tech, Internal (AoE)
Acid Blast,
a 0.5 seconds channel that will put an orange puddle on the floor, dealing low damage.
Attack and Damage Type: Tech, Internal (AoE)
0.5 seconds channel
View on swtor.jedipedia.net
![]() Acid Blast
has a 15 seconds cooldown and will be channelled approximately every 15 – 20 seconds.
Acid Blast
has a 15 seconds cooldown and will be channelled approximately every 15 – 20 seconds.
The puddle is persistent and can only be removed by using the
![]() Wash station in the second phase. Therefore, the placement of the
Attack and Damage Type: Tech, Internal (AoE)
Wash station in the second phase. Therefore, the placement of the
Attack and Damage Type: Tech, Internal (AoE)
0.5 seconds channel
View on swtor.jedipedia.net
![]() Acid Blast
puddles is important. They can either be placed at the outside of the room between the stations (as in the graphic on the previous page) or only in the Western part of the room, going along the outer wall from the
Acid Blast
puddles is important. They can either be placed at the outside of the room between the stations (as in the graphic on the previous page) or only in the Western part of the room, going along the outer wall from the
![]() Disruptor to the
Disruptor to the
![]() Wash station and then back again.
Wash station and then back again.
When reaching 93%, the Apex Vanguard will channel
Regenerating when exposed to bright light.
10 seconds channel
View on swtor.jedipedia.net
![]() Photogenesis
for 10 seconds.
Regenerating when exposed to bright light.
Photogenesis
for 10 seconds.
Regenerating when exposed to bright light.
View on swtor.jedipedia.net
![]() Photogenesis
causes it to regenerate health whenever the lights are on. After the channel, the transition phase starts.
Photogenesis
causes it to regenerate health whenever the lights are on. After the channel, the transition phase starts.
Transition Phase: Power Transformer
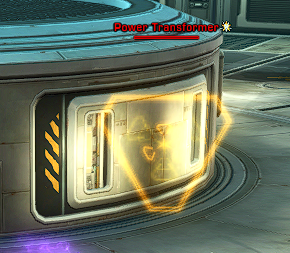
After the
Regenerating when exposed to bright light.
10 seconds channel
View on swtor.jedipedia.net
![]() Photogenesis
channel, the raid must destroy the Power Transformer on the middle. When the Power Transformer has been destroyed, the battery behind it must be taken out by the pre-fight assigned battery runner (see phase 2 for an explanation of the battery mechanics). The battery runner should be someone who already knows the fight, preferably the off tank to minimise DPS loss.
Photogenesis
channel, the raid must destroy the Power Transformer on the middle. When the Power Transformer has been destroyed, the battery behind it must be taken out by the pre-fight assigned battery runner (see phase 2 for an explanation of the battery mechanics). The battery runner should be someone who already knows the fight, preferably the off tank to minimise DPS loss.
Phase 2: Apex Vanguard 93% - 0%
The second phase involves the battery and has a few new mechanics.
After the battery has been taken out of the Power Transformer by the battery runner, the lights will go out and Apex Vanguard will stop regenerating health. Instead, it will channel
Steadily increases outgoing damage, moderately increases damage vulnerability. The Apex Vanguard grows ever more aggressive while in darkness.
10 seconds channel
View on swtor.jedipedia.net
![]() Darkness Overdrive
for 10 seconds.
Darkness Overdrive
for 10 seconds.
After the channel, the Apex Vanguard will receive a stack of
Steadily increases outgoing damage, moderately increases damage vulnerability. The Apex Vanguard grows ever more aggressive while in darkness.
View on swtor.jedipedia.net
![]() Darkness Overdrive
every 6 seconds when in the darkness (i.e. the lights are off), stacking up to 20 times. Each stack increases its damage dealt. When the lights are on (this happens when the battery is in the Power Transformer), the Apex Vanguard loses 1 stack of
Steadily increases outgoing damage, moderately increases damage vulnerability. The Apex Vanguard grows ever more aggressive while in darkness.
Darkness Overdrive
every 6 seconds when in the darkness (i.e. the lights are off), stacking up to 20 times. Each stack increases its damage dealt. When the lights are on (this happens when the battery is in the Power Transformer), the Apex Vanguard loses 1 stack of
Steadily increases outgoing damage, moderately increases damage vulnerability. The Apex Vanguard grows ever more aggressive while in darkness.
View on swtor.jedipedia.net
![]() Darkness Overdrive
per second but will instead regenerate health from
Regenerating when exposed to bright light.
Darkness Overdrive
per second but will instead regenerate health from
Regenerating when exposed to bright light.
View on swtor.jedipedia.net
![]() Photogenesis.
Photogenesis.
60 seconds after the
Steadily increases outgoing damage, moderately increases damage vulnerability. The Apex Vanguard grows ever more aggressive while in darkness.
10 seconds channel
View on swtor.jedipedia.net
![]() Darkness Overdrive
channel, the Apex Vanguard will cast
Inhaling Red Venom. It’s not very healthy...
Darkness Overdrive
channel, the Apex Vanguard will cast
Inhaling Red Venom. It’s not very healthy...
Attack and Damage Type: Tech, Internal (AoE)
3 seconds cast
View on swtor.jedipedia.net
![]() Red Venom Cloud
for 3 seconds. After the cast, the room will be filled with purple gas, and everyone will receive stacks of
Inhaling Red Venom. It’s not very healthy...
Red Venom Cloud
for 3 seconds. After the cast, the room will be filled with purple gas, and everyone will receive stacks of
Inhaling Red Venom. It’s not very healthy...
Attack and Damage Type: Tech, Internal (AoE)
3 seconds cast
View on swtor.jedipedia.net
![]() Red Venom Cloud.
This is a DoT, stacking up to 25 times and ticking every 2 seconds. It can only be removed by the battery runner using the
Red Venom Cloud.
This is a DoT, stacking up to 25 times and ticking every 2 seconds. It can only be removed by the battery runner using the
![]() Fan station.
Fan station.
2 minutes after the
Steadily increases outgoing damage, moderately increases damage vulnerability. The Apex Vanguard grows ever more aggressive while in darkness.
10 seconds channel
View on swtor.jedipedia.net
![]() Darkness Overdrive
channel, the Apex Vanguard will cast
Target locked by the Apex Vanguard. Rockets are likely to follow...
Darkness Overdrive
channel, the Apex Vanguard will cast
Target locked by the Apex Vanguard. Rockets are likely to follow...
2 seconds cast
View on swtor.jedipedia.net
![]() Mass Target Lock
for 2 seconds. The raid will receive the
Target locked by the Apex Vanguard. Rockets are likely to follow...
Mass Target Lock
for 2 seconds. The raid will receive the
Target locked by the Apex Vanguard. Rockets are likely to follow...
2 seconds cast
View on swtor.jedipedia.net
![]() Mass Target Lock
debuff. If this is not removed withing 30 seconds by the battery runner using the
Mass Target Lock
debuff. If this is not removed withing 30 seconds by the battery runner using the
![]() Disruptor station, the Apex Vanguard will channel
Attack and Damage Type: Tech, Kinetic (AoE)
Disruptor station, the Apex Vanguard will channel
Attack and Damage Type: Tech, Kinetic (AoE)
6 seconds channel
View on swtor.jedipedia.net
![]() Bombardment
for 6 seconds, dealing heavy damage and usually resulting in a wipe.
Bombardment
for 6 seconds, dealing heavy damage and usually resulting in a wipe.
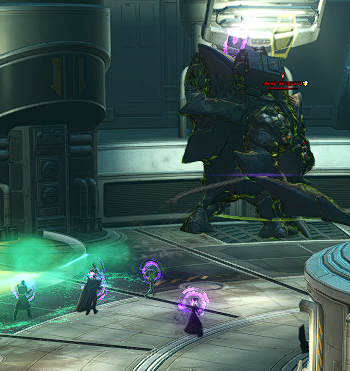
2:30 minutes after the
Steadily increases outgoing damage, moderately increases damage vulnerability. The Apex Vanguard grows ever more aggressive while in darkness.
10 seconds channel
View on swtor.jedipedia.net
![]() Darkness Overdrive
channel, the Apex Vanguard will channel
Launchers are periodically firing missiles at targets in their respective firing arcs.
Darkness Overdrive
channel, the Apex Vanguard will channel
Launchers are periodically firing missiles at targets in their respective firing arcs.
Attack and Damage Type: Tech, Kinetic (AoE)
Duration: 20 seconds
3 seconds channel
View on swtor.jedipedia.net
![]() Zone Defence
for 3 seconds. During the channel, every raid member either receives
Tracked by the Apex Vanguard’s right launcher. Missiles will continually fire at this target if it is within a 200 degree, right-facing arc of the Apex Vanguard.
Zone Defence
for 3 seconds. During the channel, every raid member either receives
Tracked by the Apex Vanguard’s right launcher. Missiles will continually fire at this target if it is within a 200 degree, right-facing arc of the Apex Vanguard.
Duration: 20 seconds
View on swtor.jedipedia.net
![]() Right Launcher Tracking
or
Tracked by the Apex Vanguard’s left launcher. Missiles will continually fire at this target if it is within a 200 degree, left-facing arc of the Apex Vanguard.
Right Launcher Tracking
or
Tracked by the Apex Vanguard’s left launcher. Missiles will continually fire at this target if it is within a 200 degree, left-facing arc of the Apex Vanguard.
Duration: 20 seconds
View on swtor.jedipedia.net
![]() Left Launcher Tracking.
After the channel, the Apex Vanguard will shoot missiles at the raid. Raid members with
Tracked by the Apex Vanguard’s right launcher. Missiles will continually fire at this target if it is within a 200 degree, right-facing arc of the Apex Vanguard.
Left Launcher Tracking.
After the channel, the Apex Vanguard will shoot missiles at the raid. Raid members with
Tracked by the Apex Vanguard’s right launcher. Missiles will continually fire at this target if it is within a 200 degree, right-facing arc of the Apex Vanguard.
Duration: 20 seconds
View on swtor.jedipedia.net
![]() Right Launcher Tracking
must stand on the left of the Apex Vanguard (at the purple missile launcher) and those with
Tracked by the Apex Vanguard’s left launcher. Missiles will continually fire at this target if it is within a 200 degree, left-facing arc of the Apex Vanguard.
Right Launcher Tracking
must stand on the left of the Apex Vanguard (at the purple missile launcher) and those with
Tracked by the Apex Vanguard’s left launcher. Missiles will continually fire at this target if it is within a 200 degree, left-facing arc of the Apex Vanguard.
Duration: 20 seconds
View on swtor.jedipedia.net
![]() Left Launcher Tracking.
must stand on the right of the Apex Vanguard (at the yellow missile launcher). That way they do not get hit by the missiles.
Left Launcher Tracking.
must stand on the right of the Apex Vanguard (at the yellow missile launcher). That way they do not get hit by the missiles.
Launchers are periodically firing missiles at targets in their respective firing arcs.
Attack and Damage Type: Tech, Kinetic (AoE)
Duration: 20 seconds
3 seconds channel
View on swtor.jedipedia.net
![]() Zone Defence
happens roughly every 5:30 minutes.
Zone Defence
happens roughly every 5:30 minutes.
Deals internal damage over time to the target, and anyone standing nearby. Why bother eliminating enemy forces yourself when you can have them eliminate each other through the convenience of Czerka’s advanced Bio-warfare solutions!
Attack and Damage Type: Tech, Internal (DoT)
Duration: 12 seconds
3 seconds cast
View on swtor.jedipedia.net
![]() Contagion
and
Attack and Damage Type: Tech, Internal (AoE)
Contagion
and
Attack and Damage Type: Tech, Internal (AoE)
0.5 seconds channel
View on swtor.jedipedia.net
![]() Acid Blast
happen as in the first phase.
Acid Blast
happen as in the first phase.
Due to the Apex Vanguard having another raid wide attack (deals damage to the raid, 30 seconds cooldown), it might be easier for the healers if the raid – except the battery runner – stands close together for AoE healing.
5.1.2 Running the Battery
The battery is most likely the hardest task in the encounter and might require a few attempts to get it right.
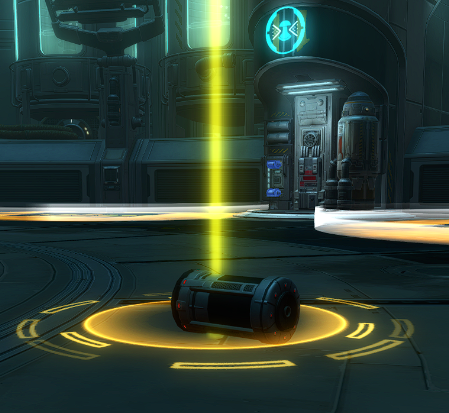
While carrying the battery, the battery runner will receive the temporary ability
Drops the battery at your feet, allowing others to pick it up. You can pick up your own dropped battery once it has been on the ground for at least 5 seconds.
0.3 seconds cast
View on swtor.jedipedia.net
![]() Drop Battery,
which drops the battery on the floor so it can be picked up again (for example by another player).
Drop Battery,
which drops the battery on the floor so it can be picked up again (for example by another player).
In addition to that, carrying the battery hinders the battery runner from executing any ability. Speed boosts should therefore be used before picking up the battery.
Carrying the battery also causes the battery runner to get stacks of
Base movement speed reduced by 1% per stack due to carrying a big heavy battery. This loss recovers gradually while not carrying a big heavy battery.
View on swtor.jedipedia.net
![]() Tired,
decreasing their movement speed. Every 3 seconds of carrying the battery applies one stack, every 4 seconds of not carrying it removes one. In the beginning, the stacks can be kept at 0 for the first few minutes. Later, other players can help with speed boosts and pulling the runner to them.
Tired,
decreasing their movement speed. Every 3 seconds of carrying the battery applies one stack, every 4 seconds of not carrying it removes one. In the beginning, the stacks can be kept at 0 for the first few minutes. Later, other players can help with speed boosts and pulling the runner to them.
Recharging the Battery
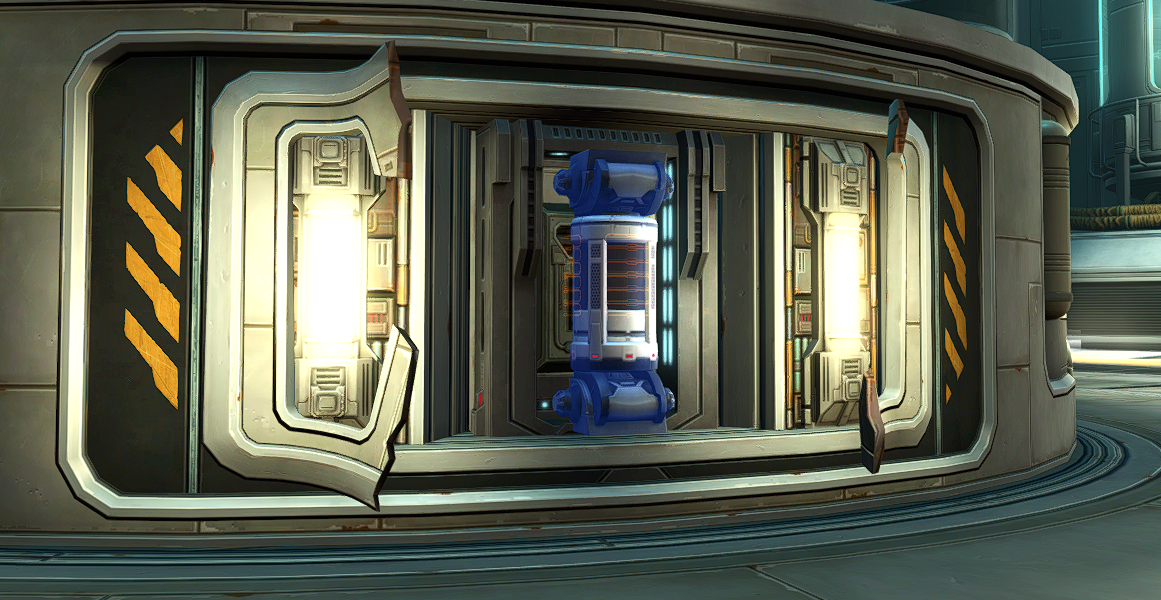
![]() Fan,
Fan,
![]() Wash and
Wash and
![]() Disruptor stations.
Disruptor stations.
![]() Fan and
Fan and
![]() Wash use one charge per usage but cannot use the last charge.
Wash use one charge per usage but cannot use the last charge.
![]() Disruptor uses all remaining charges in the battery on use, whether there were 6 charges or 1 does not matter. A summary can be found in the Hard Mode part.
Disruptor uses all remaining charges in the battery on use, whether there were 6 charges or 1 does not matter. A summary can be found in the Hard Mode part.
After the battery has been depleted, it must be recharged. This can be done at the Power Transformer (which was destroyed in the transition phase). The runner must click on the Transformer to put the battery inside and, after it is charged, click on the battery to remove it again. Charging the battery takes 5 seconds but it can be left in there for a few seconds more to get rid of the battery runner’s
Base movement speed reduced by 1% per stack due to carrying a big heavy battery. This loss recovers gradually while not carrying a big heavy battery.
View on swtor.jedipedia.net
![]() Tired
stacks and the Apex Vanguard’s
Steadily increases outgoing damage, moderately increases damage vulnerability. The Apex Vanguard grows ever more aggressive while in darkness.
Tired
stacks and the Apex Vanguard’s
Steadily increases outgoing damage, moderately increases damage vulnerability. The Apex Vanguard grows ever more aggressive while in darkness.
10 seconds channel
View on swtor.jedipedia.net
![]() Darkness Overdrive
stacks.
Darkness Overdrive
stacks.
The Stations
Story Mode features three stations,
![]() Fan,
Fan,
![]() Wash and
Wash and
![]() Disruptor.
Disruptor.
The
![]() Fan station, visible by a fan icon and vents, is in the East of the room. Using it removes the stacks of
Inhaling Red Venom. It’s not very healthy...
Fan station, visible by a fan icon and vents, is in the East of the room. Using it removes the stacks of
Inhaling Red Venom. It’s not very healthy...
Attack and Damage Type: Tech, Internal (AoE)
3 seconds cast
View on swtor.jedipedia.net
![]() Red Venom Cloud,
consuming one charge.
Red Venom Cloud,
consuming one charge.
Clicking on the socket while carrying the battery puts the battery in the socket and allows the console to be activated.
The
![]() Wash station, indicated by the wash icon, is in the South of the room. It is used to remove the
Attack and Damage Type: Tech, Internal (AoE)
Wash station, indicated by the wash icon, is in the South of the room. It is used to remove the
Attack and Damage Type: Tech, Internal (AoE)
0.5 seconds channel
View on swtor.jedipedia.net
![]() Acid Blast
puddles.
Acid Blast
puddles.
The
![]() Disruptor station is indicated by the EMP-icon and in the North of the room. Using it removes the
Target locked by the Apex Vanguard. Rockets are likely to follow...
Disruptor station is indicated by the EMP-icon and in the North of the room. Using it removes the
Target locked by the Apex Vanguard. Rockets are likely to follow...
2 seconds cast
View on swtor.jedipedia.net
![]() Mass Target Locks
from all players but completely drains the battery. It must be recharged at the Power Transformer in any case.
Mass Target Locks
from all players but completely drains the battery. It must be recharged at the Power Transformer in any case.
Operating the Stations
The priority is
![]() Disruptor, then
Disruptor, then
![]() Fan, then
Fan, then
![]() Wash. The
Attack and Damage Type: Tech, Kinetic (AoE)
Wash. The
Attack and Damage Type: Tech, Kinetic (AoE)
6 seconds channel
View on swtor.jedipedia.net
![]() Bombardment
after not cleansed
Target locked by the Apex Vanguard. Rockets are likely to follow...
Bombardment
after not cleansed
Target locked by the Apex Vanguard. Rockets are likely to follow...
2 seconds cast
View on swtor.jedipedia.net
![]() Mass Target Lock
wipes the raid, too many
Inhaling Red Venom. It’s not very healthy...
Mass Target Lock
wipes the raid, too many
Inhaling Red Venom. It’s not very healthy...
Attack and Damage Type: Tech, Internal (AoE)
3 seconds cast
View on swtor.jedipedia.net
![]() Red Venom Cloud
stacks are dangerous as well.
Red Venom Cloud
stacks are dangerous as well.
![]() Wash should be used whenever needed, it is best to communicate with the raid leader and/or the tank for this.
Wash should be used whenever needed, it is best to communicate with the raid leader and/or the tank for this.
![]() Disruptor and
Disruptor and
![]() Fan can usually be timed since
Inhaling Red Venom. It’s not very healthy...
Fan can usually be timed since
Inhaling Red Venom. It’s not very healthy...
Attack and Damage Type: Tech, Internal (AoE)
3 seconds cast
View on swtor.jedipedia.net
![]() Red Venom Cloud
and
Target locked by the Apex Vanguard. Rockets are likely to follow...
Red Venom Cloud
and
Target locked by the Apex Vanguard. Rockets are likely to follow...
2 seconds cast
View on swtor.jedipedia.net
![]() Mass Target Lock
follow a set pattern:
Mass Target Lock
follow a set pattern:
| 0:00 |
|
| 1:00 |
|
| 2:00 |
|
| After this short introduction of the mechanics, it is a repeating pattern: | |
| 3:00 |
|
| 3:30 |
|
| 4:00 |
|
| 4:30 |
|
| 5:00 |
|
| 5:30 |
|
| 6:30 |
|
| 7:00 |
|
| 7:30 |
|
| 8:00 |
|
| 8:30 |
|
| 9:00 |
|
| … and so on until the Apex Vanguard is dead. | |
StarParse Timers can be found in the Appendix.
5.2 Hard Mode
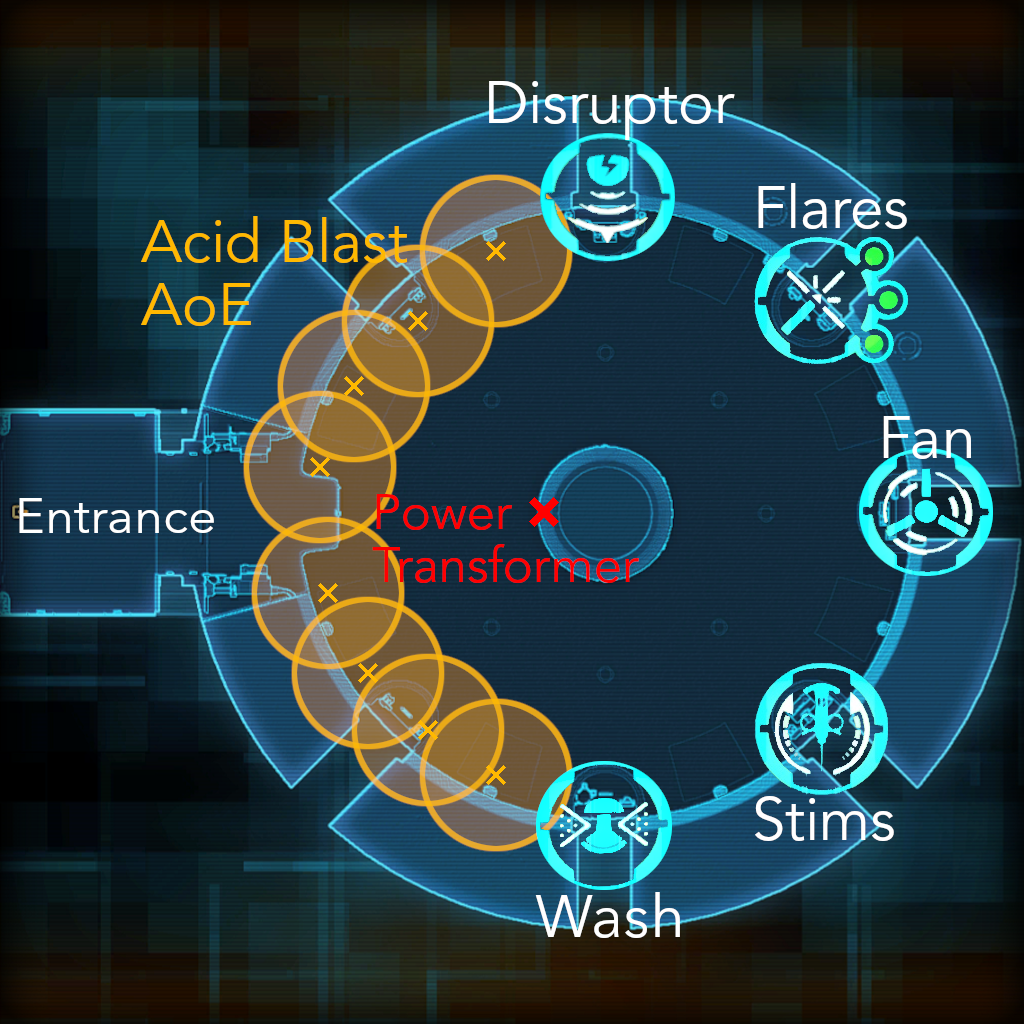
5.2.1 Fighting the Apex Vanguard
Phase 1: Apex Vanguard 100% - 93%
The Apex Vanguard has the buff
The Apex Vanguard enrages whenever his health percentage is at or above the listed value. This value decreases over time so long as the Apex Vanguard is in combat.
View on swtor.jedipedia.net
![]() Peak Performance,
causing it to enrage whenever its health is above or at the stacks. In the beginning of the fight, there will be 99 stacks, ergo the Apex Vanguard starts enraged. After 45 seconds, the stacks will drop to 95 and afterwards it is 5 stacks every 45 seconds, forcing steady DPS.
Peak Performance,
causing it to enrage whenever its health is above or at the stacks. In the beginning of the fight, there will be 99 stacks, ergo the Apex Vanguard starts enraged. After 45 seconds, the stacks will drop to 95 and afterwards it is 5 stacks every 45 seconds, forcing steady DPS.
Attack and Damage Type: Tech, Internal (DoT)
3 seconds cast
View on swtor.jedipedia.net
![]() Contagion
works differently on Hard Mode. It now is a stacking debuff that deals more damage with each additional stack and spreads to other players inside the circle. Therefore, everyone must cleanse their
Deals internal damage over time to the target, and anyone standing nearby. Standing near other Contagion sources accelerates damage growth. Why bother eliminating enemy forces yourself when you can have them eliminate each other through the convenience of Czerka’s advanced Bio-warfare solutions!
Contagion
works differently on Hard Mode. It now is a stacking debuff that deals more damage with each additional stack and spreads to other players inside the circle. Therefore, everyone must cleanse their
Deals internal damage over time to the target, and anyone standing nearby. Standing near other Contagion sources accelerates damage growth. Why bother eliminating enemy forces yourself when you can have them eliminate each other through the convenience of Czerka’s advanced Bio-warfare solutions!
Attack and Damage Type: Tech, Internal (DoT)
3 seconds cast
View on swtor.jedipedia.net
![]() Contagion.
Classes without self-cleanse (Powertechs and Snipers) are therefore not optimal for this encounter.
Contagion.
Classes without self-cleanse (Powertechs and Snipers) are therefore not optimal for this encounter.
When cleansed, it leaves a green pool on the floor. Stepping in the green pool reapplies
Deals internal damage over time to the target, and anyone standing nearby. Standing near other Contagion sources accelerates damage growth. Why bother eliminating enemy forces yourself when you can have them eliminate each other through the convenience of Czerka’s advanced Bio-warfare solutions!
Attack and Damage Type: Tech, Internal (DoT)
3 seconds cast
View on swtor.jedipedia.net
![]() Contagion;
therefore, it must not be dropped in the middle of the group. Instead, they are dropped in the
Attack and Damage Type: Tech, Internal (AoE)
Contagion;
therefore, it must not be dropped in the middle of the group. Instead, they are dropped in the
Attack and Damage Type: Tech, Internal (AoE)
0.5 seconds channel
View on swtor.jedipedia.net
![]() Acid Blast
puddles. A
Acid Blast
puddles. A
![]() Wash will remove them. Upon cleansing, the player will receive
Deals internal damage over time to the target, and anyone standing nearby. Standing near other Contagion sources accelerates damage growth. Why bother eliminating enemy forces yourself when you can have them eliminate each other through the convenience of Czerka’s advanced Bio-warfare solutions!
Wash will remove them. Upon cleansing, the player will receive
Deals internal damage over time to the target, and anyone standing nearby. Standing near other Contagion sources accelerates damage growth. Why bother eliminating enemy forces yourself when you can have them eliminate each other through the convenience of Czerka’s advanced Bio-warfare solutions!
Attack and Damage Type: Tech, Internal (DoT)
3 seconds cast
View on swtor.jedipedia.net
![]() Contagion
Immunity for 4 seconds, protecting them from receiving
Deals internal damage over time to the target, and anyone standing nearby. Standing near other Contagion sources accelerates damage growth. Why bother eliminating enemy forces yourself when you can have them eliminate each other through the convenience of Czerka’s advanced Bio-warfare solutions!
Contagion
Immunity for 4 seconds, protecting them from receiving
Deals internal damage over time to the target, and anyone standing nearby. Standing near other Contagion sources accelerates damage growth. Why bother eliminating enemy forces yourself when you can have them eliminate each other through the convenience of Czerka’s advanced Bio-warfare solutions!
Attack and Damage Type: Tech, Internal (DoT)
3 seconds cast
View on swtor.jedipedia.net
![]() Contagion
for its duration.
Contagion
for its duration.
Transition Phase: Power Transformer
You can use Raid Buffs for killing the Transformer. That way, the boss will receive less healing from
Regenerating when exposed to bright light.
View on swtor.jedipedia.net
![]() Photogenesis.
Photogenesis.
Phase 2: Apex Vanguard 93% - 5%
In addition to the
Deals internal damage over time to the target, and anyone standing nearby. Standing near other Contagion sources accelerates damage growth. Why bother eliminating enemy forces yourself when you can have them eliminate each other through the convenience of Czerka’s advanced Bio-warfare solutions!
Attack and Damage Type: Tech, Internal (DoT)
3 seconds cast
View on swtor.jedipedia.net
![]() Contagion
changes and
The Apex Vanguard enrages whenever his health percentage is at or above the listed value. This value decreases over time so long as the Apex Vanguard is in combat.
Contagion
changes and
The Apex Vanguard enrages whenever his health percentage is at or above the listed value. This value decreases over time so long as the Apex Vanguard is in combat.
View on swtor.jedipedia.net
![]() Peak Performance,
the Apex Vanguard receives three new mechanics:
Peak Performance,
the Apex Vanguard receives three new mechanics:
While not in light, the Apex Vanguard gains stacks of
Steadily increases outgoing damage, moderately increases damage vulnerability. The Apex Vanguard grows ever more aggressive while in darkness.
10 seconds channel
View on swtor.jedipedia.net
![]() Darkness Overdrive,
increasing its damage dealt. On Story Mode, this can be ignored. On Hard Mode, it cannot; the boss should always be lower than 3 stacks. To keep the stacks low, there are
Toss a flare at the targeted location. Creatures within the flare’s area of effect cannot gain stacks of Darkness Overdrive.
Darkness Overdrive,
increasing its damage dealt. On Story Mode, this can be ignored. On Hard Mode, it cannot; the boss should always be lower than 3 stacks. To keep the stacks low, there are
Toss a flare at the targeted location. Creatures within the flare’s area of effect cannot gain stacks of Darkness Overdrive.
1 seconds cast
Lasts 32 seconds
View on swtor.jedipedia.net
![]() CI Neutraliser Flares.
They work the same as in the Holding Pens: A healer drops one on the floor and it creates a circle which prevents the Apex Vanguard from gaining further stacks. Each flare lasts 32 seconds. The flares can be picked up from the
CI Neutraliser Flares.
They work the same as in the Holding Pens: A healer drops one on the floor and it creates a circle which prevents the Apex Vanguard from gaining further stacks. Each flare lasts 32 seconds. The flares can be picked up from the
![]() Flare Station. A healer should be assigned to use and get the flares. The first charge of three flares is ready right from the start.
Flare Station. A healer should be assigned to use and get the flares. The first charge of three flares is ready right from the start.
The second mechanic is
Absorbing damage while charging The Voltinator. Immune to EMP effects. Breaking this Charged Barrier will disrupt The Voltinator's charging process.
Attack and Damage Type if the channel is completed: God Damage
20 seconds channel
View on swtor.jedipedia.net
![]() The Voltinator,
a 20 seconds channel that the group must interrupt by dealing enough damage to the Apex Vanguard. If the channel is complete, the group wipes.
The Voltinator,
a 20 seconds channel that the group must interrupt by dealing enough damage to the Apex Vanguard. If the channel is complete, the group wipes.
Right before
Absorbing damage while charging The Voltinator. Immune to EMP effects. Breaking this Charged Barrier will disrupt The Voltinator's charging process.
Attack and Damage Type if the channel is completed: God Damage
20 seconds channel
View on swtor.jedipedia.net
![]() The Voltinator,
the boss will cast
Accuracy reduced by 100%.
The Voltinator,
the boss will cast
Accuracy reduced by 100%.
Duration: 18 seconds
View on swtor.jedipedia.net
![]() Blinding Spray,
reducing everyone’s Accuracy by 100%. To circumvent this Accuracy reduction, two DPS must use two
Injects a target with a dose of the experimental CI-M Synapse Accelerator Serum. When used as directed, this serum grants the user increased run speed and immunity to movement impairing effects, while also halving tiredness. Injecting a second dose while the first is active will over Overclock and Overload the body.
Blinding Spray,
reducing everyone’s Accuracy by 100%. To circumvent this Accuracy reduction, two DPS must use two
Injects a target with a dose of the experimental CI-M Synapse Accelerator Serum. When used as directed, this serum grants the user increased run speed and immunity to movement impairing effects, while also halving tiredness. Injecting a second dose while the first is active will over Overclock and Overload the body.
View on swtor.jedipedia.net
![]() CI-M Synapse Accelerator Serum
each, increasing their Accuracy by 100% (The Holding Pens say hello there).
CI-M Synapse Accelerator Serum
each, increasing their Accuracy by 100% (The Holding Pens say hello there).
The stims can be picked up at the
![]() Stim Station. Assign DPS to the specific
Absorbing damage while charging The Voltinator. Immune to EMP effects. Breaking this Charged Barrier will disrupt The Voltinator's charging process.
Stim Station. Assign DPS to the specific
Absorbing damage while charging The Voltinator. Immune to EMP effects. Breaking this Charged Barrier will disrupt The Voltinator's charging process.
Attack and Damage Type if the channel is completed: God Damage
20 seconds channel
View on swtor.jedipedia.net
![]() Voltinators;
you will most likely have four of them. The first two DPS pick up their stims early in the fight (ask the battery runner when they are ready), the other two DPS can take them during a
Absorbing damage while charging The Voltinator. Immune to EMP effects. Breaking this Charged Barrier will disrupt The Voltinator's charging process.
Voltinators;
you will most likely have four of them. The first two DPS pick up their stims early in the fight (ask the battery runner when they are ready), the other two DPS can take them during a
Absorbing damage while charging The Voltinator. Immune to EMP effects. Breaking this Charged Barrier will disrupt The Voltinator's charging process.
Attack and Damage Type if the channel is completed: God Damage
20 seconds channel
View on swtor.jedipedia.net
![]() Voltinator.
As the Apex Vanguard does not do anything besides the channel, this is also a good opportunity for the healer to pick up new flares.
Voltinator.
As the Apex Vanguard does not do anything besides the channel, this is also a good opportunity for the healer to pick up new flares.
The last mechanic is
Cooldown of Acid Blast drastically reduced for the next few uses.
2 seconds cast
View on swtor.jedipedia.net
![]() Acid Deluge.
This happens quite late in the fight (see 5.2.2 for the timers). It is a 2 seconds cast with 2 minutes cooldown, causing the Apex Vanguard to drop three
Attack and Damage Type: Tech, Internal (AoE)
Acid Deluge.
This happens quite late in the fight (see 5.2.2 for the timers). It is a 2 seconds cast with 2 minutes cooldown, causing the Apex Vanguard to drop three
Attack and Damage Type: Tech, Internal (AoE)
0.5 seconds channel
View on swtor.jedipedia.net
![]() Acid Blast
puddles on the floor and cast
Inhaling Red Venom. It’s not very healthy...
Acid Blast
puddles on the floor and cast
Inhaling Red Venom. It’s not very healthy...
Attack and Damage Type: Tech, Internal (AoE)
3 seconds cast
View on swtor.jedipedia.net
![]() Red Venom Cloud
over the next 20 seconds. The tank can place the three puddles in the same spot while using a defensive.
Red Venom Cloud
over the next 20 seconds. The tank can place the three puddles in the same spot while using a defensive.
Phase 3: Apex Vanguard 5% - 0%
When reaching 5%, the Apex Vanguard will cast
Damage massively increased.
3 seconds cast
View on swtor.jedipedia.net
![]() Last Ditch Effort,
causing it to enrage. DPS should stim themselves and the tank twice to increase their damage and the tanks Defence.
Last Ditch Effort,
causing it to enrage. DPS should stim themselves and the tank twice to increase their damage and the tanks Defence.
If the tank is more than 10 metres away from the Apex Vanguard, it will do
Attack and Damage Type: Tech, Kinetic (AoE)
View on swtor.jedipedia.net
![]() Last Ditch Leap Attack,
jumping to the tank, dealing AoE damage and a knockdown.
Last Ditch Leap Attack,
jumping to the tank, dealing AoE damage and a knockdown.
5.2.2 Running the Battery
If you have an Assassin tank, consider letting them run the battery for two reasons: They can use Force Speed, pick up the battery and benefit from their speed boost. And if the main tank dies to the enrage at the end, they can take over.
More Stations
In addition to
![]() Fan,
Fan,
![]() Wash and
Wash and
![]() Disruptor, there are
Disruptor, there are
![]() Flare and
Flare and
![]() Stim.
Stim.
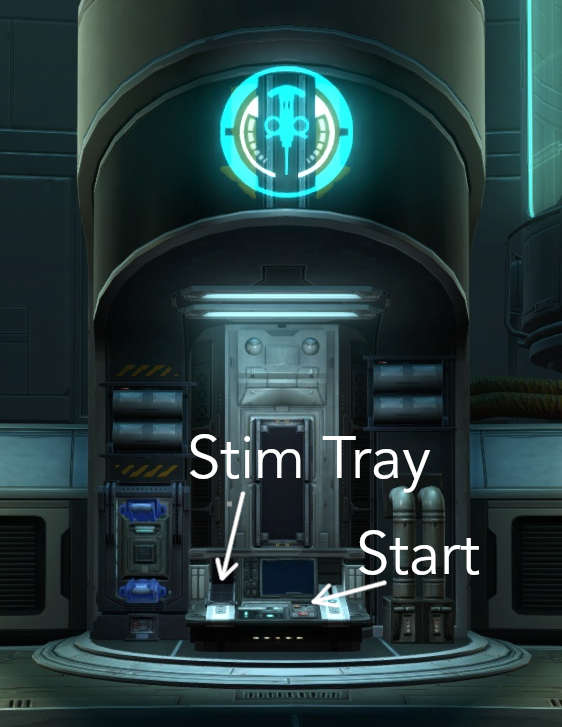
The
![]() Stim Station is the South-Eastern station. It requires at least one battery charge but does not consume any.
Stim Station is the South-Eastern station. It requires at least one battery charge but does not consume any.
After inserting the battery for the first time, the Start button must be pressed. Every 2 seconds, one stim is produced. The tray can hold up to 12 stims. If it is full, the production is halted and the Start button must be pressed again when using the station next time.
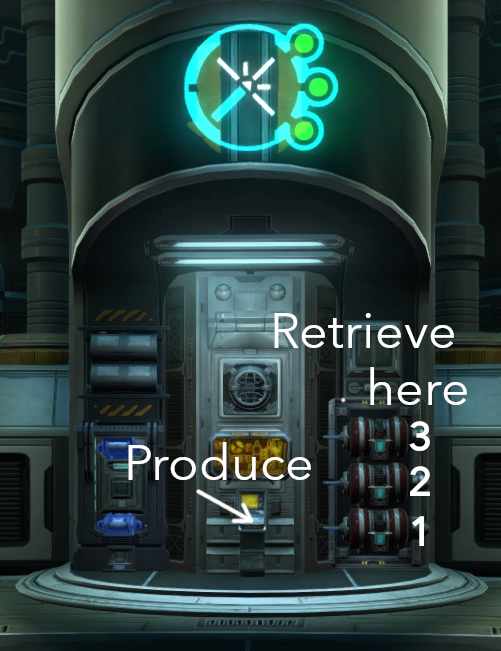
The
![]() Flare station is the North-Eastern station, producing the
Toss a flare at the targeted location. Creatures within the flare’s area of effect cannot gain stacks of Darkness Overdrive.
Flare station is the North-Eastern station, producing the
Toss a flare at the targeted location. Creatures within the flare’s area of effect cannot gain stacks of Darkness Overdrive.
1 seconds cast
Lasts 32 seconds
View on swtor.jedipedia.net
![]() CI Neutraliser Flares
for the healer. There are three separate dispensers which produce one flare each. Using dispenser 1 consumes one charge, the dispensers 2 and 3 require two charges each.
CI Neutraliser Flares
for the healer. There are three separate dispensers which produce one flare each. Using dispenser 1 consumes one charge, the dispensers 2 and 3 require two charges each.
Each flare takes 45 to be produced. After production, the healer must pick them up since each dispenser can only hold one flare at a time.
The lights of the icon indicate whether flares are ready not. A red light means that the dispenser is empty, an orange light indicates that a flare is produced, and a green light shows that a flare is ready.
In the image, all three flares are ready to be picked up.
| Station | Location | Charges required | Charges consumed |
|---|---|---|---|
|
|
North | 1 | All |
|
|
North-East | 2 |
1 (dispenser 1), 2 (dispensers 2 and 3) |
|
|
East | 2 | 1 |
|
|
South-East | 2 | 0 |
|
|
South | 2 | 1 |
Operating the Stations
As one might have guessed, this is more difficult than the simple pattern from Story Mode.
Absorbing damage while charging The Voltinator. Immune to EMP effects. Breaking this Charged Barrier will disrupt The Voltinator's charging process.
Attack and Damage Type if the channel is completed: God Damage
20 seconds channel
View on swtor.jedipedia.net
![]() The Voltinator
itself does not affect the battery runner that much, however, the stims must be produced and picked up before it first starts.
Cooldown of Acid Blast drastically reduced for the next few uses.
The Voltinator
itself does not affect the battery runner that much, however, the stims must be produced and picked up before it first starts.
Cooldown of Acid Blast drastically reduced for the next few uses.
2 seconds cast
View on swtor.jedipedia.net
![]() Acid Deluge
means that
Acid Deluge
means that
![]() Wash and
Wash and
![]() Fan
must be used. Using
Fan
must be used. Using
![]() Wash when the boss is at 2
Cooldown of Acid Blast drastically reduced for the next few uses.
Wash when the boss is at 2
Cooldown of Acid Blast drastically reduced for the next few uses.
2 seconds cast
View on swtor.jedipedia.net
![]() Acid Deluge
stacks (it starts with 3, removing one with each
Attack and Damage Type: Tech, Internal (AoE)
Acid Deluge
stacks (it starts with 3, removing one with each
Attack and Damage Type: Tech, Internal (AoE)
0.5 seconds channel
View on swtor.jedipedia.net
![]() Acid Blast
) should remove all puddles, even the two that will still be casted.
Acid Blast
) should remove all puddles, even the two that will still be casted.
Luckily, there also is a pattern on Hard Mode.
The easiest part is the beginning which is always the same. After
Steadily increases outgoing damage, moderately increases damage vulnerability. The Apex Vanguard grows ever more aggressive while in darkness.
10 seconds channel
View on swtor.jedipedia.net
![]() Darkness Overdrive,
Inhaling Red Venom. It’s not very healthy...
Darkness Overdrive,
Inhaling Red Venom. It’s not very healthy...
Attack and Damage Type: Tech, Internal (AoE)
3 seconds cast
View on swtor.jedipedia.net
![]() Red Venom Cloud
follows. After that, it will be
Target locked by the Apex Vanguard. Rockets are likely to follow...
Red Venom Cloud
follows. After that, it will be
Target locked by the Apex Vanguard. Rockets are likely to follow...
2 seconds cast
View on swtor.jedipedia.net
![]() Mass Target Lock,
followed by the first
Absorbing damage while charging The Voltinator. Immune to EMP effects. Breaking this Charged Barrier will disrupt The Voltinator's charging process.
Mass Target Lock,
followed by the first
Absorbing damage while charging The Voltinator. Immune to EMP effects. Breaking this Charged Barrier will disrupt The Voltinator's charging process.
Attack and Damage Type if the channel is completed: God Damage
20 seconds channel
View on swtor.jedipedia.net
![]() Voltinator.
Voltinator.
With flares and stims, this could become:
- 3x
 Flare
Flare
- Recharge
-
 Stims
Stims
-
 Fan when
 Red Venom Cloud happens
- More
 Stims
Stims
-
 Wash shortly after
 Contagion happens
- Recharge
- 3x
 Flare
Flare
-
 Disruptor when
 Mass Target Lock happens
- Recharge
After that, it becomes more flexible and depends a bit on the group. Some groups need more stims, some less and so on.
A point of orientation is the Apex Vanguard’s attack pattern which seems to be the same all the time. Please note that the times are not exact but can be off by 5 seconds. More accurate StarParse timers can be found in the Appendix.
| 00:00 |
|
| 01:00 |
|
| 02:00 |
|
| 03:00 |
|
| After this introductory part, the “Random Part” follows. During this part, each
Inhaling Red Venom. It’s not very healthy... Attack and Damage Type: Tech, Internal (AoE) 3 seconds cast View on swtor.jedipedia.net 2 seconds cast View on swtor.jedipedia.net Attack and Damage Type if the channel is completed: God Damage 20 seconds channel View on swtor.jedipedia.net |
|
| 04:00 | “Random Part”: 2x 2x 2x |
| 04:30 | |
| 05:30 | |
| 06:00 | |
| 00:00 | |
| 07:30 | |
| After the “Random Part”,
Cooldown of Acid Blast drastically reduced for the next few uses. 2 seconds cast View on swtor.jedipedia.net |
|
| 08:30 |
|
| 08:40 |
|
| 09:00 |
|
| 09:30 |
|
| 10:30 |
|
| 10:32 |
|
| 11:00 |
|
| 11:30 |
|
| 12:00 |
|
| 12:30 |
|
More Things to Keep in Mind
If you receive
Deals internal damage over time to the target, and anyone standing nearby. Standing near other Contagion sources accelerates damage growth. Why bother eliminating enemy forces yourself when you can have them eliminate each other through the convenience of Czerka’s advanced Bio-warfare solutions!
Attack and Damage Type: Tech, Internal (DoT)
3 seconds cast
View on swtor.jedipedia.net
![]() Contagion
as battery runner (happens sometimes, depending on whether you are in LoS of the Apex Vanguard), cleanse it right at the inner walls or in the
Attack and Damage Type: Tech, Internal (AoE)
Contagion
as battery runner (happens sometimes, depending on whether you are in LoS of the Apex Vanguard), cleanse it right at the inner walls or in the
Attack and Damage Type: Tech, Internal (AoE)
0.5 seconds channel
View on swtor.jedipedia.net
![]() Acid Blast
puddles. If you are in the Eastern part, you can also cleanse it at the outer walls.
Acid Blast
puddles. If you are in the Eastern part, you can also cleanse it at the outer walls.
Coordinate with your healer when you need to produce more flares and tell them when they are ready. Same goes for your DPS.
After recharging, pull out the battery as soon as possible to prevent the boss from getting healed, unless you need to get rid of some
Steadily increases outgoing damage, moderately increases damage vulnerability. The Apex Vanguard grows ever more aggressive while in darkness.
10 seconds channel
View on swtor.jedipedia.net
![]() Darkness Overdrive
stacks. Communicate that with your tank/ raid leader.
Darkness Overdrive
stacks. Communicate that with your tank/ raid leader.
You can use stims to half your
Base movement speed reduced by 1% per stack due to carrying a big heavy battery. This loss recovers gradually while not carrying a big heavy battery.
View on swtor.jedipedia.net
![]() Tired
stacks.
Tired
stacks.
When starting with the pattern mentioned on the previous page, the first flare will be needed after your first recharge, saving the healer one more flare to be used later.
Work out a strategy that works for you. The timers above can help you with it. It will take some time to work out something that works, do not let that discourage you.
6 Appendix
Below, there are some class-specific tips and tricks.
Red – Fluff on Red Venom stacks
Mercenaries and Powertechs can use their Energy Shield if they have the Pyro Shield utility, Sorcerers can use their Static Barrier if they have the Lightning Barrier utility, to deal some additional damage to Red while having
Causes internal damage every 2s. Red’s neurotoxin afflicts the pain centres within the brain which gradually pushes them into a state of shock.
Attack and Damage Type: Tech, Internal (AoE)
View on swtor.jedipedia.net
![]() Red Venom
stacks.
Red Venom
stacks.
Huntmaster – Reflecting Powershot Volley
A Mercenary can stand in front and use their Responsive Safeguards and Hydraulics. This way, the attack gets reflected.
Huntmaster – Cleansing Shelleigh’s DoT
Sorcerers can use their Force Barrier to cleanse their
Taking internal damage over time.
Attack and Damage Type: Tech, Internal (AoE, DoT)
View on swtor.jedipedia.net
![]() Toxic Cloud
stacks. This should be done at roughly 10 stacks.
Toxic Cloud
stacks. This should be done at roughly 10 stacks.
Apex Vanguard - Acid Blast fluff
Marauders can use Cloak of Pain and stand inside the
Attack and Damage Type: Tech, Internal (AoE)
0.5 seconds channel
View on swtor.jedipedia.net
![]() Acid Blast
puddles, dealing additional damage to the Apex Vanguard.
Acid Blast
puddles, dealing additional damage to the Apex Vanguard.
Apex Vanguard – StarParse Timers for the Battery (Story Mode)
The timers below can be used to run the battery on Story Mode. They only work for the player who takes the battery out of the Power Transformer for the first time. Alternatively, the trigger of the background timer can be edited (e.g., to trigger when using a specific ability that is not used otherwise, this ability then has to be used when the Apex Vanguard starts channelling
Steadily increases outgoing damage, moderately increases damage vulnerability. The Apex Vanguard grows ever more aggressive while in darkness.
10 seconds channel
View on swtor.jedipedia.net
![]() Darkness Overdrive).
Darkness Overdrive).
The timers below must be pasted in StarParse’s starparse-timers.xml file between the <timers> tags.
It can be found under C:\Users\YOUR NAME HERE\AppData\Local\StarParse\app\client\app.
It is also possible to download the timers as XML file and override the existing file (note that this will delete all the other custom timers).
In any case, StarParse must be closed while editing or overwriting the starparse-timers.xml file, else the changes will not be saved.
<com.ixale.starparse.domain.ConfigTimers>
  <timers>
    <!-- Other timers would be here.
    Just paste the following lines after the last
    '</com.ixale.starparse.domain.ConfigTimer>' -->
    <com.ixale.starparse.domain.ConfigTimer>
      <name>Apex Background Counter</name>
      <folder>Apex Battery Story</folder>
      <trigger>
        <type>ABILITY_ACTIVATED</type>
        <abilityGuid>4382760722497536</abilityGuid>
        <boss>Apex Vanguard</boss>
      </trigger>
      <cancel>
        <type>COMBAT_END</type>
      </cancel>
      <interval>960.0</interval>
      <enabled>true</enabled>
      <ignoreRepeated>true</ignoreRepeated>
    </com.ixale.starparse.domain.ConfigTimer>
    <com.ixale.starparse.domain.ConfigTimer>
      <name>Red Venom 1</name>
      <folder>Apex Battery Story</folder>
      <trigger>
        <type>TIMER_STARTED</type>
        <timer>Apex Background Counter</timer>
        <boss>Apex Vanguard</boss>
      </trigger>
      <cancel>
        <type>COMBAT_END</type>
      </cancel>
      <interval>65.0</interval>
      <color>0xffc010ff</color>
      <enabled>true</enabled>
      <ignoreRepeated>false</ignoreRepeated>
    </com.ixale.starparse.domain.ConfigTimer>
    <com.ixale.starparse.domain.ConfigTimer>
      <name>Mass Target Lock 1</name>
      <folder>Apex Battery Story</folder>
      <trigger>
        <type>TIMER_FINISHED</type>
        <timer>Red Venom 1</timer>
        <boss>Apex Vanguard</boss>
      </trigger>
      <cancel>
        <type>COMBAT_END</type>
      </cancel>
      <interval>59.0</interval>
      <color>0x990000ff</color>
      <enabled>true</enabled>
      <ignoreRepeated>false</ignoreRepeated>
    </com.ixale.starparse.domain.ConfigTimer>
    <com.ixale.starparse.domain.ConfigTimer>
      <name>Red Venom 2</name>
      <folder>Apex Battery Story</folder>
      <trigger>
        <type>TIMER_FINISHED</type>
        <timer>Mass Target Lock 1</timer>
        <boss>Apex Vanguard</boss>
      </trigger>
      <cancel>
        <type>COMBAT_END</type>
      </cancel>
      <interval>61.0</interval>
      <color>0xffc010ff</color>
      <enabled>true</enabled>
      <ignoreRepeated>false</ignoreRepeated>
    </com.ixale.starparse.domain.ConfigTimer>
    <com.ixale.starparse.domain.ConfigTimer>
      <name>Red Venom 3</name>
      <folder>Apex Battery Story</folder>
      <trigger>
        <type>TIMER_FINISHED</type>
        <timer>Red Venom 2</timer>
        <boss>Apex Vanguard</boss>
      </trigger>
      <cancel>
        <type>COMBAT_END</type>
      </cancel>
      <interval>34.0</interval>
      <color>0xffc010ff</color>
      <enabled>true</enabled>
      <ignoreRepeated>false</ignoreRepeated>
    </com.ixale.starparse.domain.ConfigTimer>
    <com.ixale.starparse.domain.ConfigTimer>
      <name>Mass Target Lock 2</name>
      <folder>Apex Battery Story</folder>
      <trigger>
        <type>TIMER_FINISHED</type>
        <timer>Red Venom 3</timer>
        <boss>Apex Vanguard</boss>
      </trigger>
      <cancel>
        <type>COMBAT_END</type>
      </cancel>
      <interval>26.0</interval>
      <color>0x990000ff</color>
      <enabled>true</enabled>
      <ignoreRepeated>false</ignoreRepeated>
    </com.ixale.starparse.domain.ConfigTimer>
    <com.ixale.starparse.domain.ConfigTimer>
      <name>Mass Target Lock 3</name>
      <folder>Apex Battery Story</folder>
      <trigger>
        <type>TIMER_FINISHED</type>
        <timer>Mass Target Lock 2</timer>
        <boss>Apex Vanguard</boss>
      </trigger>
      <cancel>
        <type>COMBAT_END</type>
      </cancel>
      <interval>32.5</interval>
      <color>0x990000ff</color>
      <enabled>true</enabled>
      <ignoreRepeated>false</ignoreRepeated>
    </com.ixale.starparse.domain.ConfigTimer>
    <com.ixale.starparse.domain.ConfigTimer>
      <name>Red Venom 4</name>
      <folder>Apex Battery Story</folder>
      <trigger>
        <type>TIMER_FINISHED</type>
        <timer>Mass Target Lock 3</timer>
        <boss>Apex Vanguard</boss>
      </trigger>
      <cancel>
        <type>COMBAT_END</type>
      </cancel>
      <interval>33.0</interval>
      <color>0xffc010ff</color>
      <enabled>true</enabled>
      <ignoreRepeated>false</ignoreRepeated>
    </com.ixale.starparse.domain.ConfigTimer>
    <com.ixale.starparse.domain.ConfigTimer>
      <name>Mass Target Lock 4</name>
      <folder>Apex Battery Story</folder>
      <trigger>
        <type>TIMER_FINISHED</type>
        <timer>Red Venom 4</timer>
        <boss>Apex Vanguard</boss>
      </trigger>
      <cancel>
        <type>COMBAT_END</type>
      </cancel>
      <interval>24.5</interval>
      <color>0x990000ff</color>
      <enabled>true</enabled>
      <ignoreRepeated>false</ignoreRepeated>
    </com.ixale.starparse.domain.ConfigTimer>
    <com.ixale.starparse.domain.ConfigTimer>
      <name>Red Venom 5</name>
      <folder>Apex Battery Story</folder>
      <trigger>
        <type>TIMER_FINISHED</type>
        <timer>Mass Target Lock 4</timer>
        <boss>Apex Vanguard</boss>
      </trigger>
      <cancel>
        <type>COMBAT_END</type>
      </cancel>
      <interval>60.0</interval>
      <color>0xffc010ff</color>
      <enabled>true</enabled>
      <ignoreRepeated>false</ignoreRepeated>
    </com.ixale.starparse.domain.ConfigTimer>
    <com.ixale.starparse.domain.ConfigTimer>
    <name>Red Venom 6</name>
      <folder>Apex Battery Story</folder>
      <trigger>
        <type>TIMER_FINISHED</type>
        <timer>Red Venom 5</timer>
        <boss>Apex Vanguard</boss>
      </trigger>
      <cancel>
        <type>COMBAT_END</type>
      </cancel>
      <interval>34.0</interval>
      <color>0xffc010ff</color>
      <enabled>true</enabled>
      <ignoreRepeated>false</ignoreRepeated>
    </com.ixale.starparse.domain.ConfigTimer>
    <com.ixale.starparse.domain.ConfigTimer>
      <name>Mass Target Lock 5</name>
      <folder>Apex Battery Story</folder>
      <trigger>
        <type>TIMER_FINISHED</type>
        <timer>Red Venom 6</timer>
        <boss>Apex Vanguard</boss>
      </trigger>
      <cancel>
        <type>COMBAT_END</type>
      </cancel>
      <interval>25.0</interval>
      <color>0x990000ff</color>
      <enabled>true</enabled>
      <ignoreRepeated>false</ignoreRepeated>
    </com.ixale.starparse.domain.ConfigTimer>
    <com.ixale.starparse.domain.ConfigTimer>
      <name>Mass Target Lock 6</name>
      <folder>Apex Battery Story</folder>
      <trigger>
        <type>TIMER_FINISHED</type>
        <timer>Mass Target Lock 5</timer>
        <boss>Apex Vanguard</boss>
      </trigger>
      <cancel>
        <type>COMBAT_END</type>
      </cancel>
      <interval>33.0</interval>
      <color>0x990000ff</color>
      <enabled>true</enabled>
      <ignoreRepeated>false</ignoreRepeated>
    </com.ixale.starparse.domain.ConfigTimer>
    <com.ixale.starparse.domain.ConfigTimer>
    <name>Red Venom 7</name>
      <folder>Apex Battery Story</folder>
      <trigger>
        <type>TIMER_FINISHED</type>
        <timer>Mass Target Lock 6</timer>
        <boss>Apex Vanguard</boss>
      </trigger>
      <cancel>
        <type>COMBAT_END</type>
      </cancel>
      <interval>33.0</interval>
      <color>0xffc010ff</color>
      <enabled>true</enabled>
      <ignoreRepeated>false</ignoreRepeated>
    </com.ixale.starparse.domain.ConfigTimer>
    <com.ixale.starparse.domain.ConfigTimer>
      <name>Mass Target Lock 7</name>
      <folder>Apex Battery Story</folder>
      <trigger>
        <type>TIMER_FINISHED</type>
        <timer>Red Venom 7</timer>
        <boss>Apex Vanguard</boss>
      </trigger>
      <cancel>
        <type>COMBAT_END</type>
      </cancel>
      <interval>24.0</interval>
      <color>0x990000ff</color>
      <enabled>true</enabled>
      <ignoreRepeated>false</ignoreRepeated>
    </com.ixale.starparse.domain.ConfigTimer>
    <!-- Copy until here. -->
  </timers>
</com.ixale.starparse.domain.ConfigTimers>
Apex Vanguard – StarParse Timers for the Battery (Hard Mode)
Just like the Story Mode timers, these only work for the player who takes the battery out of the Power Transformer for the first time.
<com.ixale.starparse.domain.ConfigTimers>
  <timers>
    <!-- Other timers would be here.
    Just paste the following lines after the last
    '</com.ixale.starparse.domain.ConfigTimer>' -->
    <com.ixale.starparse.domain.ConfigTimer>
      <name>Apex Background Counter</name>
      <folder>Apex Battery Hard</folder>
      <trigger>
        <type>ABILITY_ACTIVATED</type>
        <abilityGuid>4382760722497536</abilityGuid>
        <boss>Apex Vanguard</boss>
      </trigger>
      <cancel>
        <type>COMBAT_END</type>
      </cancel>
      <interval>960.0</interval>
      <enabled>true</enabled>
      <ignoreRepeated>true</ignoreRepeated>
    </com.ixale.starparse.domain.ConfigTimer>
    <com.ixale.starparse.domain.ConfigTimer>
      <name>Red Venom 1</name>
      <folder>Apex Battery Hard</folder>
      <trigger>
        <type>TIMER_STARTED</type>
        <timer>Apex Background Counter</timer>
        <boss>Apex Vanguard</boss>
      </trigger>
      <cancel>
        <type>COMBAT_END</type>
      </cancel>
      <interval>64.0</interval>
      <color>0xffc010ff</color>
      <enabled>true</enabled>
      <ignoreRepeated>false</ignoreRepeated>
    </com.ixale.starparse.domain.ConfigTimer>
    <com.ixale.starparse.domain.ConfigTimer>
      <name>Mass Target Lock 1</name>
      <folder>Apex Battery Hard</folder>
      <trigger>
        <type>TIMER_FINISHED</type>
        <timer>Red Venom 1</timer>
        <boss>Apex Vanguard</boss>
      </trigger>
      <cancel>
        <type>COMBAT_END</type>
      </cancel>
      <interval>59.0</interval>
      <color>0x990000ff</color>
      <enabled>true</enabled>
      <ignoreRepeated>false</ignoreRepeated>
    </com.ixale.starparse.domain.ConfigTimer>
    <com.ixale.starparse.domain.ConfigTimer>
      <name>Voltinator 1</name>
      <folder>Apex Battery Hard</folder>
      <trigger>
        <type>TIMER_FINISHED</type>
        <timer>Mass Target Lock 1</timer>
        <boss>Apex Vanguard</boss>
      </trigger>
      <cancel>
        <type>COMBAT_END</type>
      </cancel>
      <interval>59.0</interval>
      <color>0x00b0f0ff</color>
      <enabled>true</enabled>
      <ignoreRepeated>false</ignoreRepeated>
    </com.ixale.starparse.domain.ConfigTimer>
    <com.ixale.starparse.domain.ConfigTimer>
      <name>RV / MTL / Volt 1</name>
      <folder>Apex Battery Hard</folder>
      <trigger>
        <type>TIMER_FINISHED</type>
        <timer>Voltinator 1</timer>
        <boss>Apex Vanguard</boss>
      </trigger>
      <cancel>
        <type>COMBAT_END</type>
      </cancel>
      <interval>62.0</interval>
      <color>0x5f5f5fff</color>
      <enabled>true</enabled>
      <ignoreRepeated>false</ignoreRepeated>
    </com.ixale.starparse.domain.ConfigTimer>
    <com.ixale.starparse.domain.ConfigTimer>
      <name>RV / MTL / Volt 2</name>
      <folder>Apex Battery Hard</folder>
      <trigger>
        <type>TIMER_FINISHED</type>
        <timer>RV / MTL / Volt 1</timer>
        <boss>Apex Vanguard</boss>
      </trigger>
      <cancel>
        <type>COMBAT_END</type>
      </cancel>
      <interval>31.0</interval>
      <color>0x5f5f5fff</color>
      <enabled>true</enabled>
      <ignoreRepeated>false</ignoreRepeated>
    </com.ixale.starparse.domain.ConfigTimer>
    <com.ixale.starparse.domain.ConfigTimer>
      <name>RV / MTL / Volt 3</name>
      <folder>Apex Battery Hard</folder>
      <trigger>
        <type>TIMER_FINISHED</type>
        <timer>RV / MTL / Volt 2</timer>
        <boss>Apex Vanguard</boss>
      </trigger>
      <cancel>
        <type>COMBAT_END</type>
      </cancel>
      <interval>60.0</interval>
      <color>0x5f5f5fff</color>
      <enabled>true</enabled>
      <ignoreRepeated>false</ignoreRepeated>
    </com.ixale.starparse.domain.ConfigTimer>
    <com.ixale.starparse.domain.ConfigTimer>
      <name>RV / MTL / Volt 4</name>
      <folder>Apex Battery Hard</folder>
      <trigger>
        <type>TIMER_FINISHED</type>
        <timer>RV / MTL / Volt 3</timer>
        <boss>Apex Vanguard</boss>
      </trigger>
      <cancel>
        <type>COMBAT_END</type>
      </cancel>
      <interval>29.0</interval>
      <color>0x5f5f5fff</color>
      <enabled>true</enabled>
      <ignoreRepeated>false</ignoreRepeated>
    </com.ixale.starparse.domain.ConfigTimer>
    <com.ixale.starparse.domain.ConfigTimer>
      <name>RV / MTL / Volt 5</name>
      <folder>Apex Battery Hard</folder>
      <trigger>
        <type>TIMER_FINISHED</type>
        <timer>RV / MTL / Volt 4</timer>
        <boss>Apex Vanguard</boss>
      </trigger>
      <cancel>
        <type>COMBAT_END</type>
      </cancel>
      <interval>63.0</interval>
      <color>0x5f5f5fff</color>
      <enabled>true</enabled>
      <ignoreRepeated>false</ignoreRepeated>
    </com.ixale.starparse.domain.ConfigTimer>
    <com.ixale.starparse.domain.ConfigTimer>
      <name>RV / MTL / Volt 6</name>
      <folder>Apex Battery Hard</folder>
      <trigger>
        <type>TIMER_FINISHED</type>
        <timer>RV / MTL / Volt 5</timer>
        <boss>Apex Vanguard</boss>
      </trigger>
      <cancel>
        <type>COMBAT_END</type>
      </cancel>
      <interval>27.0</interval>
      <color>0x5f5f5fff</color>
      <enabled>true</enabled>
      <ignoreRepeated>false</ignoreRepeated>
    </com.ixale.starparse.domain.ConfigTimer>
    <com.ixale.starparse.domain.ConfigTimer>
      <name>Acid Deluge 1</name>
      <folder>Apex Battery Hard</folder>
      <trigger>
        <type>TIMER_FINISHED</type>
        <timer>RV / MTL / Volt 6</timer>
        <boss>Apex Vanguard</boss>
      </trigger>
      <cancel>
        <type>COMBAT_END</type>
      </cancel>
      <interval>59.0</interval>
      <color>0x00ff00ff</color>
      <enabled>true</enabled>
      <ignoreRepeated>false</ignoreRepeated>
    </com.ixale.starparse.domain.ConfigTimer>
    <com.ixale.starparse.domain.ConfigTimer>
      <name>Red Venom 4</name>
      <folder>Apex Battery Hard</folder>
      <trigger>
        <type>TIMER_FINISHED</type>
        <timer>RV / MTL / Volt 6</timer>
        <boss>Apex Vanguard</boss>
      </trigger>
      <cancel>
        <type>COMBAT_END</type>
      </cancel>
      <interval>69.0</interval>
      <color>0xffc010ff</color>
      <enabled>true</enabled>
      <ignoreRepeated>false</ignoreRepeated>
    </com.ixale.starparse.domain.ConfigTimer>
    <com.ixale.starparse.domain.ConfigTimer>
      <name>Mass Target Lock 4</name>
      <folder>Apex Battery Hard</folder>
      <trigger>
        <type>TIMER_FINISHED</type>
        <timer>Acid Deluge 1</timer>
        <boss>Apex Vanguard</boss>
      </trigger>
      <cancel>
        <type>COMBAT_END</type>
      </cancel>
      <interval>30.0</interval>
      <color>0x990000ff</color>
      <enabled>true</enabled>
      <ignoreRepeated>false</ignoreRepeated>
    </com.ixale.starparse.domain.ConfigTimer>
    <com.ixale.starparse.domain.ConfigTimer>
      <name>Voltinator 4</name>
      <folder>Apex Battery Hard</folder>
      <trigger>
        <type>TIMER_FINISHED</type>
        <timer>Mass Target Lock 4</timer>
        <boss>Apex Vanguard</boss>
      </trigger>
      <cancel>
        <type>COMBAT_END</type>
      </cancel>
      <interval>29.0</interval>
      <color>0x00b0f0ff</color>
      <enabled>true</enabled>
      <ignoreRepeated>false</ignoreRepeated>
    </com.ixale.starparse.domain.ConfigTimer>
    <com.ixale.starparse.domain.ConfigTimer>
      <name>Red Venom 5</name>
      <folder>Apex Battery Hard</folder>
      <trigger>
        <type>TIMER_FINISHED</type>
        <timer>Voltinator 4</timer>
        <boss>Apex Vanguard</boss>
      </trigger>
      <cancel>
        <type>COMBAT_END</type>
      </cancel>
      <interval>62.0</interval>
      <color>0xffc010ff</color>
      <enabled>true</enabled>
      <ignoreRepeated>false</ignoreRepeated>
    </com.ixale.starparse.domain.ConfigTimer>
    <com.ixale.starparse.domain.ConfigTimer>
      <name>Acid Deluge 2</name>
      <folder>Apex Battery Hard</folder>
      <trigger>
        <type>TIMER_FINISHED</type>
        <timer>Voltinator 4</timer>
        <boss>Apex Vanguard</boss>
      </trigger>
      <cancel>
        <type>COMBAT_END</type>
      </cancel>
      <interval>64.0</interval>
      <color>0x00ff00ff</color>
      <enabled>true</enabled>
      <ignoreRepeated>false</ignoreRepeated>
    </com.ixale.starparse.domain.ConfigTimer>
    <com.ixale.starparse.domain.ConfigTimer>
      <name>Mass Target Lock 5</name>
      <folder>Apex Battery Hard</folder>
      <trigger>
        <type>TIMER_FINISHED</type>
        <timer>Red Venom 5</timer>
        <boss>Apex Vanguard</boss>
      </trigger>
      <cancel>
        <type>COMBAT_END</type>
      </cancel>
      <interval>29.0</interval>
      <color>0x990000ff</color>
      <enabled>true</enabled>
      <ignoreRepeated>false</ignoreRepeated>
    </com.ixale.starparse.domain.ConfigTimer>
    <com.ixale.starparse.domain.ConfigTimer>
      <name>Mass Target Lock 6</name>
      <folder>Apex Battery Hard</folder>
      <trigger>
        <type>TIMER_FINISHED</type>
        <timer>Mass Target Lock 5</timer>
        <boss>Apex Vanguard</boss>
      </trigger>
      <cancel>
        <type>COMBAT_END</type>
      </cancel>
      <interval>33.0</interval>
      <color>0x990000ff</color>
      <enabled>true</enabled>
      <ignoreRepeated>false</ignoreRepeated>
    </com.ixale.starparse.domain.ConfigTimer>
    <com.ixale.starparse.domain.ConfigTimer>
      <name>Red Venom 6</name>
      <folder>Apex Battery Hard</folder>
      <trigger>
        <type>TIMER_FINISHED</type>
        <timer>Mass Target Lock 6</timer>
        <boss>Apex Vanguard</boss>
      </trigger>
      <cancel>
        <type>COMBAT_END</type>
      </cancel>
      <interval>27.0</interval>
      <color>0xffc010ff</color>
      <enabled>true</enabled>
      <ignoreRepeated>false</ignoreRepeated>
    </com.ixale.starparse.domain.ConfigTimer>
    <com.ixale.starparse.domain.ConfigTimer>
      <name>Voltinator 5</name>
      <folder>Apex Battery Hard</folder>
      <trigger>
        <type>TIMER_FINISHED</type>
        <timer>Red Venom 6</timer>
        <boss>Apex Vanguard</boss>
      </trigger>
      <cancel>
        <type>COMBAT_END</type>
      </cancel>
      <interval>37.0</interval>
      <color>0x00b0f0ff</color>
      <enabled>true</enabled>
      <ignoreRepeated>false</ignoreRepeated>
    </com.ixale.starparse.domain.ConfigTimer>
    <!-- Copy until here. -->
  </timers>
</com.ixale.starparse.domain.ConfigTimers>
7 Download
Written by Syseea. Images taken from Star Wars: The old Republic. Additional information taken from swtor.jedipedia.net. For questions or complaints, contact me.
This page was last updated on 2 October 2021.
