Operation Guide: Eternity Vault
An ancient vault on the prison world of Belsavis, housing a deadly entity, has been uncovered. The threat must be ended.
The Eternity Vault is the first Operation in Star Wars: The Old Republic. It is a fairly easy Operation, even on Hard Mode.
While having a Hard Mode, the mechanics for all fights are all nearly the same. The difference between Story Mode and Hard Mode is the bosses dealing more damage and having more health.
The Operation can be completed with only one tank.
The Eternity Vault no longer has a Nightmare Mode.
1 Annihilation Droid XRR-3

The Annihilation Droid is the first boss in the Eternity Vault and mainly a tank and spank.
The boss will spawn shortly after two turrets at the entrance have been destroyed and should be tanked towards the gate. The rest positions themselves behind the boss.
The Annihilation Droid has three notable mechanics.
The first one is a combination of
Attack and Damage Type: Tech, Kinetic
View on swtor.jedipedia.net
![]() Shockwave,
stunning everyone within 16 metres, and
Attack and Damage Type: Tech, Kinetic
Shockwave,
stunning everyone within 16 metres, and
Attack and Damage Type: Tech, Kinetic
View on swtor.jedipedia.net
![]() Overwhelming Swipe,
a knockback.
Attack and Damage Type: Tech, Kinetic
Overwhelming Swipe,
a knockback.
Attack and Damage Type: Tech, Kinetic
View on swtor.jedipedia.net
![]() Overwhelming Swipe
can also happen alone; the combination however always happens when the boss reaches 95%, 75%, 40% and 10% health, respectively.
Overwhelming Swipe
can also happen alone; the combination however always happens when the boss reaches 95%, 75%, 40% and 10% health, respectively.
The second one is
Attack and Damage Type: Ranged, Energy (AoE)
View on swtor.jedipedia.net
![]() Missile Salvo,
a raid wide AoE which cannot be avoided. The group should stand together for AoE healing. The attack is announced by the message “I have been armed with twenty-four weapons technologies.” After the last
Attack and Damage Type: Tech, Kinetic
Missile Salvo,
a raid wide AoE which cannot be avoided. The group should stand together for AoE healing. The attack is announced by the message “I have been armed with twenty-four weapons technologies.” After the last
Attack and Damage Type: Tech, Kinetic
View on swtor.jedipedia.net
![]() Shockwave
–
Attack and Damage Type: Tech, Kinetic
Shockwave
–
Attack and Damage Type: Tech, Kinetic
View on swtor.jedipedia.net
![]() Overwhelming Swipe
combination, the boss will channel
Attack and Damage Type: Ranged, Energy (AoE)
Overwhelming Swipe
combination, the boss will channel
Attack and Damage Type: Ranged, Energy (AoE)
View on swtor.jedipedia.net
![]() Missile Salvo
until he dies.
Missile Salvo
until he dies.

The Annihilation Droid will regularly engage STORM Protocols, placing small red circles on the floor for 11 seconds and firing
Attack and Damage Type: Tech, Kinetic (AoE)
View on swtor.jedipedia.net
![]() Groundfire,
missiles, dealing damage. The group should keep moving not to get hit. The mechanic is announced by the boss saying “Enemy tactics analysed. Engaging STORM Protocols.”
Groundfire,
missiles, dealing damage. The group should keep moving not to get hit. The mechanic is announced by the boss saying “Enemy tactics analysed. Engaging STORM Protocols.”
Enrage Timers
The timers start when the encounter starts. Once expired, the boss will receive
Dealing 200% increased damage.
View on swtor.jedipedia.net
![]() Enrage,
increasing damage dealt by 200% for the rest of the fight.
Enrage,
increasing damage dealt by 200% for the rest of the fight.
| 8-person | 16-person | |
|---|---|---|
| Story Mode | 7:00min (420s) | 8:00min (480s) |
| Hard Mode | 6:05min (365s) | 7:05min (425s) |
2 Gharj
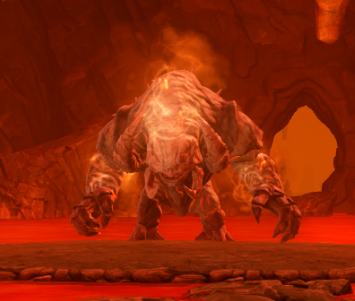
Gharj is the second encounter in the Eternity Vault.
In this encounter, the group must regularly switch platforms as the current one will disappear in the lava.
His main mechanic is Frenzy:
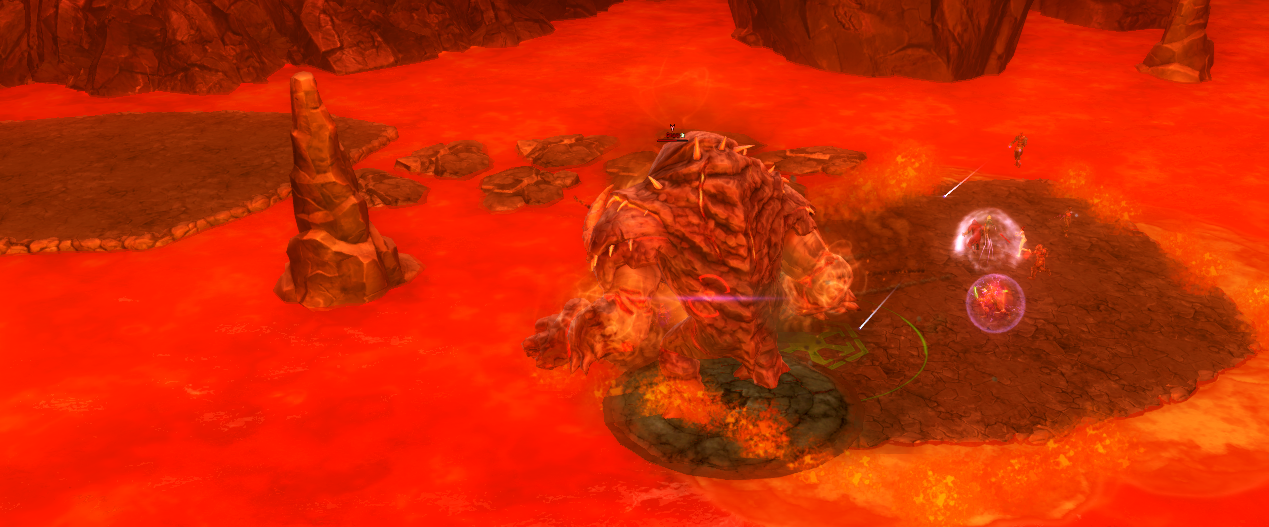
During Frenzy, which is announced as “Gharj is entering a Frenzy”, the platform the group is currently on will shake; at the same time, a new platform will appear. When Frenzy ends, the old platform will disappear; the group must therefore move to the new platform in time. Standing in Lava should be avoided since it deals damage. When the tank is on the new platform, Gharj will
Attack and Damage Type: Tech, Kinetic (AoE)
View on swtor.jedipedia.net
![]() Leap
to them, stunning them for 2 seconds. Frenzy happens when the boss’ health falls below 95%, 70%, 50%, 30% and 10%, respectively. Below 50%, adds will spawn as well. They can be killed easily; the priority however is to get to the new platform.
Leap
to them, stunning them for 2 seconds. Frenzy happens when the boss’ health falls below 95%, 70%, 50%, 30% and 10%, respectively. Below 50%, adds will spawn as well. They can be killed easily; the priority however is to get to the new platform.
Another ability is
Attack and Damage Type: Melee, Kinetic (AoE)
View on swtor.jedipedia.net
![]() Pulverizing Slam,
an AoE knocking back everyone except the tank. The closer to Gharj, the smaller the knockback.
Pulverizing Slam,
an AoE knocking back everyone except the tank. The closer to Gharj, the smaller the knockback.
Enrage Timers
The timers start when the encounter starts. Once expired, the boss will receive
Dealing 200% increased damage.
View on swtor.jedipedia.net
![]() Enrage,
increasing damage dealt by 200% for the rest of the fight.
Enrage,
increasing damage dealt by 200% for the rest of the fight.
| 8-person | 16-person | |
|---|---|---|
| Story Mode | 6:20min (380s) | 8:00min (480s) |
| Hard Mode | 6:20min (380s) | 7:20min (440s) |
3 The Ancient Pylons
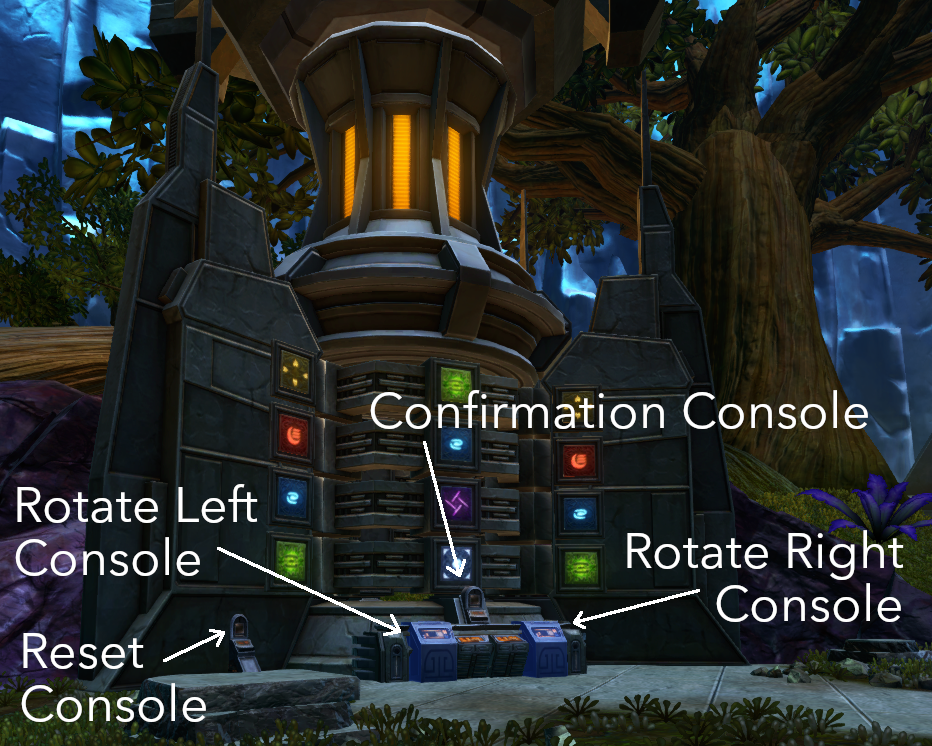
The Ancient Pylons are the puzzle boss of the Eternity Vault. The encounter features two pylons, one in the North, one in the South. In order to complete this encounter, the group must split up and solve both pylons simultaneously.
A pylon is solved if the symbols on the central wheel of the pylon match the ones on the sides. This can be achieved by clicking on the Rotate Right / Left Consoles which will rotate the wheel. Once the symbol on the central wheel matches the one on the sides, the Confirmation Console must be clicked. As soon as the Confirmations Consoles on both pylons are clicked, the next wheel can be rotated. This happens until the puzzle is solved.
During the encounter, waves of adds spawn. They can be killed easily, however there are two mechanics to keep in mind.
Rakata Eternal Guardians cast a
Incoming damage reflected.
Duration: 10 seconds
View on swtor.jedipedia.net
![]() Force Barrier
on themselves, reflecting all incoming damage.
Force Barrier
on themselves, reflecting all incoming damage.
Rakata Eternal Wardens stun their targets.
The puzzle must be completed in under 3:55 minutes, else the pylons will reset. Some time before the reset, waves of Acklays will spawn dealing considerable damage. The pylon solver below can tell the fastest way to solve the puzzle.
Hard Mode
The only change in Hard Mode is that everyone who clicks the Rotate Left / Left Consoles will receive the debuff
You cannot interact with the Ancient Pylon.
Duration: 30 seconds
View on swtor.jedipedia.net
![]() Pylon Ward
, preventing them from interacting with those consoles for 30 seconds. Therefore, the group on each pylon must rotate with clicking. At least two members per group are required for this rotation, it is however smoother with three.
Pylon Ward
, preventing them from interacting with those consoles for 30 seconds. Therefore, the group on each pylon must rotate with clicking. At least two members per group are required for this rotation, it is however smoother with three.
Pylon Solver
This tool can solve the pylons, making it easier to solve the puzzle in time.
How to use
Set the colours in the Solver to those of the pylon in game and click on the “Solve” button. The top row in the Solver represents the top wheel in game.
The Solver will then calculate the fastest solution. Clicking on the “Copy” button copies the solution into your clipboard. This solution starts with the bottom wheel.
The Solver outputs “Error” for a wheel!
This happens when the colour in the Side Columns is set to the same colour as the colour in the Central Column; the colours must be different (Red - Green for example).
4 The Infernal Council
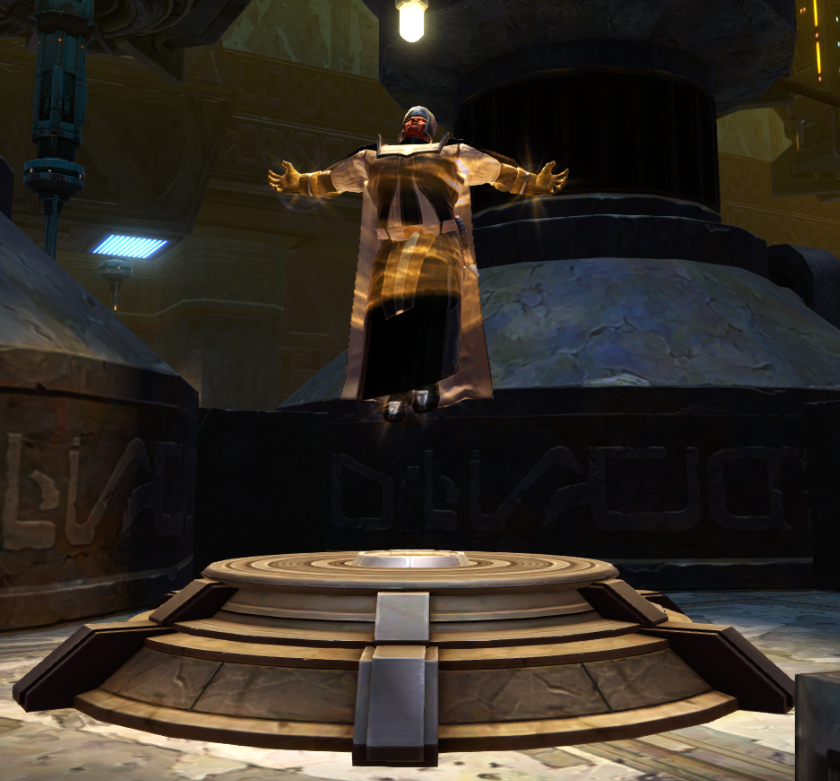
The Infernal Council is the fourth encounter in the Eternity Vault and is a series of duels.
Before the fight, every player must choose an opponent. In general, tanks should take Lords, DPS Marauders and Healers Assassins. The encounter can be started by clicking on the console in the room. Do not click on that console until everyone is assigned to a boss.
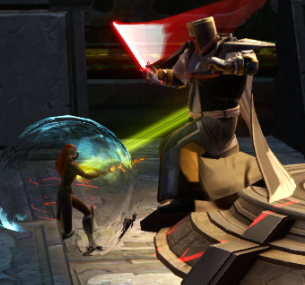
When a player attacks a boss, the boss will lock onto them, indicated by a green beam.
It is important that the battles must be 1 vs. 1 battles. Other players may not intervene in any battle except their own. Therefore, no healing or guarding others, no raid buffs should be used, etc. After a player killed their own boss, they can do one single attack which then applies the debuff
You have attempted to assist someone else in their duel of fates. As a result you have incurred the penalty of destiny. Outgoing damage and healing reduced by 100%.
Duration: 60 seconds
View on swtor.jedipedia.net
![]() Penalty of Destiny,
reducing all outgoing damage and healing, as well as any incoming healing by 100%.
Penalty of Destiny,
reducing all outgoing damage and healing, as well as any incoming healing by 100%.
If the group is incomplete, somebody has to take two bosses. This is done by letting the spare boss roam around the room until said player finished their first duel who then engages the second boss.
The duels themselves are basically dummy parses. The Assassins regularly channel
Attack and Damage Type: Melee, Energy
3s channel
View on swtor.jedipedia.net
![]() Rapid Attack,
dealing high damage and should therefore be interrupted.
Rapid Attack,
dealing high damage and should therefore be interrupted.
Enrage Timers
The timers start when the bosses enter combat. Once expired, they will receive
Dealing 200% increased damage.
View on swtor.jedipedia.net
![]() Enrage,
increasing damage dealt by 200% for the rest of the fight.
Enrage,
increasing damage dealt by 200% for the rest of the fight.
| 8-person | 16-person | |
|---|---|---|
| Story / Hard Mode | 2:10min (130s) | 2:05min (125s) |
5 Soa
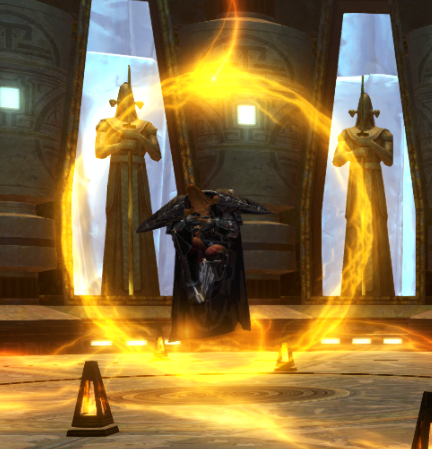
Soa, an ancient Rakatan warlord, is the last boss in the Eternity Vault. He is the most difficult encounter in the Operation with his main mechanic that lets the inner rings of the platform disappear when his health reaches certain percentages.
Pre-fight
Sometimes, the encounter starts as soon as a players enters Soa’s chamber. Therefore, the group should wait in front of the entrance of the chamber until everyone is ready.
Phase 1: Top Floor, Soa 100% - 75%
Soa will start shielded; the shield will remove itself after a few seconds.
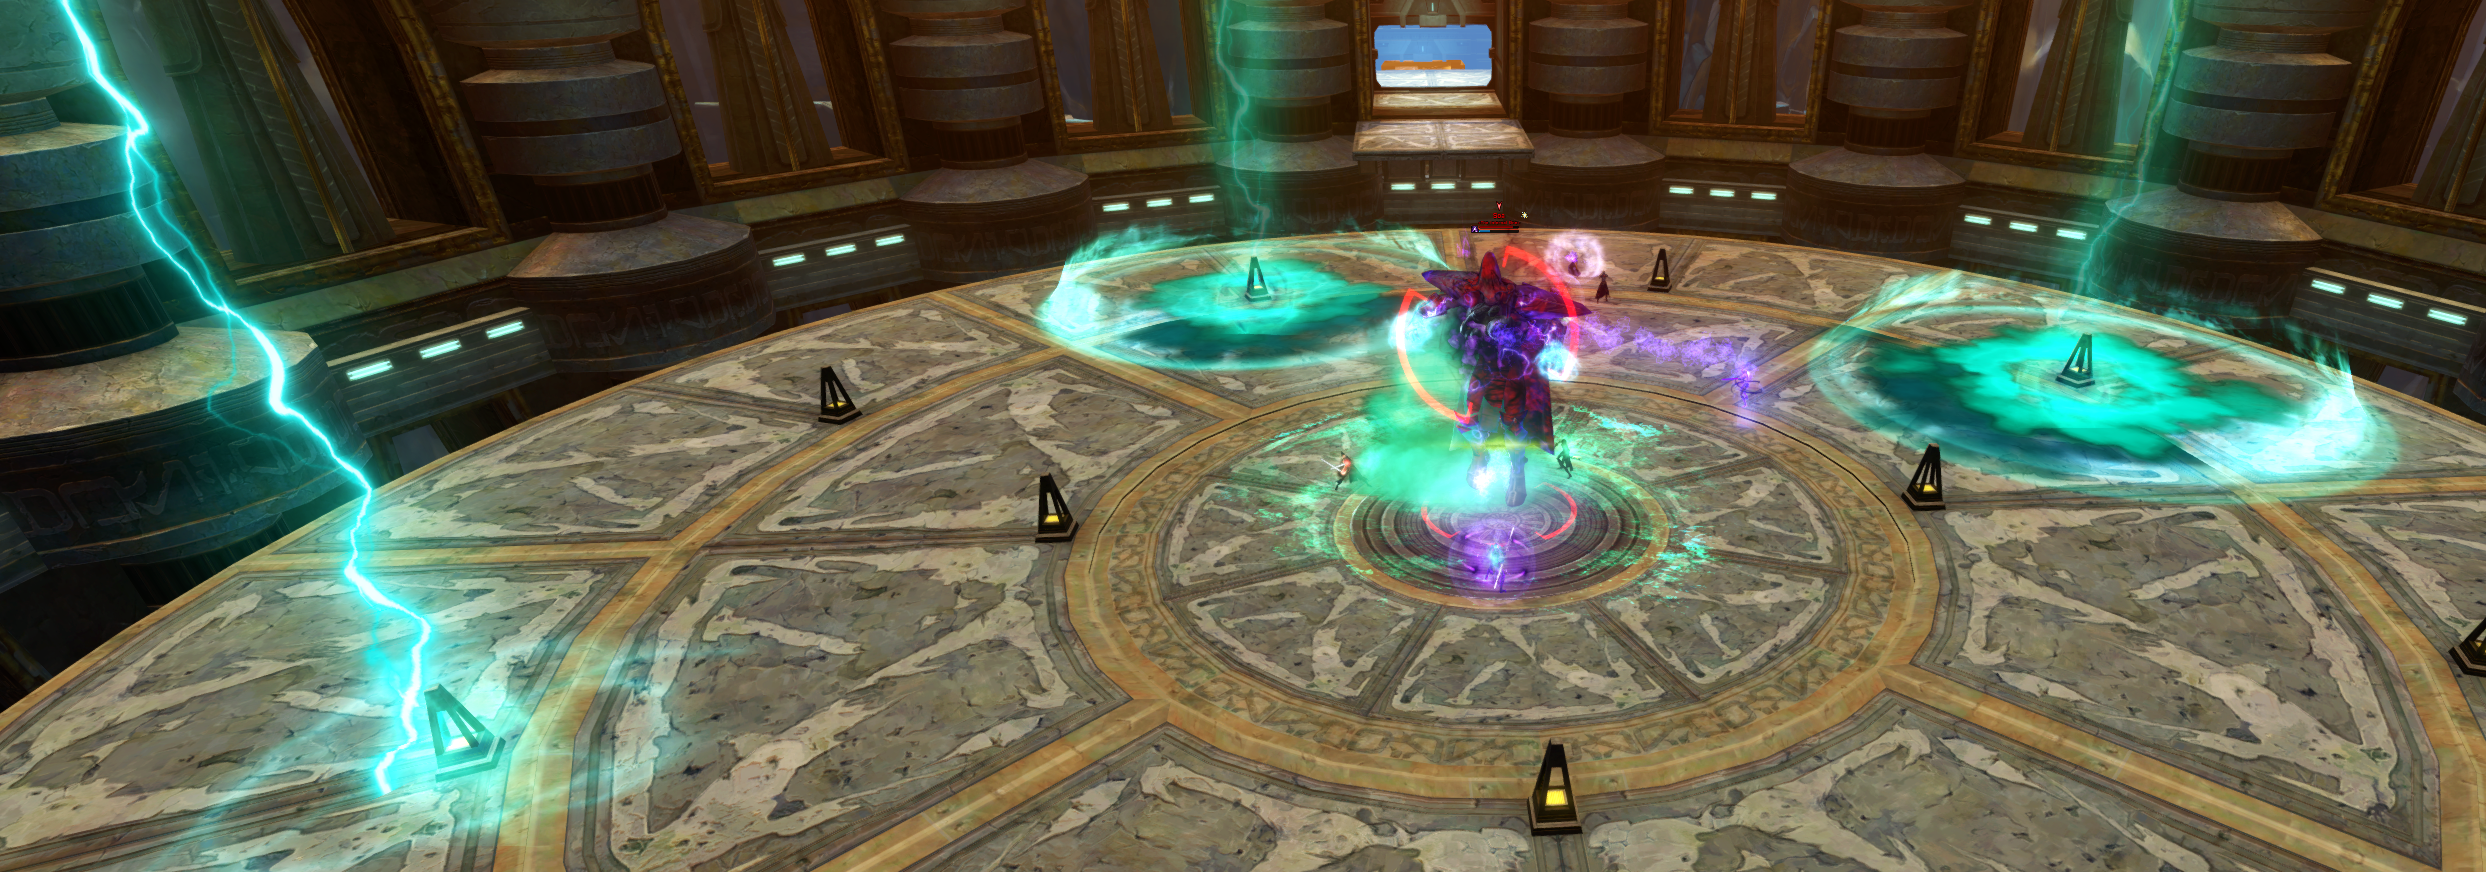
The only noteable mechanic on the top floor is
Attack and Damage Type while standing in the green AoE: Force, Energy (AoE)
View on swtor.jedipedia.net
![]() Force Torrent,
“activating” one of the nodes on the outer ring. The node will start to glow green, damaging anyone standing in the green area.
Force Torrent,
“activating” one of the nodes on the outer ring. The node will start to glow green, damaging anyone standing in the green area.
At 75%, Soa will shield again and soon after, all rings of the platform, except the outer one, will fall down. While this is usually announced by Soa saying “I have waited twenty thousand years, but I will wait no longer!”, it can happen that DPS is so high that he has not even finished his introduction speech.
Everyone should stand near the entrance of the room when the inner rings collapse. Else they will die from fall damage and may land somewhere where they cannot be revived.
Transistion Phase

The group has to jump down the platforms to get to the middle floor. New platforms to jump on will appear little by little. The platforms will fall down after a certain time, so the group should not waste too many time on a platform.
Soa will gain 5 stacks of the buff
Increases Soa’s damage and allows Soa to use his Power Orb Detonation ability.
View on swtor.jedipedia.net
![]() Power Orbs
at the beginning of the Transistion Phase. The stacks increase his damage dealt by 5% and for each stack that is still present in the next phase, he will cast
Attack and Damage Type: Force, Energy
Power Orbs
at the beginning of the Transistion Phase. The stacks increase his damage dealt by 5% and for each stack that is still present in the next phase, he will cast
Attack and Damage Type: Force, Energy
View on swtor.jedipedia.net
![]() Power Orb Detonation,
dealing high raid wide damage in the beginning of the phase until the stacks are gone. To remove stacks, the group must destroy five of the Ancient Power Sources on the platforms while jumping down; each destroyed Ancient Power Sources removes one
Increases Soa’s damage and allows Soa to use his Power Orb Detonation ability.
Power Orb Detonation,
dealing high raid wide damage in the beginning of the phase until the stacks are gone. To remove stacks, the group must destroy five of the Ancient Power Sources on the platforms while jumping down; each destroyed Ancient Power Sources removes one
Increases Soa’s damage and allows Soa to use his Power Orb Detonation ability.
View on swtor.jedipedia.net
![]() Power Orbs
stack.
Power Orbs
stack.
It can happen that this mechanic bugs and destroyed Ancient Power Sources no longer
Increases Soa’s damage and allows Soa to use his Power Orb Detonation ability.
View on swtor.jedipedia.net
![]() Power Orbs
stacks.
Power Orbs
stacks.
Phase 2: Middle Floor, Soa 75% - 30%
On the middle floor, there are three notable mechanics.

Soa will periodically cast
Soa uses this ability to create a Mind Trap which seals a player in a psychic prison.
3 seconds channel
View on swtor.jedipedia.net
![]() Mind Trap
which will then spawn and trap a player in it. The player can only be released by destroying the Mind Trap.
Mind Trap
which will then spawn and trap a player in it. The player can only be released by destroying the Mind Trap.
Two
Soa uses this ability to create Ball Lightning that follows a player and explodes if it gets close to that player.
3 seconds channel
View on swtor.jedipedia.net
![]() Ball Lightnings
will regularly be summoned by the boss. Each Ball Lightning targets a random player, as announced on the screen, and moves towards its respective target When they collide with their target, they explode with
Attack and Damage Type: Force, Energy (AoE)
Ball Lightnings
will regularly be summoned by the boss. Each Ball Lightning targets a random player, as announced on the screen, and moves towards its respective target When they collide with their target, they explode with
Attack and Damage Type: Force, Energy (AoE)
View on swtor.jedipedia.net
Ball Lightning Detonation,
dealing AoE damage. Therefore, the two players should intercept the Ball Lightnings before they reach the group.
Soa will regularly cast
You are caught in a Force Cyclone!
Attack and Damage Type: Force, Kinetic
Duration: 15 seconds
1.5 seconds cast
View on swtor.jedipedia.net
![]() Force Cyclone
on a random DPS or healer. The affected will be teleported around the room for some time.
Force Cyclone
on a random DPS or healer. The affected will be teleported around the room for some time.
At 30%, Soa will shield again and the inner rings of the platform will collapse again. Once again, the raid should move to where they started the fight.
Transistion Phase
Same procedure as in the first Transistion Phase.
Phase 3: Bottom Floor, Soa 30% - 0%
The mechanics of the middle floor are also on the bottom floor.

In addition to that, Soa remains shielded. The only way to remove the shield is to position him under the objects that he regularly hurls on the ground with
Hurls a large object at the designated region.
Attack and Damage Type when the object falls down: Force, Energy (AoE)
View on swtor.jedipedia.net
![]() Final Hurl
on the ground. On Story Mode, the location is indicated by a blue circle on the floor. On Hard Mode, the falling object must be tracked by looking at it or using its shadow. Players getting hit receive damage and are knocked back. Once Soa gets hit by the object, his shield is removed. He will cast
Soa takes damage from his own final hurl ability, despite being invulnerable.
Final Hurl
on the ground. On Story Mode, the location is indicated by a blue circle on the floor. On Hard Mode, the falling object must be tracked by looking at it or using its shadow. Players getting hit receive damage and are knocked back. Once Soa gets hit by the object, his shield is removed. He will cast
Soa takes damage from his own final hurl ability, despite being invulnerable.
12 seconds channel
View on swtor.jedipedia.net
![]() Recovering
for 12 seconds, during which he can be damaged. After that he shields again. This repeats until Soa is dead.
Recovering
for 12 seconds, during which he can be damaged. After that he shields again. This repeats until Soa is dead.
After 3:12 minutes, Soa enrages, dealing 200% more damage for the rest of the encounter.
6 Download
Written by Syseea. Images taken from Star Wars: The old Republic. Additional information taken from swtor.jedipedia.net. For questions or complaints, contact me.
This page was last updated on 21 March 2022.
